Initial Server Setup with FreeBSD 14 (16 Things to do)
In this guide, I will show you initial server setup with FreeBSD 14. This should be the first things to do after you have installed FreeBSD.
By completing these 16 steps, you will have FreeBSD server ready to host your applications.
Let’s get started.
1. Setting Up IP Address
To set up an IP address on FreeBSD server, use the ifconfig command for temporary, and use the /etc/rc.conf file for permanent static IP address. For DHCP, use the dhclient command.
2. Disable Banner Login
When logging in to FreeBSD, the motd (message of the day) will be displayed. To make your terminal clean when logging in, you can disable motd on FreeBSD by adding the ~/.hushlogin file on each user’s home directory.
Execute the command below to create the ~/.hushlogin file on your home directory.
touch ~/.hushlogin3. Setup Hostname and FQDN (Fully Qualified Domain Name)
To set up FQDN (Fully Qualified Domain Name) on FreeBSD, follow these steps:
1. Run the command below to set up FQDN (Fully Qualified Domain Name) on FreeBSD. In this demo, we’ll set up fqdn to geekandnix.example.lan, the hostname of is geekandnix with the local domain example.lan.
hostname geekandnix.example.lan2. Now run the sysrc command below to make your fqdn changes permanently. This will add a new parameter hostname to the /etc/rc.conf file.
sysrc hostname="geekandnix.example.lan"3. Next, open the /etc/hosts file using editor vi.
vi /etc/hostsAdd the configuration below and be sure to change the information of IP address, fqdn, and the system hostname with your details.
192.168.5.150 geekandnix.example.lan geekandnixSave the file and exit the editor when finished.
4. Lastly, run the hostname command below to verify the fqdn and default domain of your FreeBSD server.
hostname -f
hostname -d
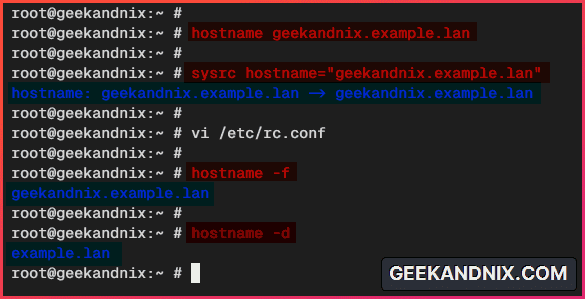
In the following output, you can see the fqdn of our FreeBSD server is geekandnix.example.lan with the default domain example.lan.
4. Applying System Updates on FreeBSD Server
Now that you’ve configured the IP address and fqdn, let’s install the FreeBSD system update using the freebsd-update.
1. Run the freebsd-update command below to update and apply patches to your FreeBSD base system.
freebsd-update fetch install
freebsd-update install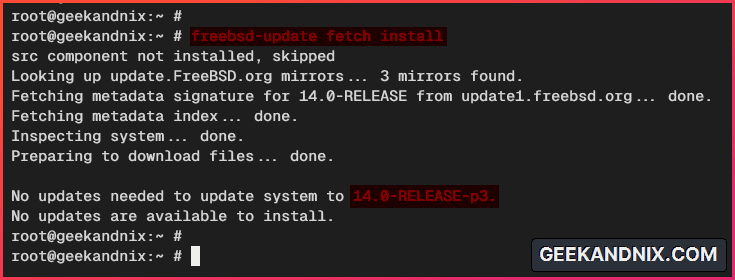
2. Optional, run the freebsd-update command below to compare the difference between your current FreeBSD server against the original FreeBSD base system.
freebsd-update IDSIn the following output, you can see the different hash of the current configuration with the original FreeBSD base system.

5. Upgrading Packages via pkg Package Manager
On FreeBSD, you can install software in two ways:
- via ports: manually compile software using FreeBSD ports collections. You will learn how to enable Ports in the next step.
- via pkg: installing software via repository. Similar to APT, YUM, or Pacman on Linux.
Follow these to update the FreeBSD package index and upgrade packages:
1. Run the command below to update the FreeBSD ports repository. This command is similar to apt update on Debian/Ubuntu, or dnf check-update on RHEL-based distribution.
pkg update2. Once ports are updated, run the pkg command below to upgrade packages.
pkg upgrade
6. (Optional): Enabling FreeBSD Ports
If you have directory /usr/ports on your FreeBSD server, skip this, because ports are enabled. But if you do not have ports enabled, complete the following steps to enable FreeBSD ports:
1. Run the pkg command below to install portsnap to your FreeBSD server. The portsnap is a utility for downloading and updating FreeBSD ports tree.
pkg install portsnap
2. Now, run the portsnap command below to download the compressed ports tree to your FreeBSD server.
portsnap fetch
3. Once the process is finished, run the following command to extract the ports tree to the /usr/ports directory.
portsnap extractNOTE: both portsnap fetch and portsnap extract will take some time, depending on your internet connection and disk speed for read and write.
4. Lastly, go to the /usr/ports directory and run the ls command to verify the list of ports tree.
cd /usr/ports
ls -ah
7. Installing Basic Packages
After updating the FreeBSD package index, you’re ready to install some basic packages and tools, which include the following:
- bash and bash-completion: You will change the default shell
shtobash. - sudo: Control your privileges access via
sudo. Alternative tosudo? trydoas. - vim: The default text editor that will be used. Alternative to
vim? you can usenanoorpico. - en-freebsd-doc: The complete documentation of the FreeBSD project.
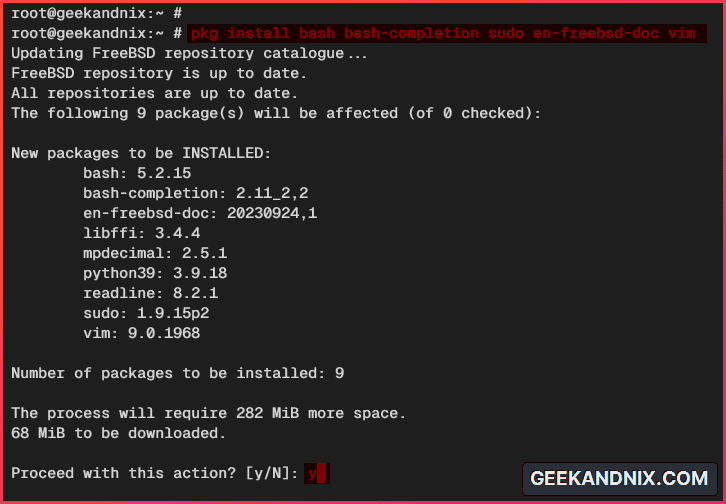
Run the pkg install command below to install those packages on your FreeBSD server.
pkg install bash bash-completion sudo en-freebsd-doc vimInput y to confirm and proceed to the installation.
8. Configuring Sudo
Now that you’ve installed sudo, let’s take control of your FreeBSD server by setting up root privileges via sudo.
Take the following tasks to configure sudo on FreeBSD:
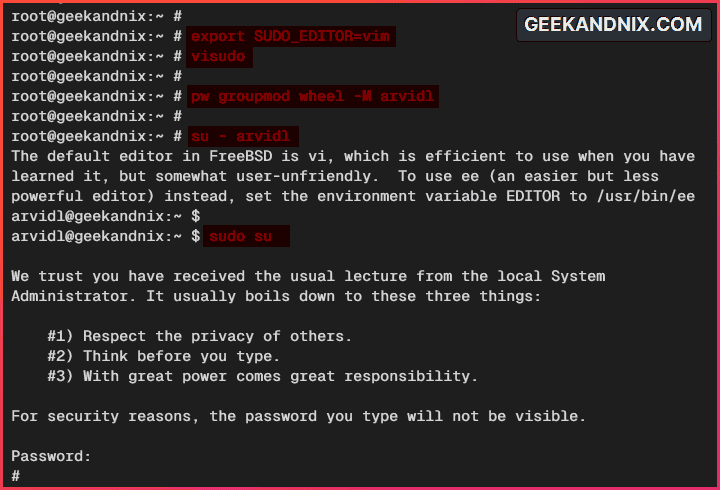
1. Run the command below to set up the default EDITOR to vim and modify the sudoers configuration via visudo.
export SUDO_EDITOR=vim
visudo
2. Uncomment the %wheel configuration below. This allows users within the group wheel to execute the sudo command and get root privileges.
%wheel ALL=(ALL=ALL) ALLWhen finished, save the file and exit the editor.

3. Next, run the pw groupmod command below to add your user to the wheel group. In this demo, we’ll add user arvidl to the group wheel.
pw groupmod wheel -M arvidl4. Lastly, run the command below to log in as a normal user, then execute the sudo su command to get the root privileges. Input the user password when asked.
su - arvidl
sudo su
If your sudo configuration is successful, you should get the root privileges with a prompt such as [root@geekandnix ...]#.
9. Changing Default Shell to Bash
The default shell for users in FreeBSD is sh. To make bash the default shell for your user, follow these steps:
Note: In this example, we’ll be using user arvidl, be sure to change it with your username.
1. First, run the command below to check the list of valid shells for your FreeBSD server.
cat /etc/shellsIn the following output, you can see the list of valid shells on FreeBSD, including bash which is located in /usr/local/bin/bash.

2. Run the chsh command below to change the default shell for your user to bash.
chsh -s /usr/local/bin/bash arvidl3. Next, execute the following command to log in as your user and verify your current shell.
su - arvidl
echo $SHELL
In the following output, you can see the default shell is hanged to bash.

4. Optional, run the command below to disable motd via ~/.hushlogin.
touch ~/.hushlogin
exit
10. (Optional) Changing Default Shell to Bash for Root
In addition to changing the default shell for your user, you can also change the default shell for the root user.
1. Execute the command below to change the default shell for user root to bash.
chsh -s /usr/local/bin/bash root2. Relogin your session and verify the default shell for root. You should see the default shell is changed to bash.
echo $SHELL
11. Hardening SSH on FreeBSD
If you’re running FreeBSD as a server, complete these tasks to secure and harden your SSH server:
1. Open the default SSH configuration /etc/ssh/sshd_config using the vim editor.
vim /etc/ssh/sshd_configInsert and change the default configuration with the following. In this demo, you will change SSH Port to 3896 and disable the login for the root user.
Port 3896
PermitRootLogin no
Save the file and exit the editor when finished.
2. Now run the command below to delete the default SSH host key. You will be regenerating the SSH server key in the next step.
rm /etc/ssh/ssh_host_*3. Then, run the following sysrc command to disable DSA type keys and only enable strong key cryptography via ed25519 and rsa keys.
sysrc sshd_dsa_enable="no"
sysrc sshd_ecdsa_enable="no"
sysrc sshd_ed25519_enable="yes"
sysrc sshd_rsa_enable="yes"
4. Now run the service command below to regenerate the SSH key server. This will generate RSA and ED25519 keys for your server server.
service sshd keygen5. Next, run the command below to restart the sshd service and apply your modification. After executing the command, your SSH will be running in a non-default port.
service sshd restart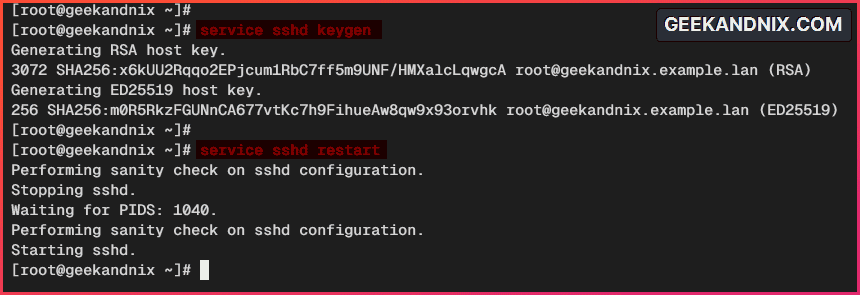
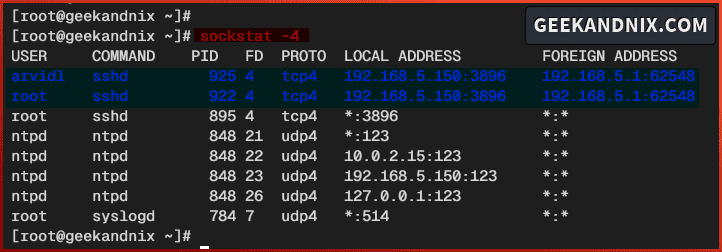
6. Lastly, run the sockstat command below to verify the list ports on FreeBSD.
sockstat -4Based on the following, the sshd is running on custom port 3896.
12. Synchronizing Time with NTP Server
Time synchronization is important to track events on your FreeBSD server. Complete these actions to set up the NTP server via ntpd on FreeBSD:
1. By default, the ntpd is installed. So, open the default ntpd configuration /etc/ntp.conf using vim.
vim /etc/ntp.confVisit https://ntppool.org/eg/, and select your nearest location and time zone. Then, change the default NTP server pool like this.
pool 0.freebsd.pool.ntp.org iburst
pool 1.freebsd.pool.ntp.org iburst
pool 2.freebsd.pool.ntp.org iburst
pool 3.freebsd.pool.ntp.org iburst
Save and exit the file when you’re done.
2. Now, run the command below to start and enable the ntpd service.
sysrc ntpd_enable=YES
service ntpd start
3. Once ntpd is running, execute the ntpq command below to verify the NTP server source.
ntpq -pnYou can see the current usage of NTP server sources like the following:

4. Additionally, run the command below to create a new cronjob that will update the NTP server source once in every hour.
export EDITOR=vim
crontab -e
Insert the following configuration into the file.
0 * * * * root service ntpd stop; ntpdate -vb 0.freebsd.pool.ntp.org; service ntpd startSave and close the file when you’re finished.
Note: In my case, the command ntpdate -vb 0.freebsd.pool.ntp.org can solve errors like Clock offset exceeds panic threshold. Also, I disabled the leapfile on the ntp.conf file and added the start/stop command to the ntpd service in cron to solve an error such as leapsecond file ('/var/db/ntpd.leap-seconds.list'): will expire in less than 12 days.
13. (Optional) Creating Alias for Root Mail
Setting up aliases for root mail will keep you notified. Follow these tasks to create a mail alias for the root user in FreeBSD:
1. Open the file /etc/aliases using your preferred editor and Insert the following configuration to create mail aliases for user root to [email protected].
Any local mail to root will be delivered to user arvidl.
root: [email protected]Save the file and exit the editor.
2. Now run the command below to apply new mail aliases.
newaliases3. Next, run the mail root command below to send an email to user root.
mail rootInput the subject and body mail, then press Ctrl+d and ENTER to exit.
Test mail
Hello arvidl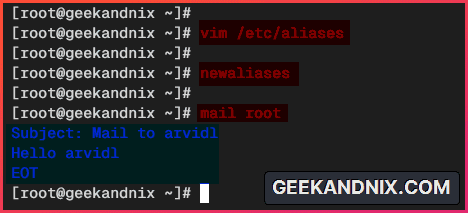
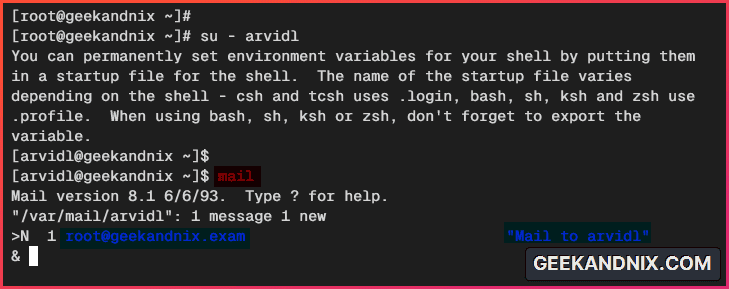
4. Lastly, log in as your user and execute the mail command below to check the new email.
su - arvidl
mail
You should see the new email is forwarded from user root to your user – Press q to exit.
14. Installing Basic Utilities
Below you will also install some basic utilities that you may need on your FreeBSD server, including:
- lsof
- git
- curl/wget
- unzip
1. Run the pkg install command below to install the lsof, git, curl, wget, and unzip utilities. Input y and press ENTER to proceed.
pkg install lsof git curl wget unzip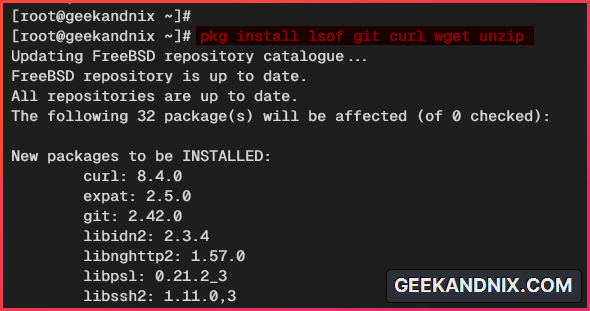
2. Additionally, run the command below to get started with the lsof utility, which is a powerful utility for monitoring connections on the FreeBSD server.
lsof -i4
lsof -i tcp
lsof -i -a -c ssh
15. Tips: How to Read Manual Page via man
Before going further, ensure you understand the following numbers on the man page:
1 - User related commands such as ls, vim, and grep.
2 - System calls that relate to the FreeBSD kernel.
3 - C library functions.
4 - Devices and special files - You can see a list of devices on the /dev and include pseudo-devices like /dev/null and /dev/random.
5 - File formats and conventions related to configuration files of applications, such as rc.conf, /etc/passwd.
6 - Games.
7 - Miscellaneous - This can be an overview or description of programs, protocols, and standard filesystem layouts.
8 - System administration tools and daemons, which include user commands, administrator commands, and services.
9 - The kernel developer's manual.
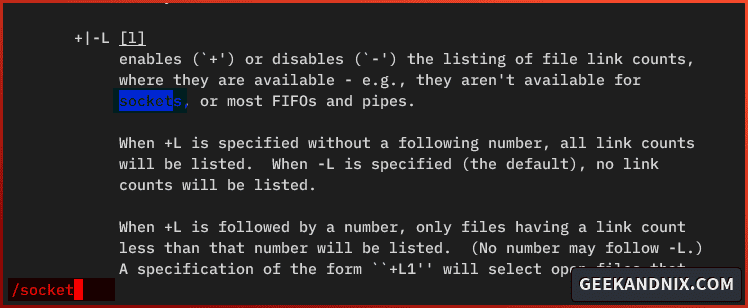
1. Run the command below to access the manual page or instructions.
man lsofFrom there, you can find patterns via /pattern. Then navigate with n for next highlighted pattern, or p for previous pattern.
To quit, press q.
2. Next, run the man command below to find man pages from any pattern. In this case, you will check available man pages that contain ssh.
man -k pattern
man -k ssh
You will see multiple man pages related to ssh.

3. Run the command below to get the man page of a specific section.
man 1 scp
man 5 sshd_config
man 8 sshd
16. Setting Up of Firewall
Last but not least, you also need to implement a firewall on your FreeBSD. In this case, you will be using pf (packet filter) as the default firewall on your FreeBSD server.
Conclusion
That’s it! You’ve now configured your FreeBSD 14 server. With this in mind, you’re ready to install software such FAMP (FreeBSD, Apache, MySQL/MariaDB, and PHP) or FEMP (FreeBSD, Nginx, MySQL/MariaDB, and PHP-FPM) Stack to host your applications.
