How to Install Debian 12 Bookworm (with Screenshot)
The journey begins, the waiting is over, and you’re ready to install the Debian 12. This release with the codename Bookworm is the latest stable version of Debian and will be supported for the next 5 years. It comes with enhanced performance and updated packages.
For Desktop enthusiasts, the new Debian 12 ships with new versions of Desktop Environments (DE):
- Gnome 43
- KDE Plasma 5.27
- Xfce 4.18
- MATE 1.24
- LXDE 11
- and LXQt 1.2.0
Also, it comes with updated software packages such as:
- Linux kernel 6.1 series
- Nginx 1.22
- Apache 2.4.57
- OpenSSH 9.2p1
- MariaDB 10.11
- PostgreSQL 15
- PHP 8.2
- Python 3, 3.11.2
- Rustc 1.63
- BIND DNS Server 9.18
- GIMP 2.10.34
- LibreOffice 7.4
In this guide, we’ll walk you through how to install Debian 12 Bookworm, step-by-step with screenshots.
Without further ado, let’s dive in.
Prerequisites
Before proceeding, make sure you have a machine (bare-metal or virtual-machine) with the following:
- 64-bit system architecture.
- For Debian as a server: minimum 1GB of RAM with 5GB of disk.
- For Debian as a desktop: minimum 2GB of RAM with 20GB of disk.
Downloading Debian 12 ISO
The Debian 12 comes in two ISO types:
- netinstall: ISO file smaller – around 7xx MB, but required an internet connection to install additional packages.
- DVD: The DVD version with bigger size and contains more packages. Suitable even without an internet connection.
Download your preferred Debian ISO file.
Creating bootable media
If you’re installing Debian on a PC/Laptop, create the USB media installation via Ventoy or Rufus. If installing as a virtual machine (VM), just create a new VM and make the Debian ISO file as default bootable media.
Booting and installing Debian
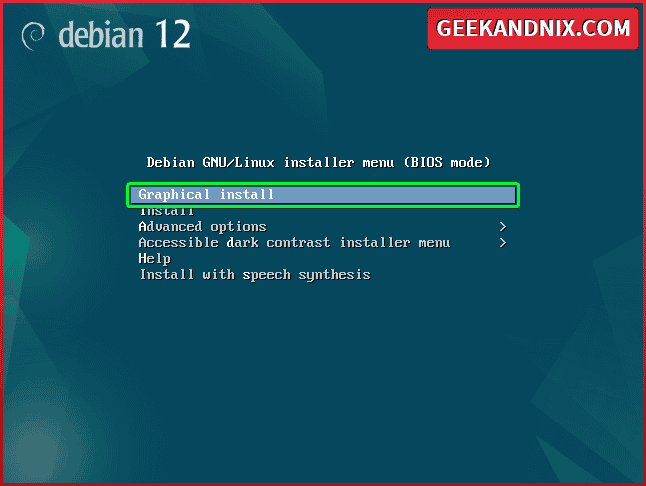
Boot up your machine with USB media installation or your VM with ISO file, then you will be presented with the following screen:
Select the installation method via Graphical install.
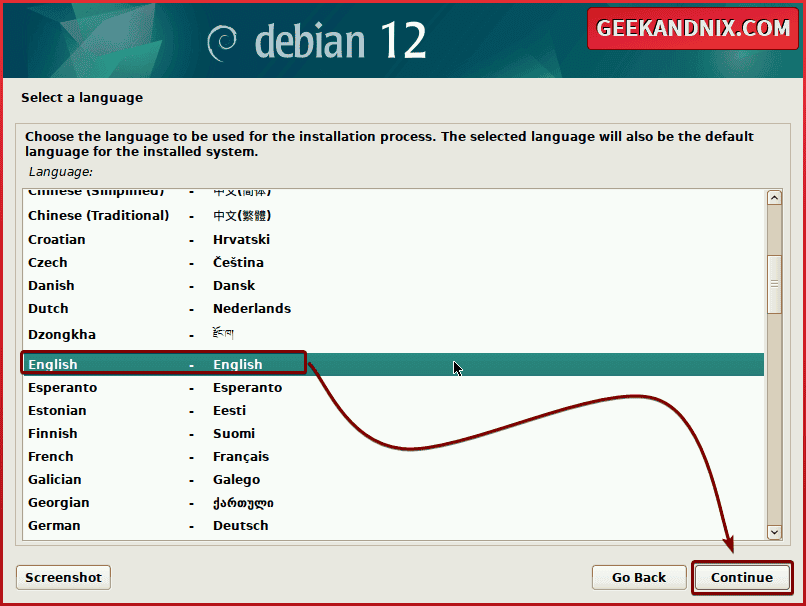
Selecting default language
Select your preferred language that will be used for this installation process. The default language is English, then click Continue.
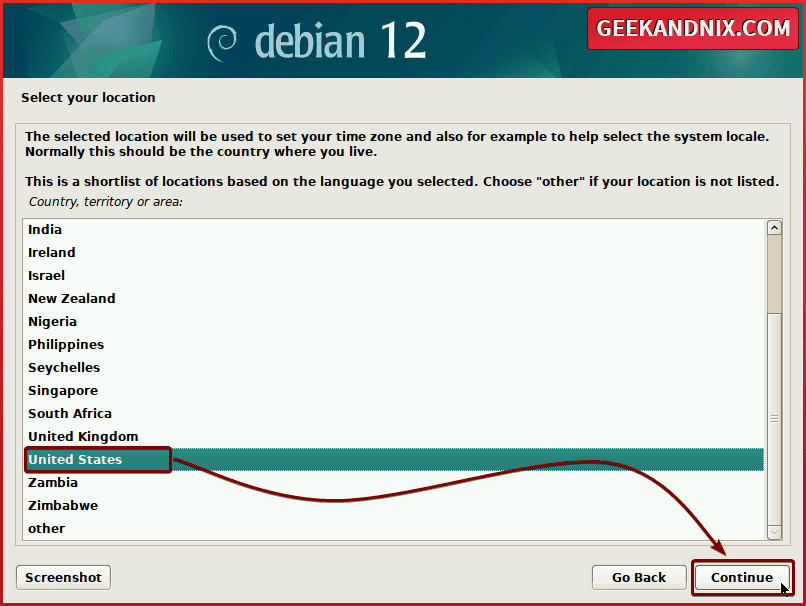
Selecting country/location
Select your location (country) and click Continue. The location setting will be used as the default time zone and system locale.
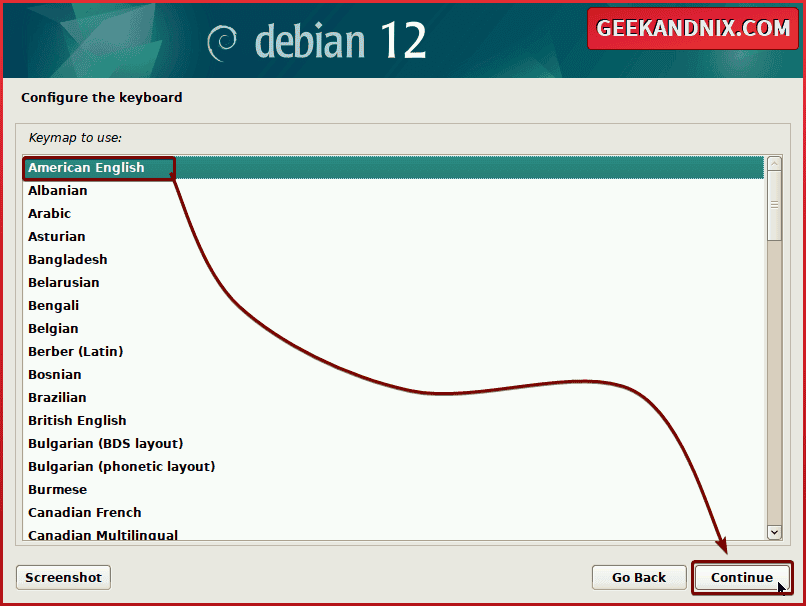
Configuring keyboard layout
Now choose your preferred keyboard setting or keymap that you want to use and click Continue.
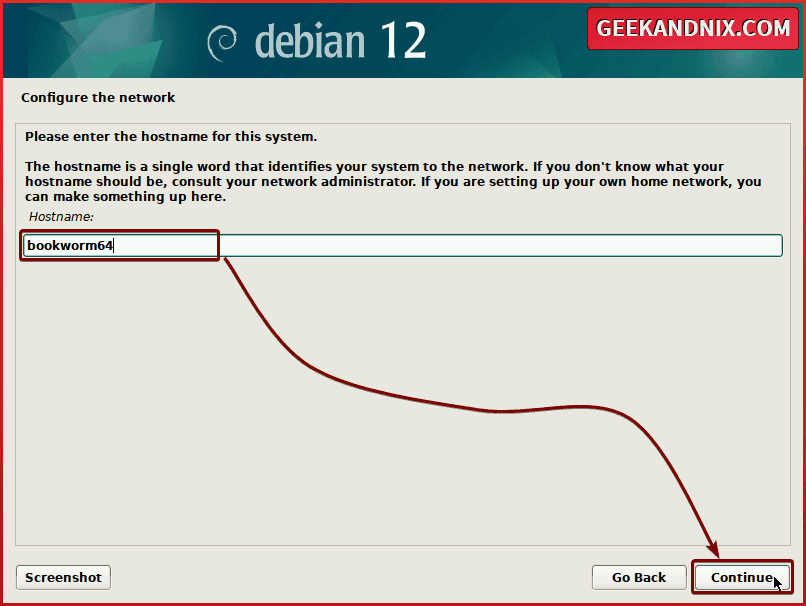
Setting up Hostname
Input the hostname for the new system and click Continue. In this example, I will use the hostname bookworm64.
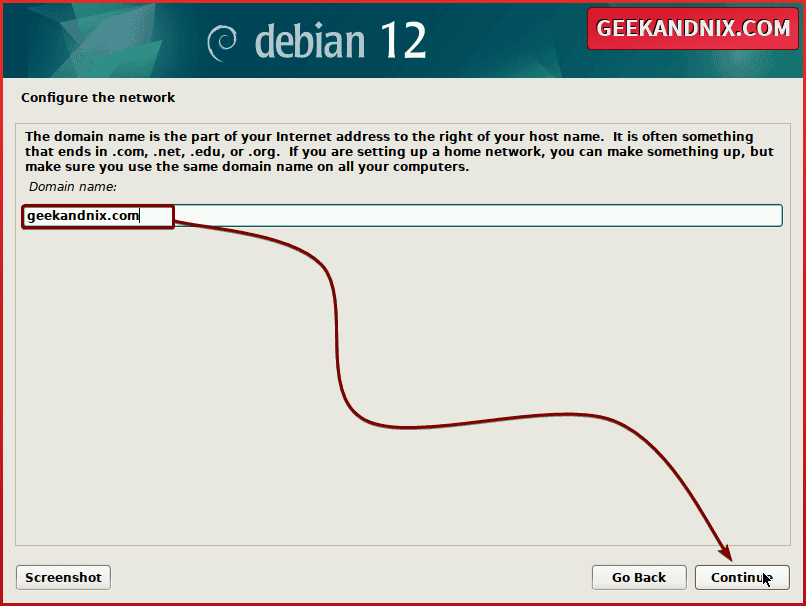
Setting up the default domain
Input the domain name for your local network such as geekandnix.com or geekandnix.lan, then click Continue. This determined your new system’s FQDN (Fully Qualified Domain Name).
The FQDN = hostname + default domain = bookworkm64.geekandnix.com
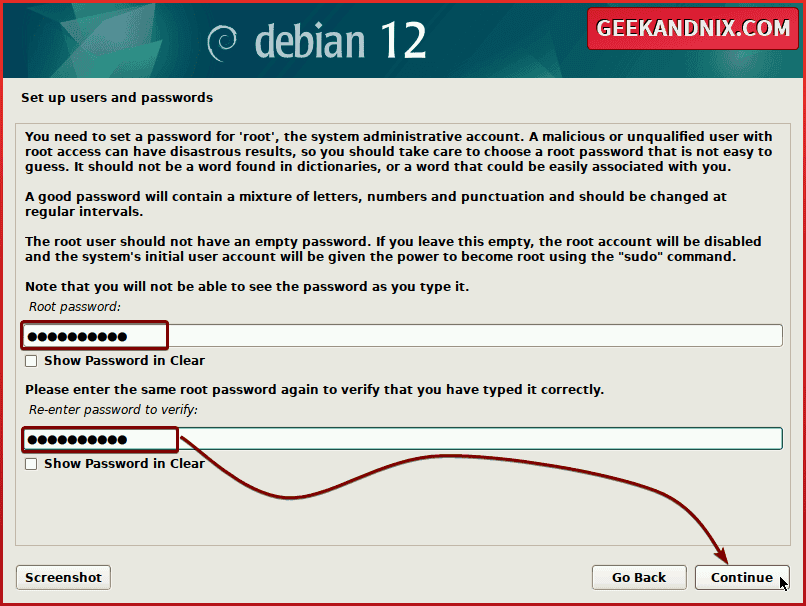
Setting up a root password
Input the new root password for your Debian system and repeat the password. Be sure to use strong passwords such combination of characters, numbers, and special characters. Then, click Continue.
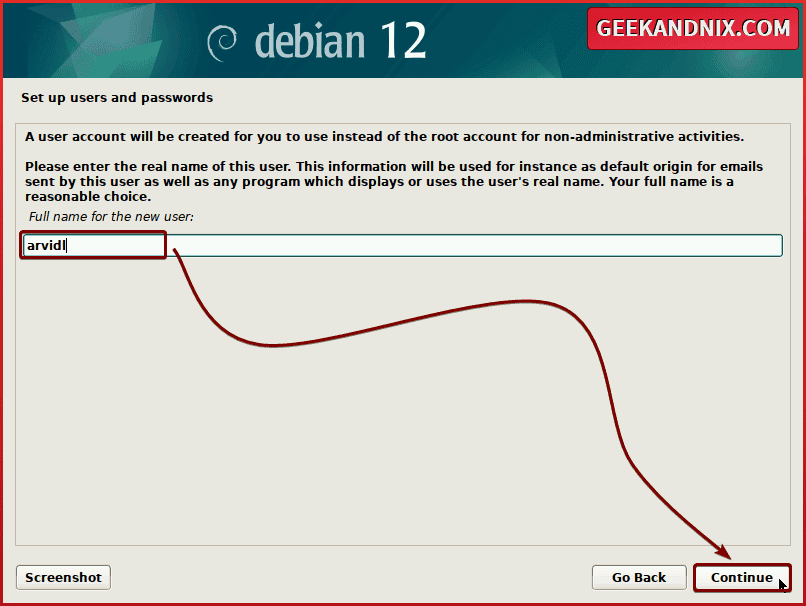
Adding new user
Input the Full Name for the new user and click Continue.
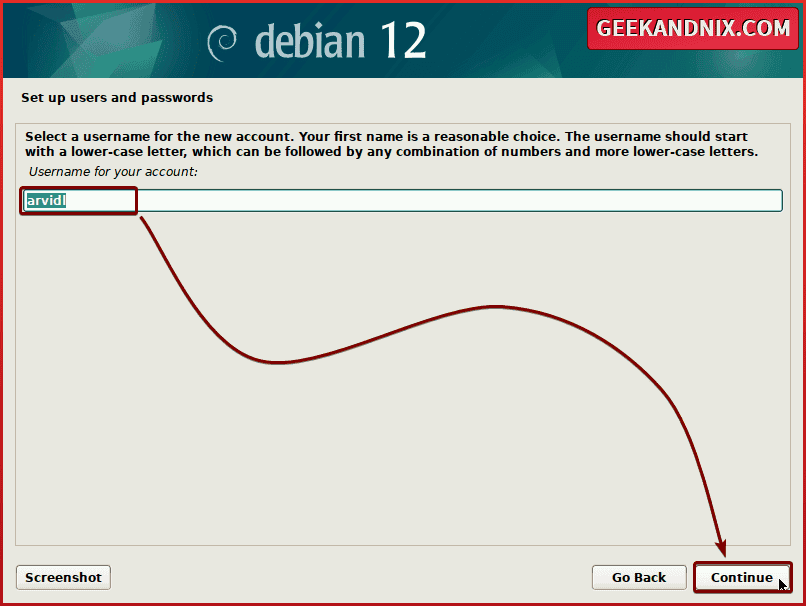
After that, input the username that will be used to log in to the new Debian machine and click Continue.
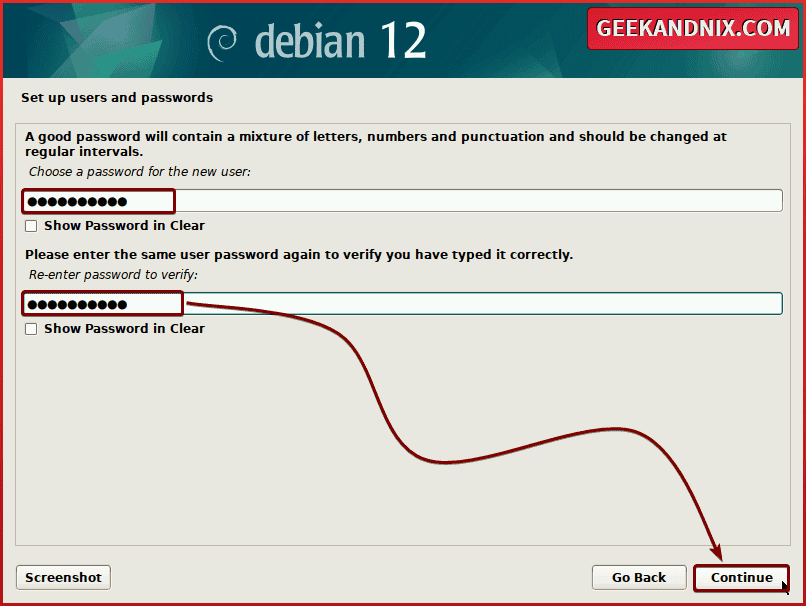
Lastly, input the new password and repeat the password, then click Continue.
Configuring time zone/clock
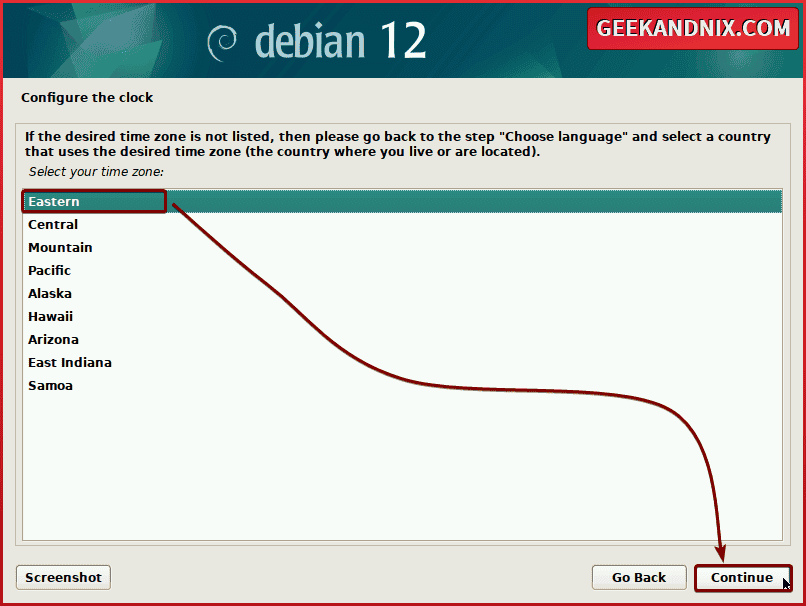
Select the default time zone based on your location and click Continue. You may have different list timezones, which are based on the default country or location that you have selected.
Partitioning Disks
After configuring the user, you will create a partition for the target installation disk.
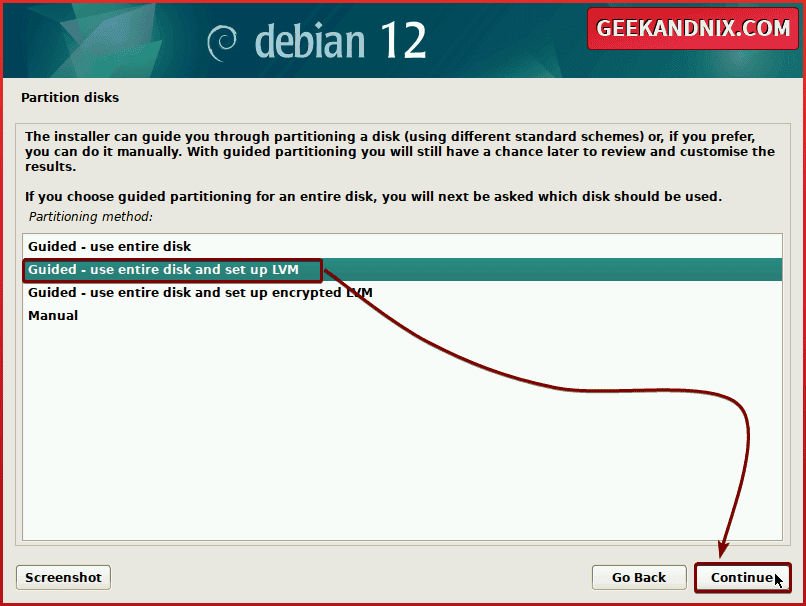
The Debian installer provides 4 methods to partition the disk:
- Guided – use entire disk
- Guided – use entire disk and set up LVM
- Guided – use entire disk and set up encrypted LVM
- Manual
Note: If you’re new to Linux, use the Guided methods. But for experienced users, you can use the Manual method and customize the partition as you need.
In this case, select the Guided – use entire disk and set up, LVM, and click Continue.
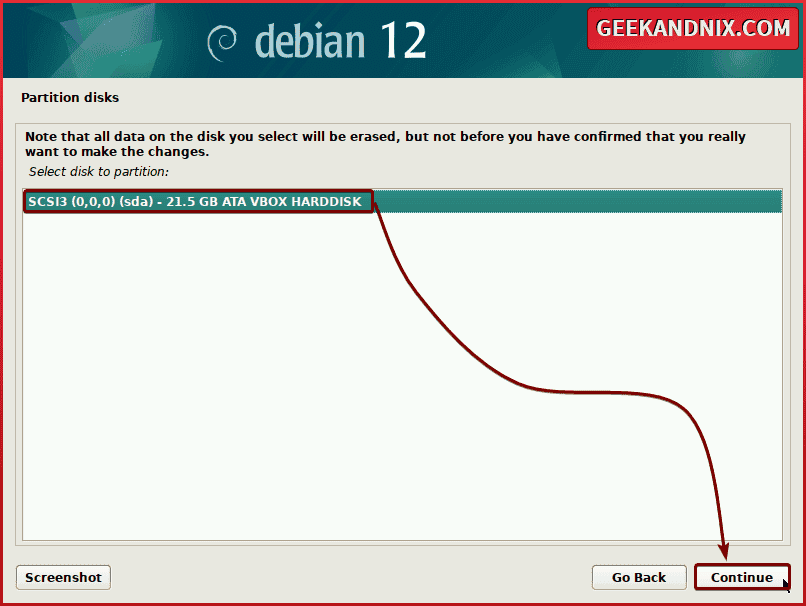
Then select your disk for the target installation and click Continue.
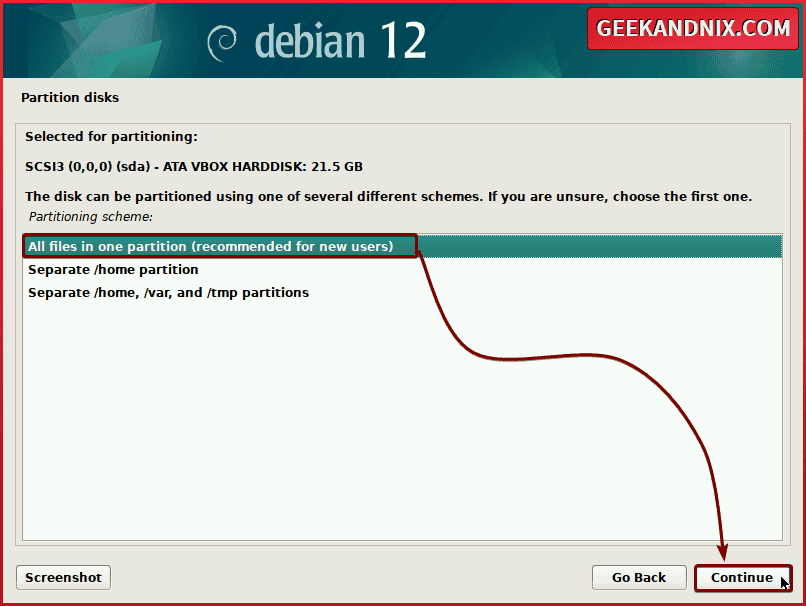
Next, choose the partition schema that is suitable for you. The following example uses All files in one partition, which puts both / (root) and /home in one partition, then click Continue again.
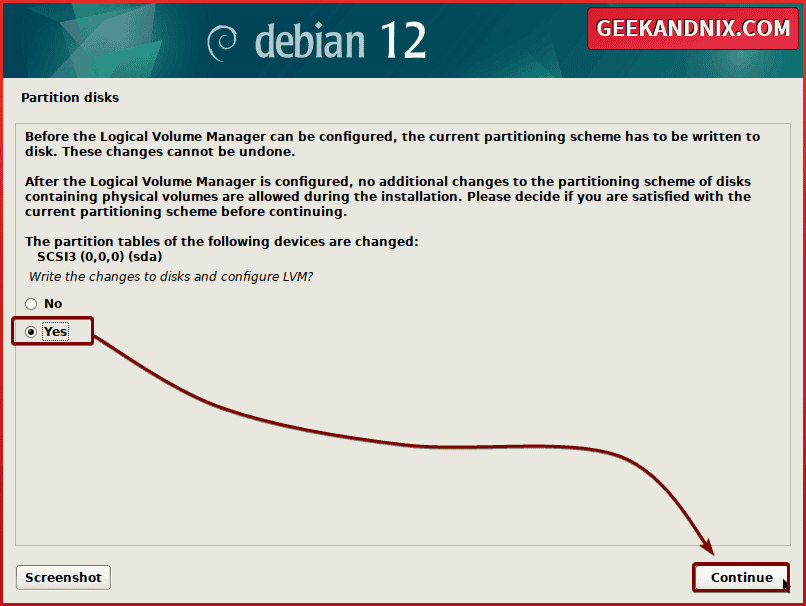
Now select Yes to write the new partition table and format the disk, then click Continue.
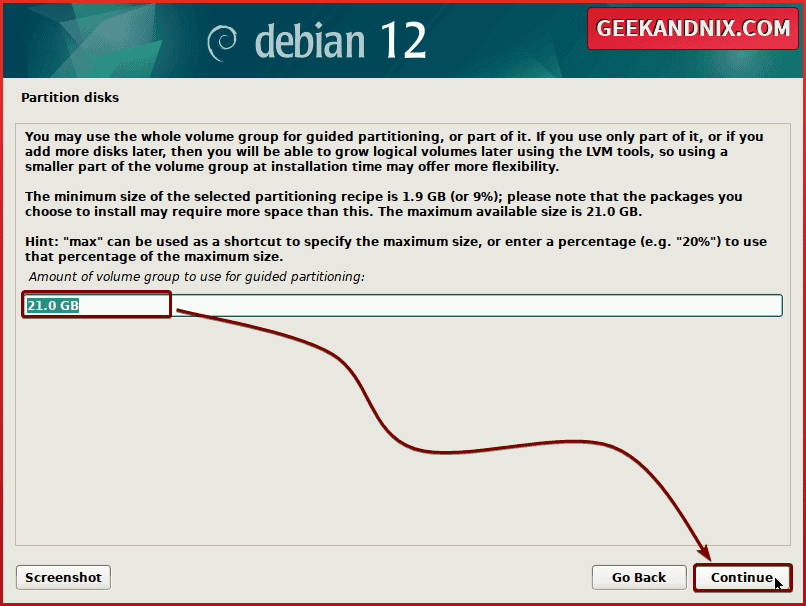
Input the disk size such as 21GB or percentage 100% that will be used for the installation ( or the LVM volume group) and click Continue.
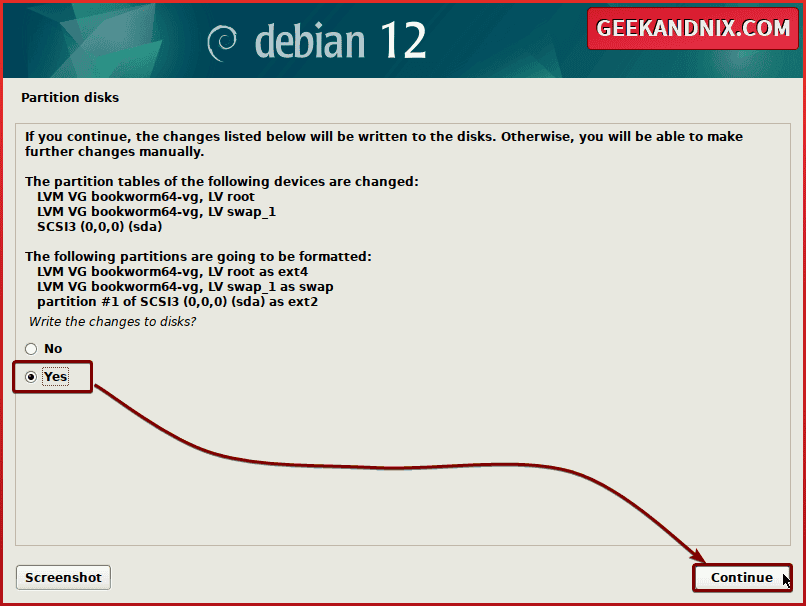
Lastly, double-check the partition table that you will be creating, then select Yes to confirm and click Continue to proceed with the installation.
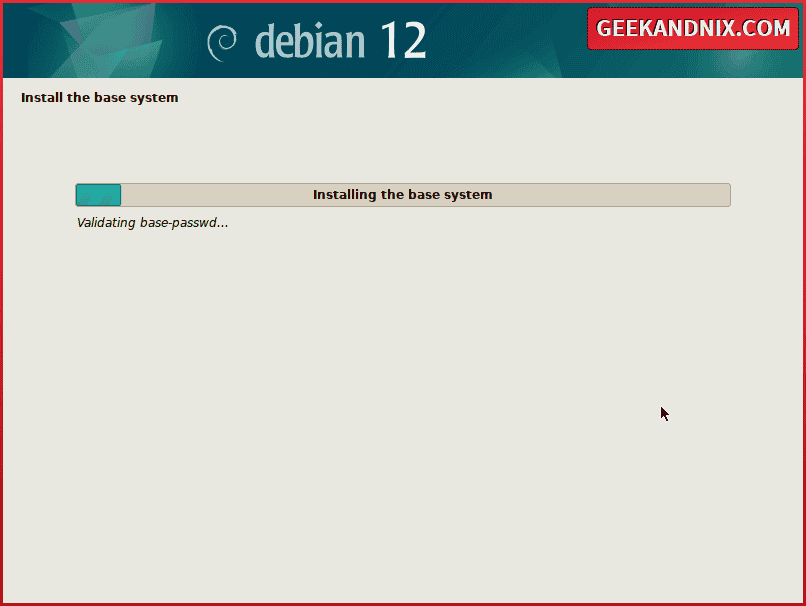
Debian installation begins
Now the Debian installation of the base system should begin.
After installation is finished, select No when asked to scan another installation media and click Continue.
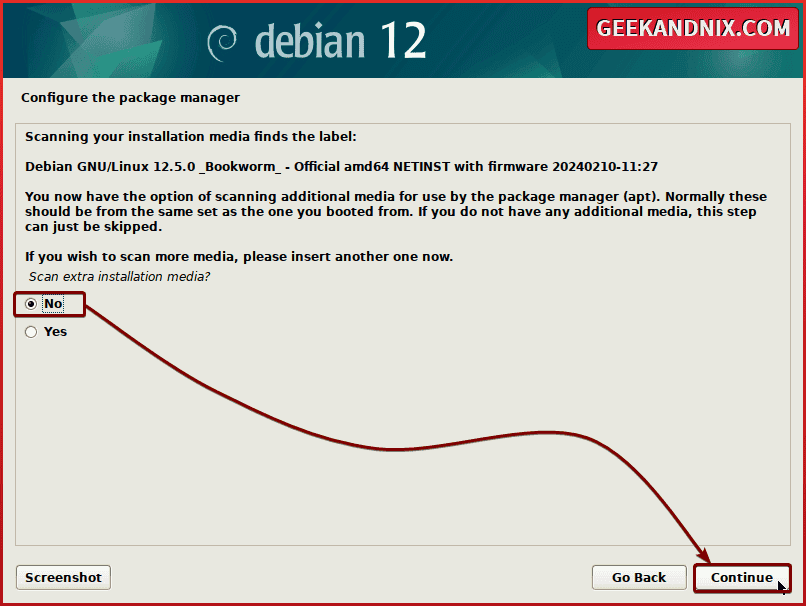
Configuring Mirror Repository
Next, select Yes and click Continue to configure the mirror repository for your new system.
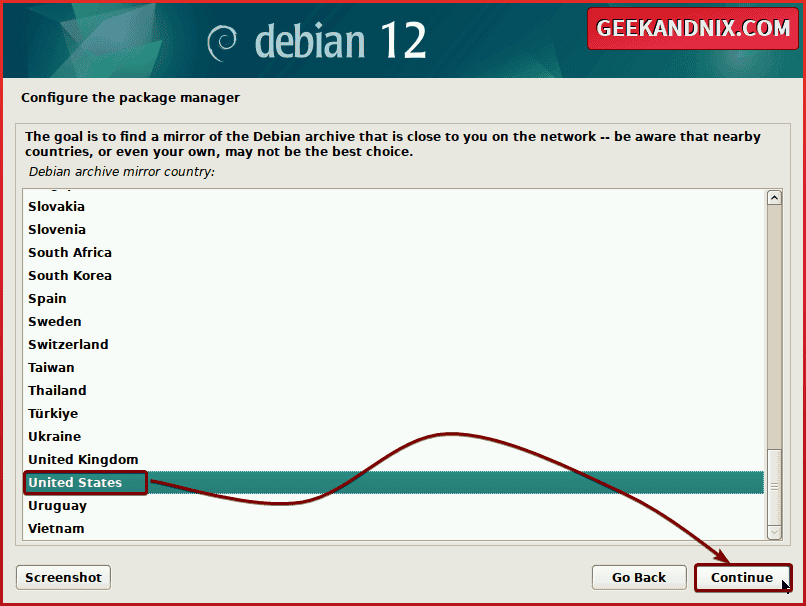
Select the country nearest your location and click Continue. Using the nearest mirror will improve speed during the installation of packages.
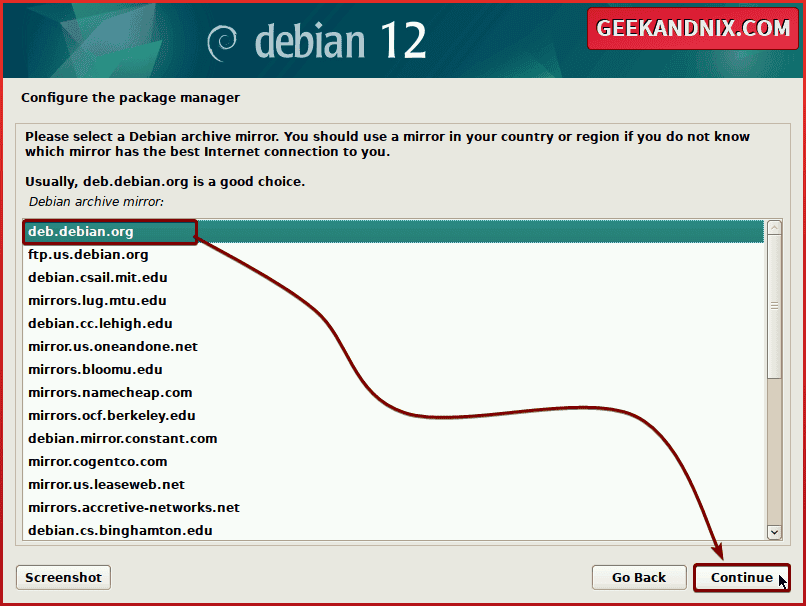
Select the specific Debian archive mirror that you want to use and click Continue.
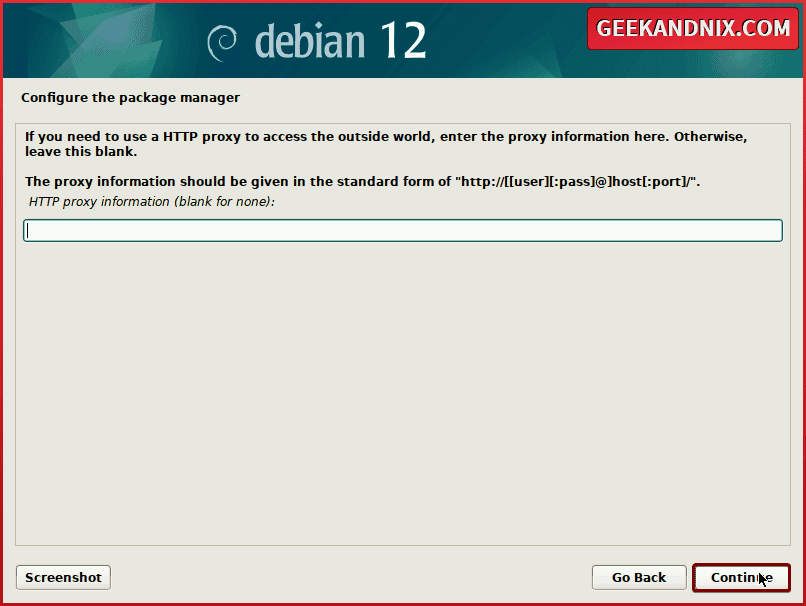
For the HTTP proxy, leave it blank to disable it, then click Continue.
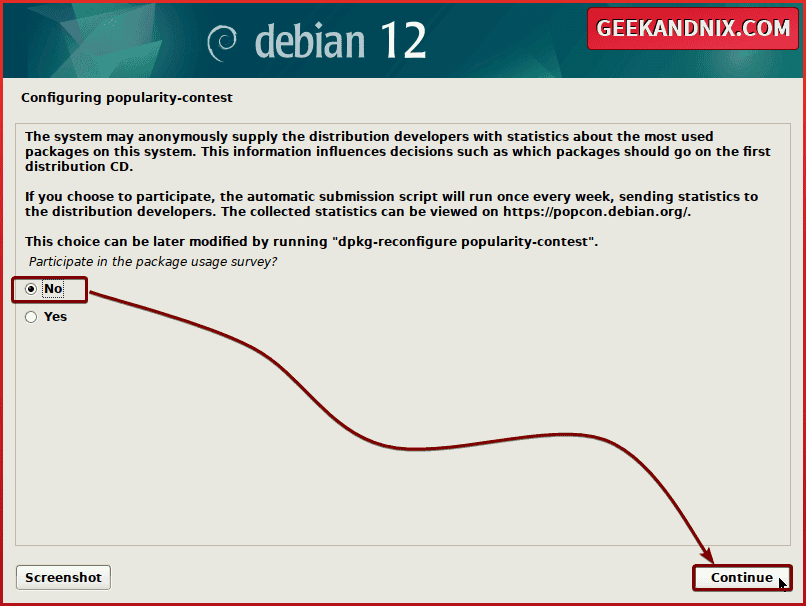
Select No again when asked to participate in the server usage and click Continue.
Installing software (server or desktop)
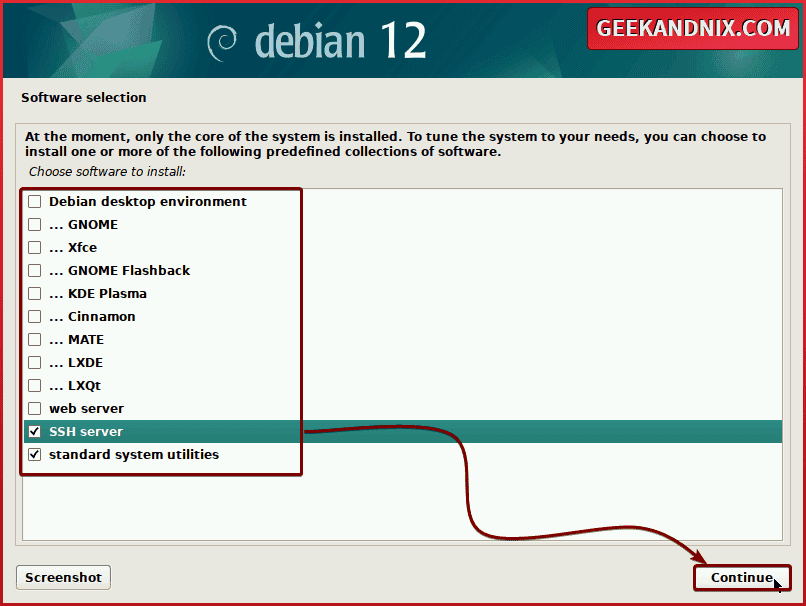
Now select which software you want to install in your new Debian machine. Below are some conditional most people used Debian for:
- If you want to install the Debian Server, select the SSH Server and standard system utilities.
- For the Debian Desktop users, select your preferred Desktop Environment (DE) and also select the standard system utilities.
Then click Continue to proceed to the installation.
Installing GRUB boot loader
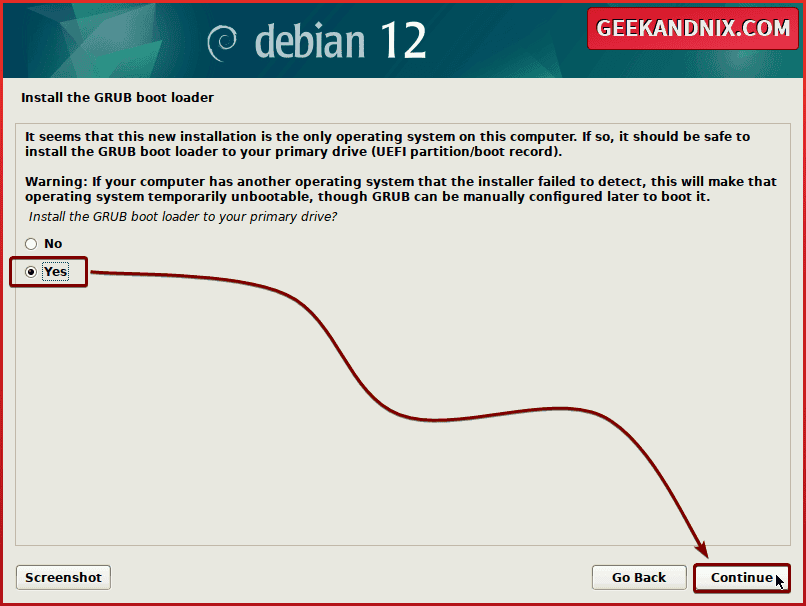
After the software packages are installed, select Yes to install the GRUB boot loader and click Continue.
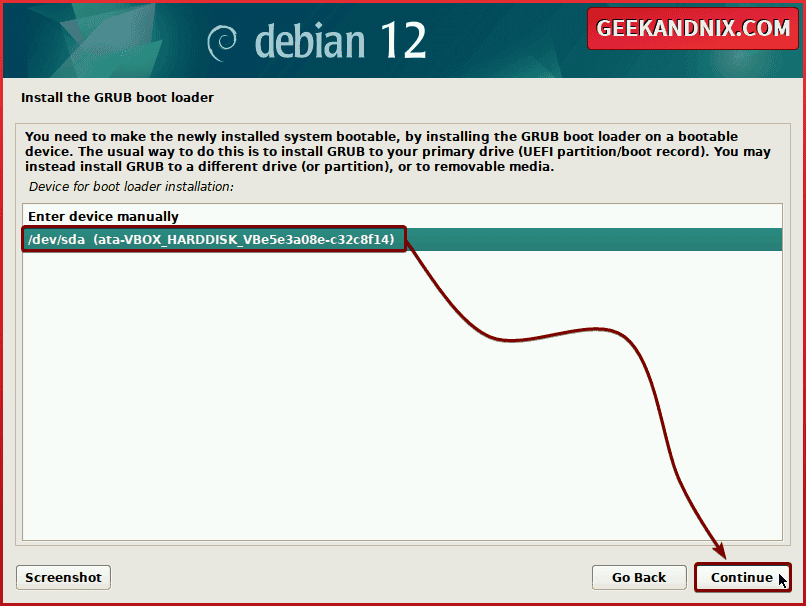
Select the device where GRUB will be installed and click Continue to the installation.
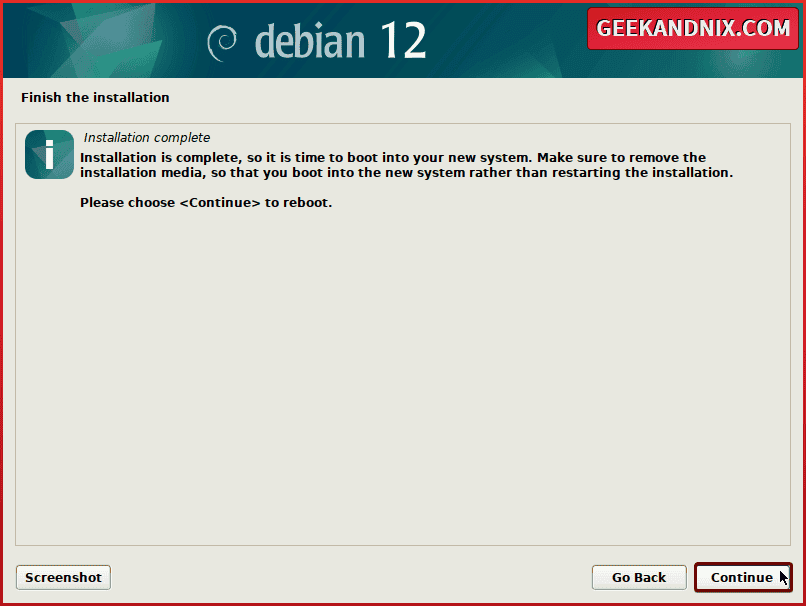
Once the GRUB bootloader is installed, everything is completed. Click Continue to reboot, then remove the USB installation media or ISO file if you’re using a virtual machine.
Logging into Debian
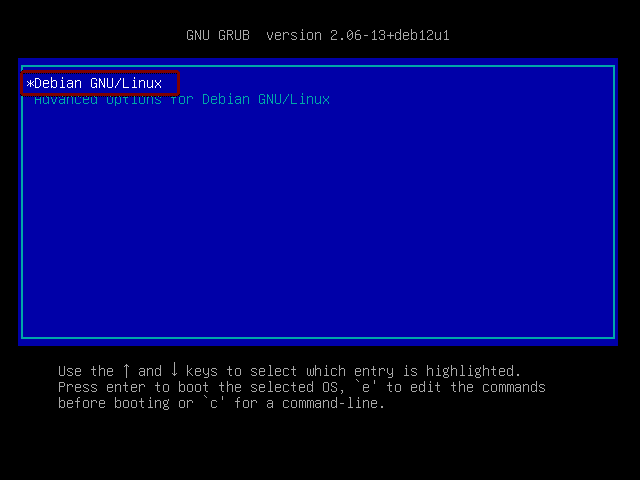
After the system rebooted, you will be displayed the Debian GRUB screen.
Select Debian GNU/Linux and press ENTER.
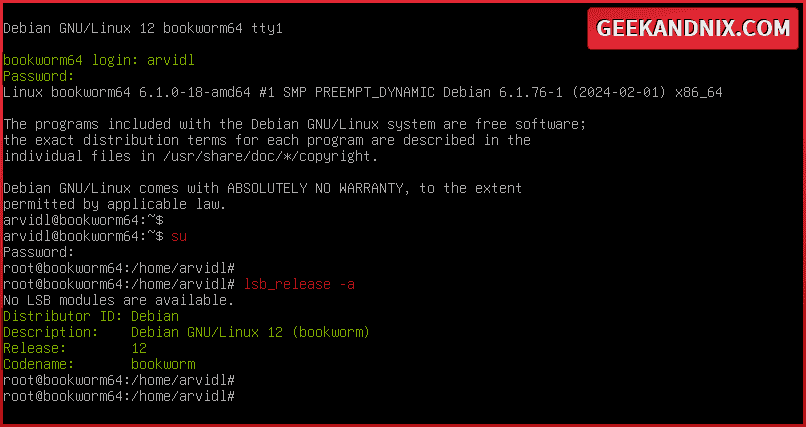
Once the boot process is complete, you will be prompted with the login screen:
- The graphical login screen if you’ve installed the Debian Desktop.
- CLI-based login screen if you’ve installed Debian Server, which is the case for this example.
Input your username and password, then press ENTER to log in.
Once logged in, run the su command to log in as the root user and input your root password (not a normal user password).
Now, run the following command to check the Debian version.
lsb_release -aYou will notice that you’ve installed Debian 12 codename Bookworm.
Updating the repository and installing text editors
Lastly, enter the following command to update your Debian package index and get the latest version of package information. Then, install vim and nano text editors via the apt command below.
apt update
apt install nano vim -y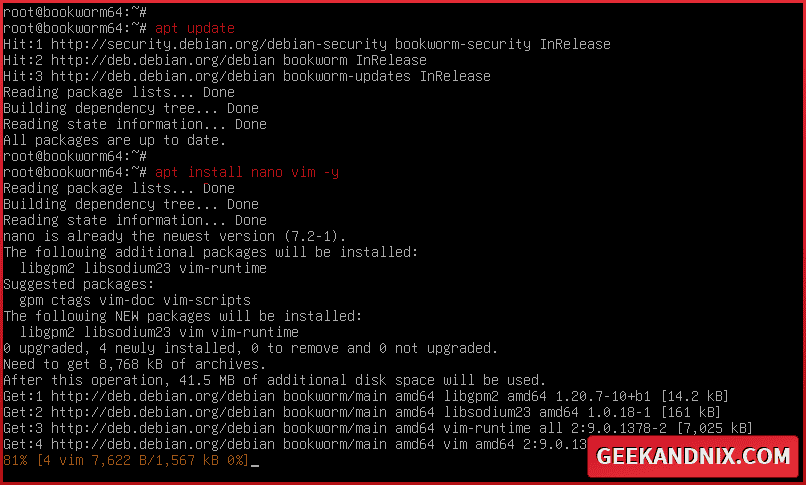
Conclusion
That’s it! You completed the installation Debian 12 server. As for the next, you may follow this path:
