How to Install Chrony as NTP Server and Client on Debian 12
Having synchronized time between your servers is important, especially for Distributed applications. Chrony is a modern implementation of NTP (Network Time Protocol) for Unix and Linux operating systems, such as Debian. It can be used as an NTP server software, as well as an NTP client.
This guide shows you how to install Chrony as an NTP server and client on a Debian server.
Now let’s get started.
Prerequisites
Make sure you have the following prerequisites before starting:
- A Debian 12 server with a non-root user as an administrator via
sudo, and the UFW (Uncomplicated Firewall) initialized. To achieve this, follow the Initial server setup with Debian 12. - Optional: a Debian machine for NTP client.
Installing Chrony on Debian
Chrony is a modern implementation of the NTP protocol for Unix and Linux operating systems. It can be used as both an NTP server and a client. On Debian, chrony is available in the main repository, which can be installed via APT.
To install chrony on the Debian server, follow these steps:
1. First, use the following command to update your Debian package index and get the latest version of package information.
sudo apt update2. Now, install the chrony package by executing the apt install command below. Input y when prompted to proceed with the installation.
sudo apt install chrony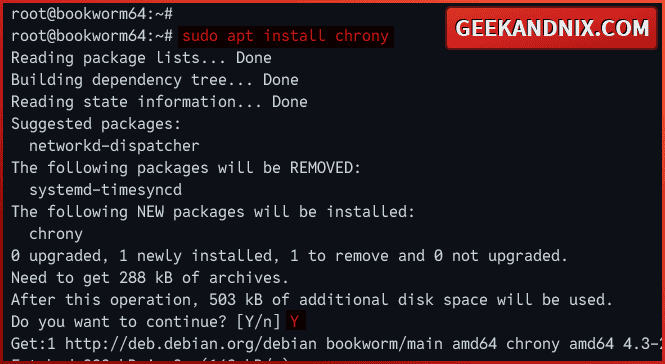
3. After chrony is installed, there will be two things added to your system:
chronyc: The command line for managing and monitoring Chrony.chronyd: The main service for Chrony is managed via thesystemctlutility.
Managing Chrony Service on Debian
With the chrony installed, the service is running and enabled automatically. Before configuring chrony as an NTP server or client, you will learn how to manage chrony service.
To manage chrony service on Debian, carry out the following actions:
1. To start the chronyd service, enter the following systemctl command.
sudo systemctl start chronyd2. If you need to stop the chronyd service, run the systemctl stop command below.
sudo systemctl stop chronyd3. If you make changes to your Chrony installation, you must restart it using the following command.
sudo systemctl restart chronyd4. Lastly, use the following command to verify the chronyd service. If chrony is running, the output will be "active (running)".
sudo systemctl status chronyd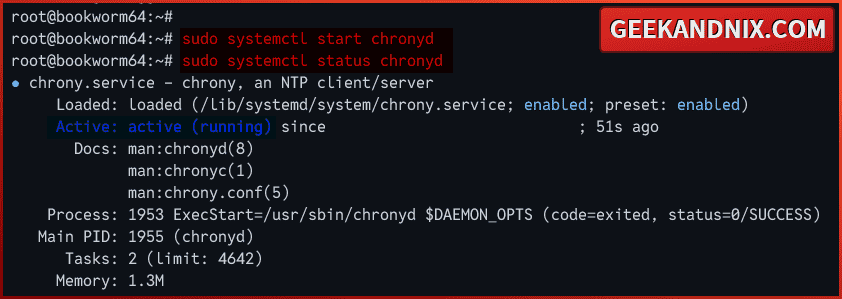
Creating NTP Server with Chrony on Debian
Now that you’ve learned how to manage chrony service, you’ll configure chrony as an NTP server on Debian. In most cases, you should deploy an NTP server for clients on your local networks. Also, this allows computers within your networks to have synchronized clocks from a single source.
To set up the NTP server with chrony, follow these instructions:
1. Visit https://www.ntppool.org/zone and choose the NTP server near your server location. The following example will be using the NTP server us.pool.ntp.org as the NTP source.

2. Now open the Chrony configuration /etc/chrony/chrony.conf using your preferred text editor. This example will be using Vim.
sudo vim /etc/chrony/chrony.confChange the default NTP source with the new configuration like the following.
pool 0.us.pool.ntp.org iburst
pool 1.us.pool.ntp.org iburst
pool 2.us.pool.ntp.org iburst
pool 3.us.pool.ntp.org iburst
Uncomment the allow parameter and input the subnet of your internal network. This will allow your network to access the NTP server installation.
allow 192.168.5.0/24When finished, save the file and exit the editor.
3. After making changes, run the following command to restart the chronyd service and apply the changes.
sudo systemctl restart chronyd4. Next, run the chronyc command below to make immediate changes and synchronize your system time with the new NTP source.
sudo chronyc -a makestep5. Then, verify your system clock performance using the chronyc command below.
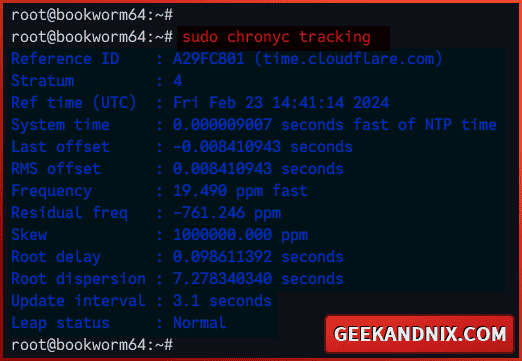
sudo chronyc trackingFrom the output. you should see the following:
- Reference ID: The NTP server source is currently your system clock synchronized.
- Startum: How many hops away from your system to the NTP source.
- Ref Time: The last measurement time from the NTP source was processed.
6. Lastly, run the following command to check the NTP sources that your system is currently connected to.
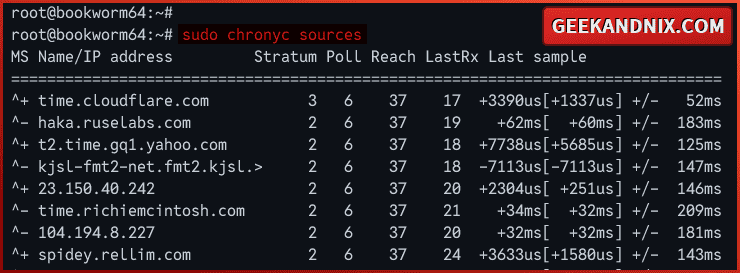
sudo chronyc sourcesYou should see the list of NTP servers that you’re currently connected to.
- M or mode of the source of NTP,
^means server,=means peer, and#means locally connected clock. - S or state of NTP sources,
*means the source that is currently synchronized,+means acceptable NTP source,-means acceptable NTP source but excluded by algorithm,?means the source that lost connectivity. - Name/IP Address shows you the NTP server source, which can be an IP address or domain name. This output will be the same as the Reference ID.
Allowing traffic to the NTP server via UFW
As you have now created an NTP server, you’ll allow traffic to the NTP server port 123/udp via UFW (Uncomplicated Firewall). Perform these tasks to allow traffic on your NTP server:
1. Run the following command to allow traffic to NTP port 123/udp.
sudo ufw allow 123/udp2. Once added, run the command below to verify firewall status. Make sure port 123/udp is available on the UFW list.
sudo ufw statusConfiguring Chrony as NTP Client on Debian
Since you’ve finished the configuration of the NTP server with chrony, let’s move on to configure chrony as an NTP client on Debian. In this example, I will configure chrony as an NTP client on the Debian server with the hostname hadoop.
To setup NTP client with chrony, execute these tasks:
1. Connect and log in to your Debian client machine.
2. Now, update and refresh your repositories on your Debian client. Then, install Chrony via the apt command. Type y to proceed with the installation.
# updating repository
sudo apt update

# installing chrony
sudo apt install chrony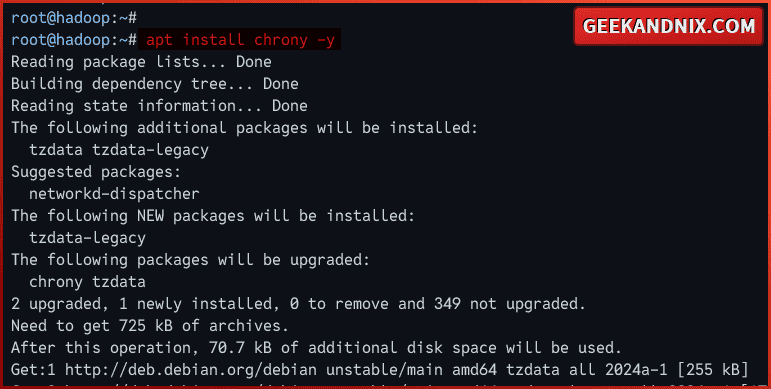
3. After Chrony is installed, open the default configuration /etc/chrony/chrony.conf using vim.
sudo vim /etc/chrony/chrony.confChange the default source to the IP address of your local NTP server.
server 192.168.5.30Save and close the file after finished.
4. Next, run the following systemctl command to restart the chronyd service and your changes.
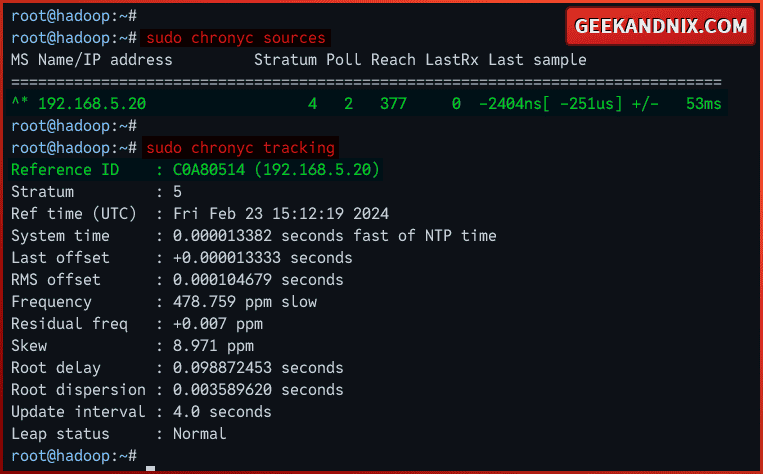
sudo systemctl restart chrony5. Now that the NTP client configuration is finished, verify your settings using the chronyc commands below.
# checking NTP server source
sudo chronyc sources

# tracking time
sudo chronyc tracking
If your NTP client configuration is successful, the expected output should be the IP address of your NTP server.
Conclusion
You now have an NTP server installed via Chrony on the Debian server. You also have configured the NTP client with Chrony on the Debian machine. Chrony is a lightweight implementation of NTP that also supports NTPS, the secure version of NTP.
If you have followed my Debian basic guide so far, then you’re ready to install your applications. You also may need to install the following as needed:
