How to Install ProFTPD on Debian 12 Server
Hello geekandnix, in this guide, I will show you how to install ProFTPd on Debian.
This guide will focus on how to build a secure FTP server using ProFTPd on Debian 12 server. Lastly, I’ll also show you how to use FileZilla for connecting and uploading files to your FTP server.
Let’s dive right in.
Prerequisites
To begin with the guide, make sure you have a Debian 12 server initialized with the non-root user as sudo/administrator privileges and UFW (Uncomplicated Firewall).
Follow our guide: Initial server setup with Debian server
Installing ProFTPD on Debian
The ProFTPd is an open-source FTP server software for Unix and Unix-like operating systems. ProFTPd is available by default on the Debian repository, and you can install it via APT.
To install ProFTPd on Debian, complete the following actions:
1. Connect to your Debian server and run the command below to update your package index.
sudo apt update2. Now, install proFTPd to Debian using the apt install command below. Input Y to proceed to the installation.
sudo apt install proftpd-basic proftpd-mod-crypto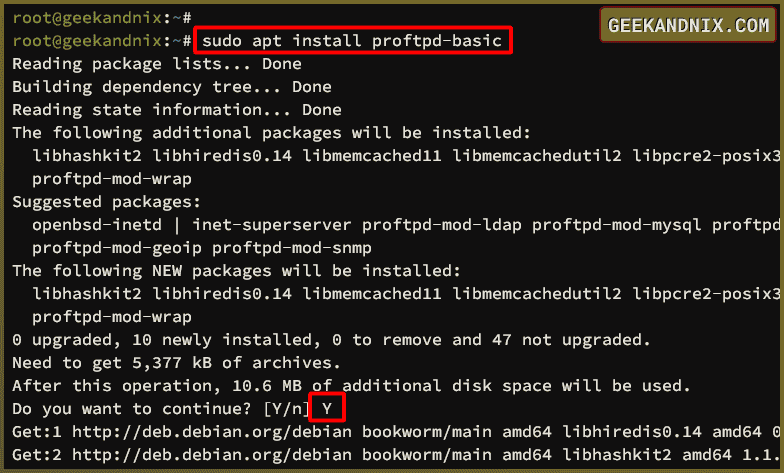
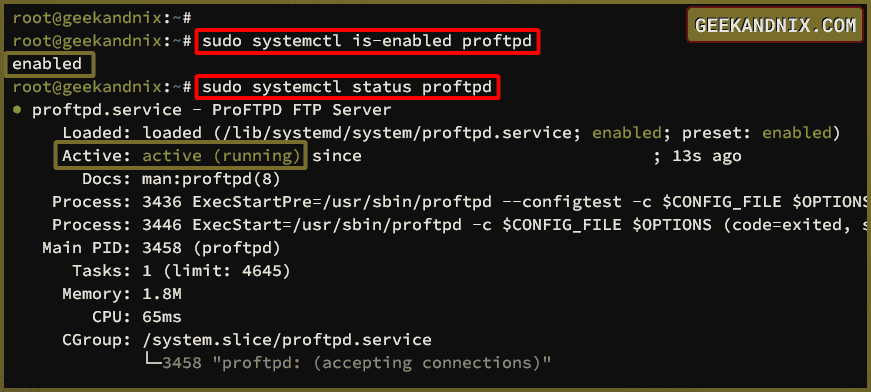
3. Once finished, check the proftpd service status and make sure it is enabled with the following command.
sudo systemctl is-enabled proftpd
sudo systemctl status proftpd
If proftpd is enabled, you will get an output enabled. Then, you’ll see confirmations active (running) when proftpd is running.
4. Now, check the default FTP port 21/tcp using the command below.
ss -tulpnYou’ll see the proftpd-basic running on port 21/tcp.

Opening port 21 via UFW (Uncomplicated Firewall)
Before configuring ProFTPd, you must open the default FTP port 21/tcp via UFW (Uncomplicated Firewall) and allow traffic to your FTP server.
To open port 21/tcp via UFW (Uncomplicated Firewall), go through these actions:
1. To allow traffic to port 21/tcp, run the ufw allow command below. You can see an output Rule added.
sudo ufw allow 21/tcp2. Now, add the FTP passive port range 49152-65534 for ProFTPd with the command below.
sudo ufw allow 49152:65534/tcp3. Lastly, check the list rules in UFW with the command below. Make sure traffic to port 21 and range 49152-65534 is ALLOWED.
sudo ufw status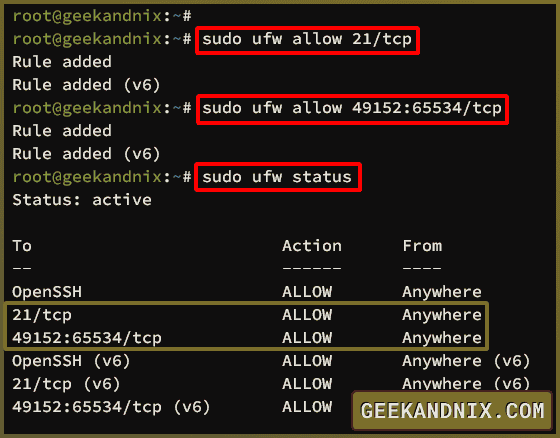
ProFTPD config files and directories
In this section, you’ll explore ProFTPd configuration files and directories. This is important for configuring and debugging ProFTPd during the configuration process.
Below are directories and files for ProFTPd that you must know:
- /etc/proftpd/: The default ProFTPd configuration directory.
- /etc/proftpd/proftpd.conf: The default ProFTPd config file.
- /var/log/proftpd/access.log: This is the ProFTPd access log, which you can enable via the
proftpd.conffile: - /var/log/proftpd/xferlog: This is the log of data transfer operations between the ProFTPd server and clients.
Configuring and securing ProFTPD
You’ll configure ProFTPd by editing the default configuration /etc/proftpd/proftpd.conf. For basic ProFTPd configuration, you’ll enable jail/chroot, set up the ServerName, and disable the IPv6 feature.
To configure ProFTPd, complete the following steps:
1. Open the default ProFTPd configuration /etc/proftpd/proftpd.conf using vim.
sudo vim /etc/proftpd/proftpd.conf2. Uncommet the DefaultRoot parameter to enable jail for FTP users. The term of jail or chroot is user’s home directory will be shown as the root directory and will be trapped in it.
DefaultRoot ~3. Change the ServerName option with your FTP server information. Or, you can type your system hostname here.
ServerName "Geekandnix.com"4. Uncomment the following line to enable the passive mode FTP server via port range 49152-65534.
PassivePorts 49152 655345. Optional, if you dont have IPv6, then disable the IPv6 support with the following.
UseIPv6 off6. Lastly, uncomment the following lines to include the ProFTPd TLS configuration /etc/proftpd/tls.conf.
# Include the tls.conf to proftpd.conf
Include /etc/proftpd/tls.conf
When done, save and exit the file.
Securing ProFTPD with mod_tls module
Now that you’ve configured ProFTPd, you’ll secure ProFTPd via the mod_tls module. This will encrypt both the authentication and data transfer process from the FTP client to the server.
To configure mod_tls, you must generate SSL/TLS certificates, which can be done via openssl. Additionally, if you’re on a public server with a domain name such as ftp.geekandnix.io, you can generate an SSL/TLS certificate via Certbot and Letsencrypt.
To secure your ProFTPd installation, carry out the following:
1. To start, install the openssl package to your Debian system with the apt install command below. With the openssl, you’ll generate SSL/TLS certificates for ProFTPd.
sudo apt install openssl -y2. Now, run the openssl command below to generate self-signed SSL/TLS certificates for ProFTPd. In this case, the private key certificate will be stored at /etc/ssl/private/proftpd.key, and the public key certificate will be available at /etc/ssl/certs/proftpd.crt.
sudo openssl req -x509 -newkey rsa:2048 -keyout /etc/ssl/private/proftpd.key -out /etc/ssl/certs/proftpd.crt -nodes -days 365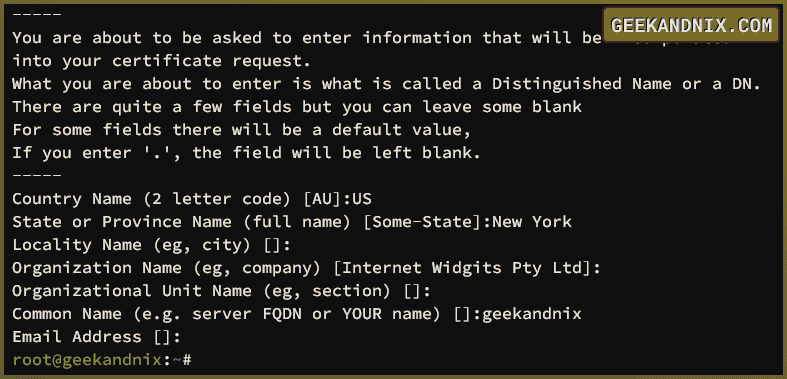
3. Once SSL/TLS certificates are generated, run the command below to change the permission for both private and public certificates to 0600. This means only the owner can access those certificates.
sudo chmod 600 /etc/ssl/private/proftpd.key
sudo chmod 644 /etc/ssl/certs/proftpd.crt
4. Now, to enable TLS support on ProFTPd, open the file /etc/proftpd/modules.conf using vim.
sudo vim /etc/proftpd/modules.confUncomment the following lines to enable the mod_tls ProFTPd module.
# Install proftpd-mod-crypto to use this module for TLS/SSL support.
LoadModule mod_tls.c
# Even these modules depend on the previous one
LoadModule mod_tls_fscache.c
LoadModule mod_tls_shmcache.c
Save the file and exit.
5. Next, open the ProFTPd TLS configuration /etc/proftpd/tls.conf using vim.
sudo vim /etc/proftpd/tls.confChange the default TLS options with the following, and make sure to adjust both TLSRSACertificateFile and TLSRSACertificateKeyFile options with the path of your SSL/TLS certificates.
TLSEngine on
TLSLog /var/log/proftpd/tls.log

TLSProtocol TLSv1.3
TLSRequired on

TLSRSACertificateFile /etc/ssl/certs/proftpd.crt
TLSRSACertificateKeyFile /etc/ssl/private/proftpd.key
When finished, save and exit the file.
6. Lastly, run the command below to restart the proftpd service and apply your new changes. Once the command is executed, your ProFTPd should be secured with SSl/TLS certificates.
sudo systemctl restart proftpdSetting up ProFTPD users
With the ProFTPd secured, you can start adding FTP users. For this, you’ll add a new dummy/fake valid shell that will be used by ProFTPd users. After that, you can add your FTP users.
Creating a dummy shell
By default, the ProFTPd required a valid shell to allow users to log in to the FTP server. So now you’ll create a new dummy/fake shell that will be used only for FTP users.
To create a dummy shell for ProFTPd, follow these steps:
1. To create a dummy or fake shell /usr/bin/proftpdshell for ProFTPd users, run the command below.
sudo ln -v -s /bin/false /usr/bin/proftpdshell2. After that, run the following command to add /usr/bin/proftpdshell as a valid shell to /etc/shells.
sudo echo "/usr/bin/proftpdshell" >> /etc/shellsCreating FTP users
After you’ve created a dummy/fake shell, you’re ready to create new FTP users on your ProFTPd server. To add a new ProFTPd user:
1. Run the command below to create a new ProFTPd user testuser with the default shell /usr/bin/proftpdshell.
sudo useradd -s /usr/bin/proftpdshell -m testuser2. Now, run the following command to configure a password for user testuser. Input your password and repeat, make sure to use strong and unpredictable passwords.
sudo passwd testuser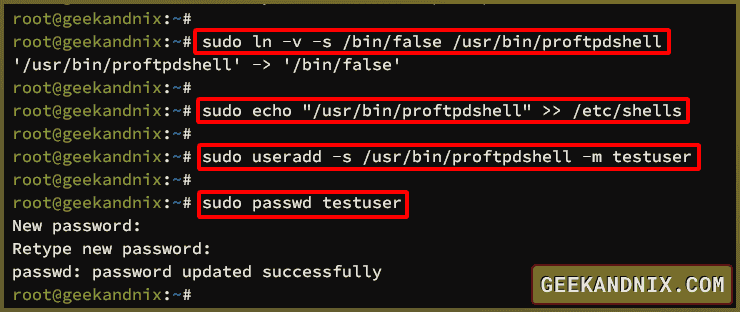
Uploading files to FTP Server with FileZilla
With the ProFTPd running and users created, you can log in to the FTP server from your local client. In this example, you’ll be using FileZilla to connect and upload files to the FTP server. FileZilla is a free and open-source FTP client that supports various operating systems such as Unix, Linux, Windows, and MacOS.
To connect and upload files to the FTP server via FileZilla, perform the following actions:
1. Download and install FileZilla to your local computer. For Linux users, you can install it with a package manager, such as apt, dnf, and Pacman.
2. Open FileZilla input detail information about the FTP server and click Quickconnect.
- Host: Type
ftpes://192.168.5.15– with the ftpes in the beginning, you explicitly connect to the FTP server via secure SSL/TLS connection. - Username and Password: Type your FTP user and password.
- Port: Type port 21 as the default port for FTP server.

Click OK to accept SSL/TLS certificates from the FTP server.
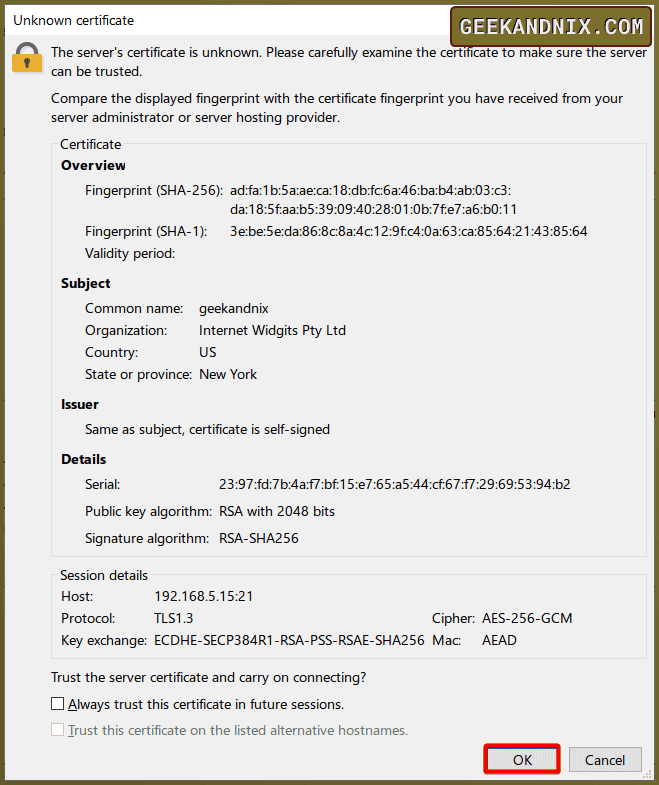
Once connected, you should see the message Status: Logged in on FileZilla. Also, your FTP home directory will be shown as root /, which confirms that chroot/jail is enabled.
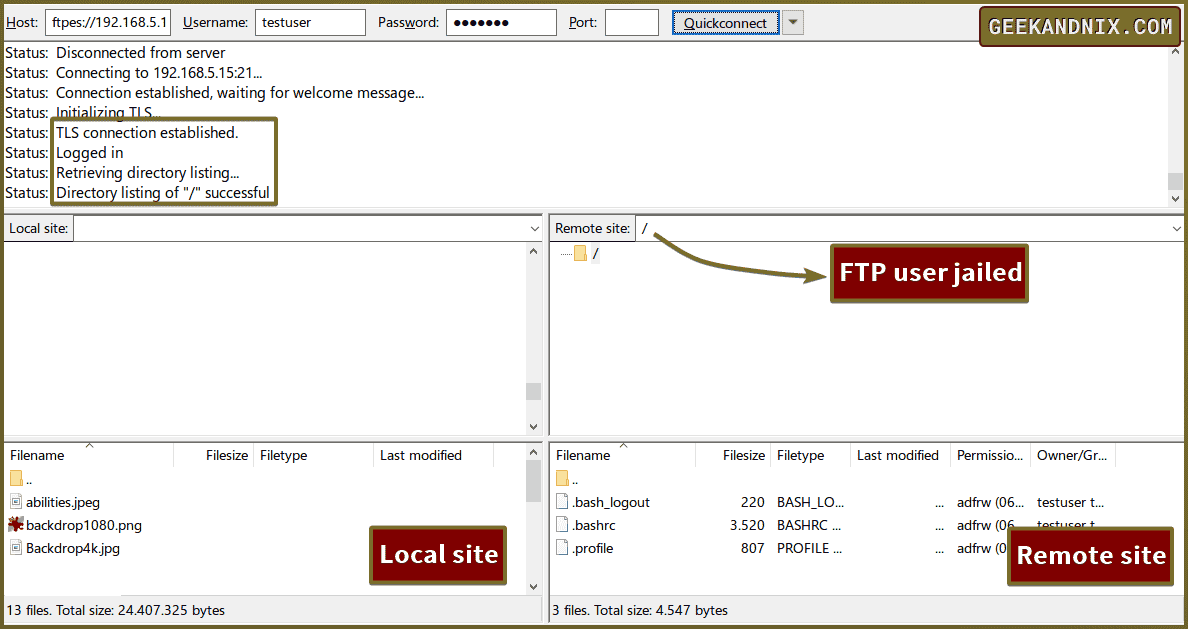
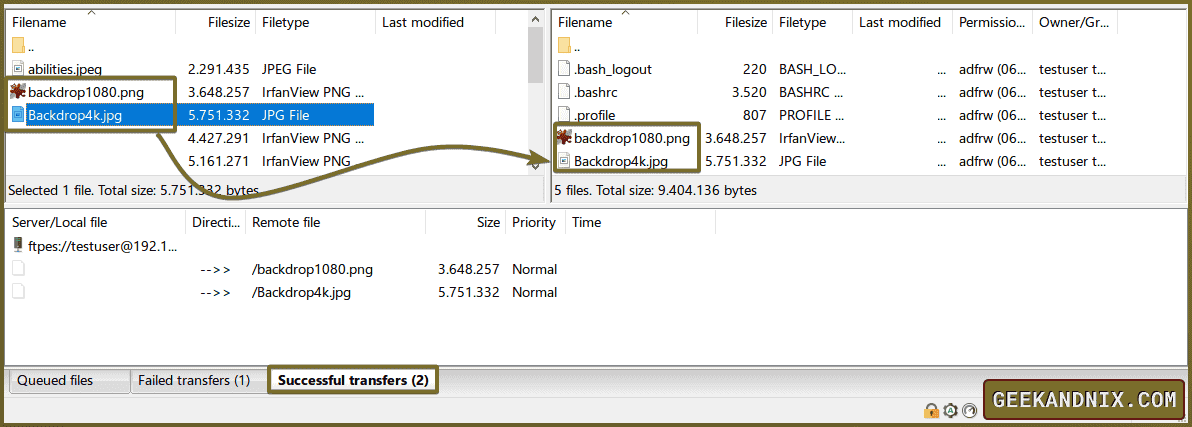
3. Lastly, drag and drop your files from the Local site to the Remote site section.
Conclusion
You now have a secure FTP server based on ProFTPd on the Debian server. You can now upload files from your local machine to the FTP server securely via FileZilla. With the ftpes, you will ensure that you’re connecting to the FTP server securely from your local machine.

