How to Install Java (21, 19, 17, or 11) on Debian 12
In this tutorial, I will show you how to install Java on the Debian system.
I will show you two methods for installing Java on Debian 12, then how to set up the default Java version (when you’ve multiple versions installed), and how to configure the JAVA_HOME environment variable.
tl;dr:
- You can easily install Java on Debian via
apt install default-jdk. - You can install a specific Java version to Debian using the Debian Unstable repository.
- Be sure to set up the default Java version via the
update-alternativescommand when you have multiple Java versions installed. - You can set up JAVA_HOME environment as per-user or system-wide.
Prerequisites
To begin the process, make sure you have a Debian 12 system initialized with the non-root user as sudo/administrator privileges.
Installing Java on Debian
At this time, the Debian repository provides the Java OpenJDK 17, which is suitable for generic application development and deployment. You can install the default-jdk package via the APT package manager.
To install Java OpenJDK on Debian, follow these steps:
1. Firstly, run the apt command below to update your Debian package index.
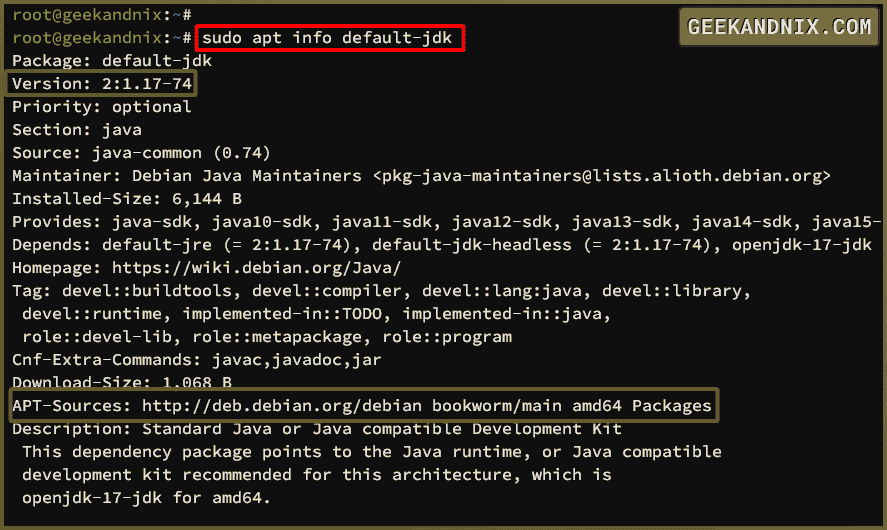
sudo apt update2. Once updated, run the apt info command below to get information on the default-jdk package.
sudo apt info default-jdkFrom the output below, you can see the default-jdk version referred to Java OpenJDK 17.
Note: By installing Java JDK (Java Development Kit), you will also automatically install the Java JRE (Java Runtime Engine) to your system. Java JDK is a complete package for developing and deploying Java applications, while JRE is used to run Java code.
3. Now, execute the apt install command below to install the Java via the default-jdk package. Enter Y to proceed with the installation.
sudo apt install default-jdk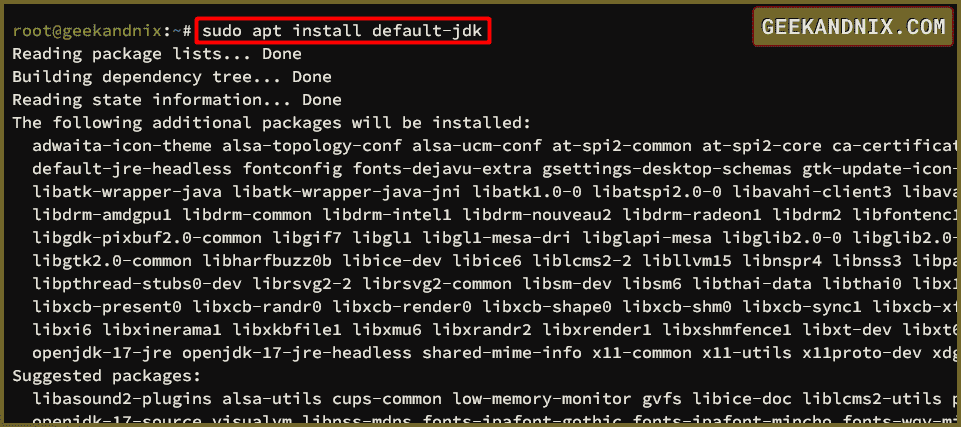
4. After installation is complete, run the java command below to check your Java version.
java --versionYou can see the Java OpenJDK 17 is installed on your Debian server.

Installing specific Java versions (21, 19, 17, or 11)
If you need to install a specific Java version to Debian, you can install it via the Debian Unstable (Sid) repository. At this time, the Debian Unstable (Sid) repository provides Java 21, 19, 17, and 11.
Note: The Debian Unstable (Sid) is the bleeding edge of Debian packages. You can install the latest version of packages introduced to Debian via the Debian Sid repository.
To install Java via the Debian Unstable repository, complete the following actions:
1. At first, execute the following command to enable Debian unstable repository and refresh the package index.
# enable debian unstable (Sid) repository
echo "deb http://deb.debian.org/debian unstable main non-free contrib" >> /etc/apt/sources.list

# refresh repository
sudo apt update
2. Now, run the apt search command below to find available openjdk packages. You will see multiple OpenJDK packages available, such as openjdk-21-jdk/unstable, which is provided by the Debian unstable repository.
sudo apt search openjdk3. Run the command below to install your specific Java version to your Debian machine. Enter Y to proceed with the installation.
sudo apt install openjdk-21-jdk/unstable
sudo apt install openjdk-19-jdk/unstable
sudo apt install openjdk-17-jdk/unstable
sudo apt install openjdk-11-jdk/unstable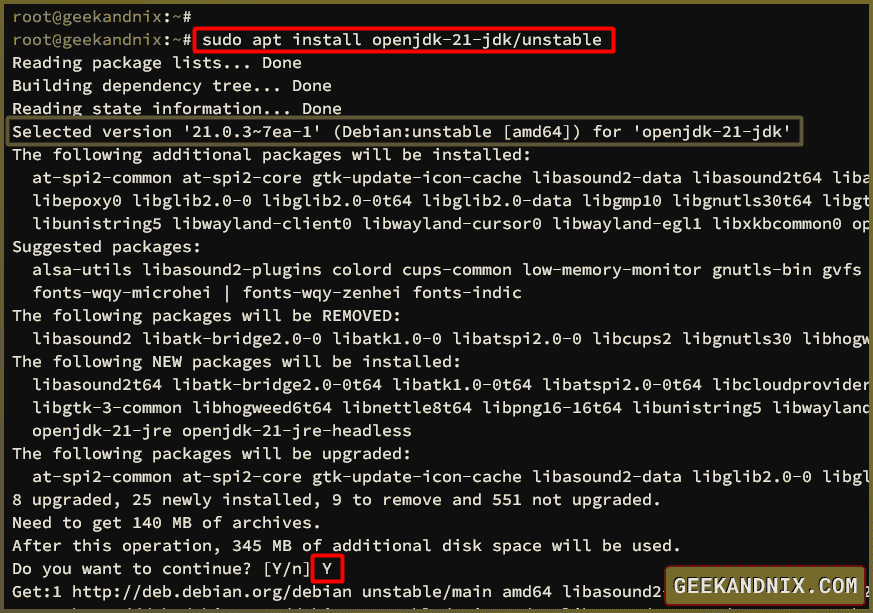
4. Once the installation is complete, check your Java version via the command below.
java --versionAs of this example, I’ve installed Java OpenJDK 21 via Debian unstable repository.

Optional: Setting up default Java
If you have multiple Java versions installed, you must configure the default Java for your applications. On the Debian system, you can configure the default program via the update-alternatives command line.
To set up the default Java version, perform these actions:
1. First, inspect available java by executing the following command. Through this command, you will get the path of the java binary location and your OpenJDK installation directory.
sudo update-alternatives --list javaIn the following output, you can see Java 17 installed at /usr/lib/jvm/java-17-openjdk-amd64 directory and Java 21 installed at /usr/lib/jvm/java-21-openjdk-amd64.
2. Now, run the update-alternatives command below to set the default Java version. In this example, you will set up the default Java version to 17.
sudo update-alternatives --set java /usr/lib/jvm/java-17-openjdk-amd64/bin/java
3. Once changed, check your Java version with the command below. You will see your default Java version.
java --versionSetting up JAVA_HOME environment variable
What is JAVA_HOME? It’s a system environment variable that points to your Java installation directory. Whether you’re developing or deploying Java applications, ensure that you have proper JAVA_HOME configuration.
In this section, you’ll set up JAVA_HOME on Debian as a per-user via the ~/.bashrc file or system-wide using the /etc/environment file.
Specific user via ~/.bashrc
To set up JAVA_HOME for a specific user, execute these actions as your user:
1. Run the following command to add new configuration to the ~/.bashrc file. You’ve checked Java installation path via the update-alternatives command at the top.
echo 'export JAVA_HOME=/usr/lib/jvm/java-17-openjdk-amd64' >> ~/.bashrc2. Next, run the source command below to load the ~/.bashrc configuration in your current session. This will automatically load when logging in to your user.
source ~/.bashrc3. Now, run the command below to check your JAVA_HOME path.
echo $JAVA_HOMEAs seen in the following, the JAVA_HOME path is pointed to the /usr/lib/jvm/java-17-openjdk-amd64 directory and matched with the ~/.bashrc configuration.

System-wide via /etc/environment
To set up JAVA_HOME system-wide, execute these actions as root:
1. Run the command below to configure JAVA_HOME via the /etc/environment file. The /etc/environment will be loaded automatically by Debian, which affects system-wide (roo, non-root, and services).
echo 'export JAVA_HOME=/usr/lib/jvm/java-17-openjdk-amd64' >> /etc/environment2. Now, run the following command to load the /etc/environment file to your current session.
source /etc/environment3. Lastly, check the JAVA_HOME environment variable with the command below.
echo $JAVA_HOMEYou can see the JAVA_HOME is set to Java 17 in the /usr/lib/jvm/java-17-openjdk-amd64 directory.

Creating Java hello world program
In this section, you’ll verify Java OpenJDK installation by creating a simple ‘Hello World’ program, compiling it, and then running it. Through this, you test functionality for both JDK (Java Development Kit) and JRE (Java Runtime Environment) in your system.
1. First, create a new script TestJava.java using vim.
vim TestJava.javaAdd the Java code below. When compiled and executed, the message Hello Java - Geekandnix.com will be printed out.
class TestJava
{
    public static void main(String args[])
    {
        System.out.println("Hello Java - Geekandnix.com");
    }
}
Save and exit the file.
2. Next, run the javac command below to compile the TestJava.java file. Once compiled, you will see the new file TestJava.class is created.
javac TestJava.java
ls - TestJava.class
3. Now, run the java command below to execute the TestJava program. After the program is executed, you will see the message Hello Java - Geekandnix.com in your terminal.
java TestJava
How to uninstall Java from Debian
If you need to uninstall Java OpenJDK from Debian,
1. If you; ‘re installing Java through the default-jdk package, you can uninstall it with the command below.
sudo apt remove default-jdk2. If you’re using Java from the Debian unstable repository, then uninstall it with the following command.
sudo apt remove openjdk-11-jdk/unstable
sudo apt remove openjdk-17-jdk/unstable
sudo apt remove openjdk-19-jdk/unstable
sudo apt remove openjdk-21-jdk/unstable
3. Now, execute the apt autoremove command below to delete orphaned/unused packages from your Debian.
sudo apt autoremoveConclusion
In this tutorial, you have installed Java on Debian 12 server. You also learned how to configure the default Java version and set up the JAVA_HOME environment variable on Debian. Lastly, you created the Java ‘Hello World’ application to test both Java JDK and JRE on your server.
