How to Install FreeBSD 14 Step-by-Step (With Screenshot)
The new FreeBSD 14.0 has been released, let’s now install it. In this guide, I will show you step-by-step how to install FreeBSD 14.
If you want to know what changes in FreeBSD 14, check some notable changes below:
- OpenSSH updated to new version 9.5p1.
- Major update of OpenSSL to version 3.0.12.
- The new bhyve hypervisor now supports TPM (Trusted Platform Module) and GPU Passthrough.
- ZFS with OpenZFS has been upgraded to version 2.2, which produces significant improvement in performance.
- CUBIC has become the default congestion control algorithm for TCP protocol.
In addition, there are also some merged features from FreeBSD 13.1 and 13.2, including:
- Bhyve hypervisor supports 16 vCPUs on guest via the vmm kernel module.
- FIDO/U2F hardware authenticators support for SSH.
- Added new daemons rpc.tlsclntd and rpc.tlsservd that support NFS-over-TLS.
- KTLS (Kernel TLS implementation) now supports TLS 1.3.
- Reintegrated Wireguard driver with small bug fixes and API changes.
Check out the FreeBSD release note to get details information.
Prerequisites
Before you begin, below the bare minimum system that you must have – bare-metal or virtual machine:
- 64-bit system architecture.
- 2 vCPUs.
- 25 GB of disk space.
- 2 or 4 GB of memory/RAM.
Step 1 – Downloading FreeBSD ISO Installer
Download the FreeBSD 14 ISO installer (CD or DVD version) and create a new bootable media. Then, boot it up.
If you want to install it on a live machine (bare-metal/computer/laptop), create a USB Bootable. For virtualization such as VirtualBox, KVM/QEMU, and Proxmox, create an Optical Drive and insert the FreeBSD ISO file as bootable media.
Step 2 – Booting to FreeBSD Installer
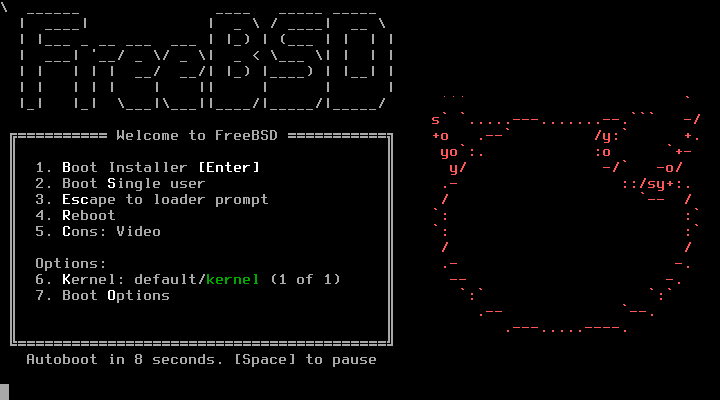
On the FreeBSD boot menu, press ENTER to start the installer.
Step 3 – Welcome to bsdinstall
Now you will see the welcome message from the bsdinstall – The FreeBSD installer.
Select Install to start the installation.
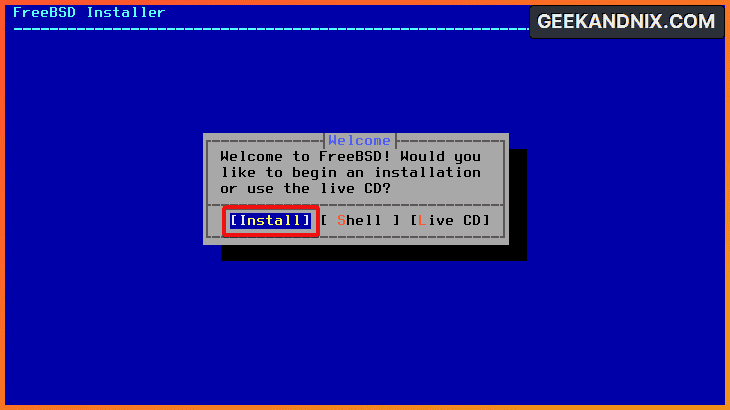
Note: Use TAB to move between menus on the bsdinstall.
Step 4 – Select Default Keymap (Keyboard Map)
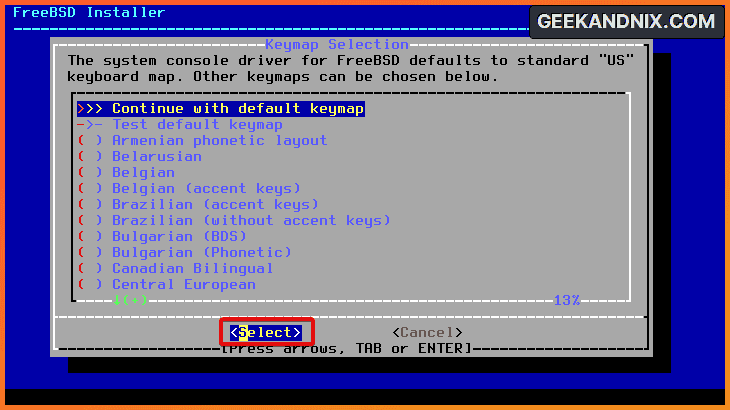
Choose the keymap or keyboard layout for your new FreeBSD system. The default keymap for FreeBSD is the standard US, which is the most popular and safe choice.
Move the menu to Continue with default keymap, then press ENTER on the Select menu.
Step 5 – Setting Up Hostname and FQDN
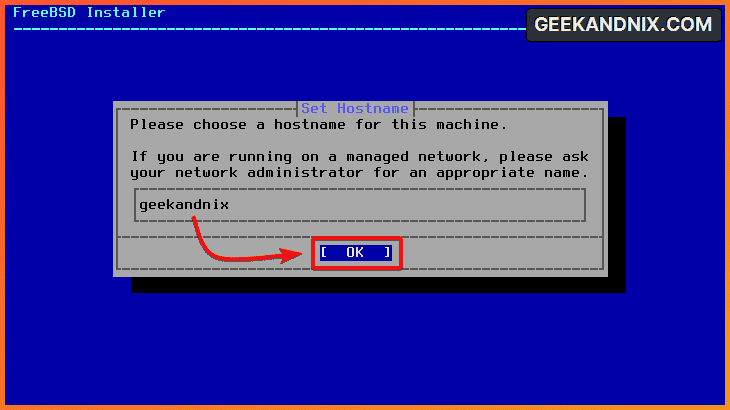
Input your hostname or FQDN (Fully Qualified Domain Name), such as geekandnix.domain.lan, then select OK.
Step 6 – Adding Components to FreeBSD
Choose additional components that you want to install (alongside the FreeBSD base system). The following example will include ports to the installation.
On FreeBSD, ports is where you can install and compile applications manually. This is useful, whether you want to strip/remove unused feature from application to boost performance, or enable specific feature.
Select ports option and OK.
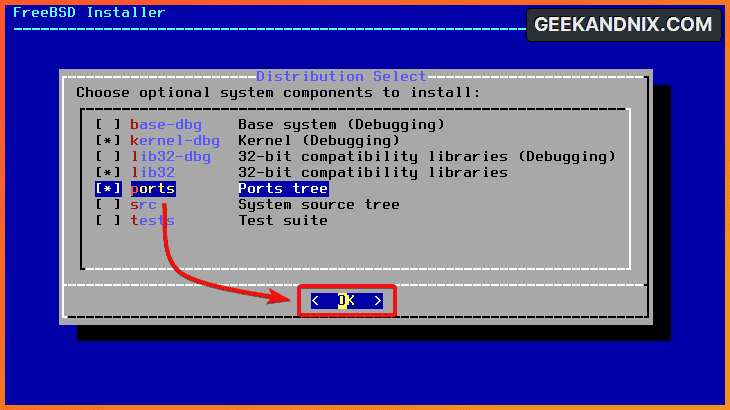
Note: Use the SPACE button to select the option, then move with the UP/DOWN keys.
Step 7 – Partitioning Methods for FreeBSD
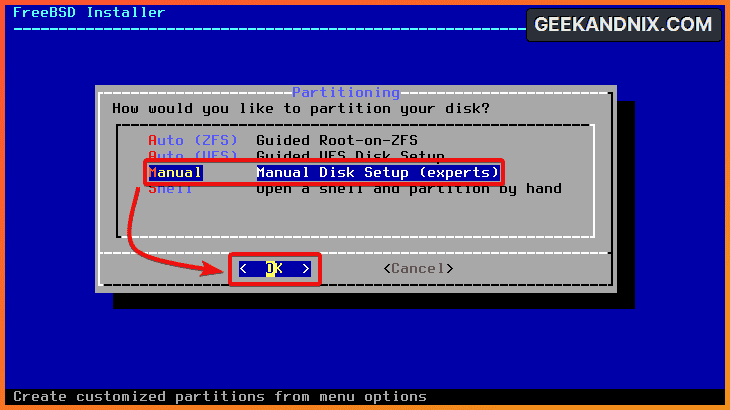
Now time to create a disk partition for FreeBSD. By default, the bsdinstall provides 4 methods to partition disks:
- Auto ZFS: automated and guided with ZFS.
- Auto UFS: automated guided with UFS Disk setup.
- Manual: partition disk manually via an interactive interface.
- Shell: configuring disk partition via command line
In this example, we’ll be using the Manual partition method. So, choose Manual and select OK.
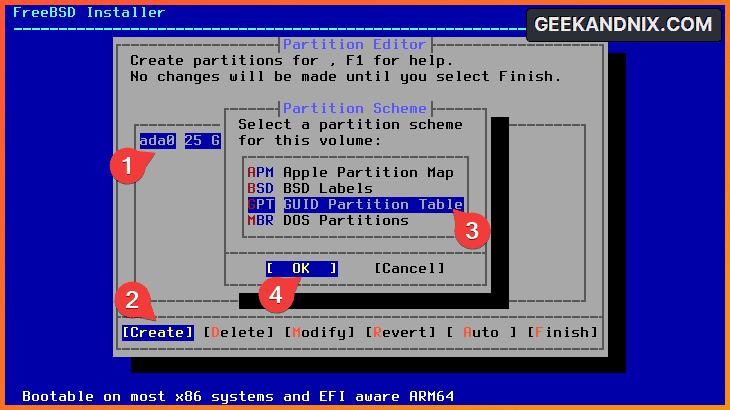
Creating Partition Scheme
Choose your disk and select Create. Then, choose the partition schema to GPT (GUID Partition Table) and OK.
As you can see in the following, we’ll be using disk ada0 with size 25GB.
Preparing Disk Layout for FreeBSD Installation
Before you start partitioning, below are some disk layouts that you MUST create to install FreeBSD:
- boot: partition for FreeBSD boot files. The type must be
freebsd-bootwith the size between64KB-512KB. - root: the root or
/partition for FreeBSD with the type asfreebsd-rootand mountpoint to/. - SWAP: optional partition in addition to memory/RAM.
Note: In addition to those top 3 partitions, you can use a specific partition for the /usr and /var directories. For example, you may create a partition for /usr/home that will be used as users’ home directories, or /var/tmp for storing temporary files.
Adding Boot Partition
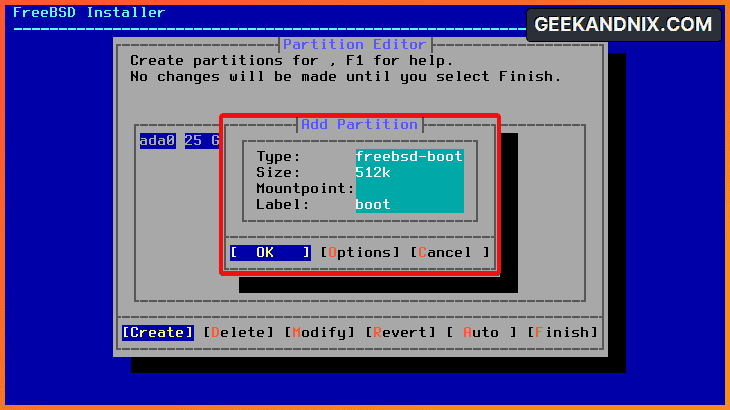
Choose your disk (ada0) and select Create. Then, input details of boot partition below:
- Type: freebsd-boot
- Size: 512k
- Mountpoint: Leave it blank
- Label: boot
Select OK to confirm.
Adding Root Partition
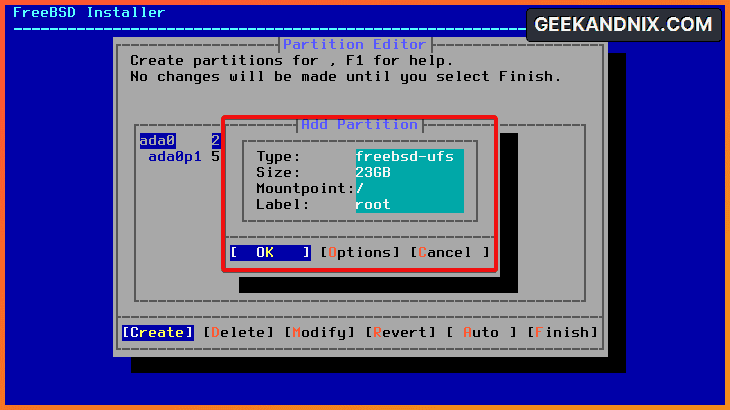
For the root partition, use the following settings:
- Type: freebsd-ufs
- Size: 23GB (Adjust the size with your disk size)
- Mountpoint: /
- Label: root
Adding SWAP Partition
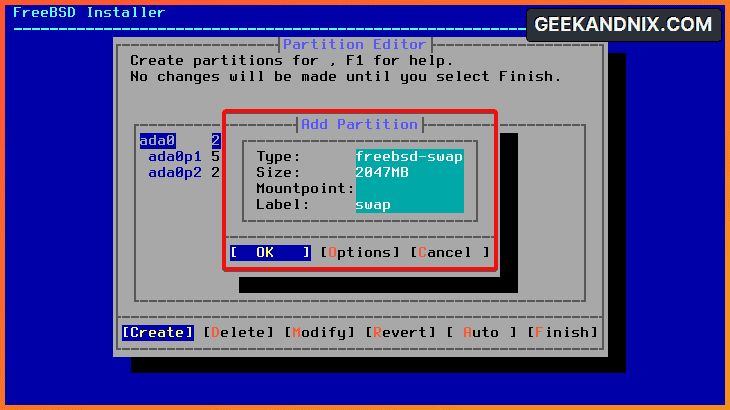
Lastly, for the SWAP partition, use the following details:
- Type: freebsd-swap
- Size: 2047MB (Adjust the size as you need)
- Mountpoint: Leave it blank
- Label: swap
Format Disk with New Partition Layout
Double-check your partition layout and select Finish when you’re done.
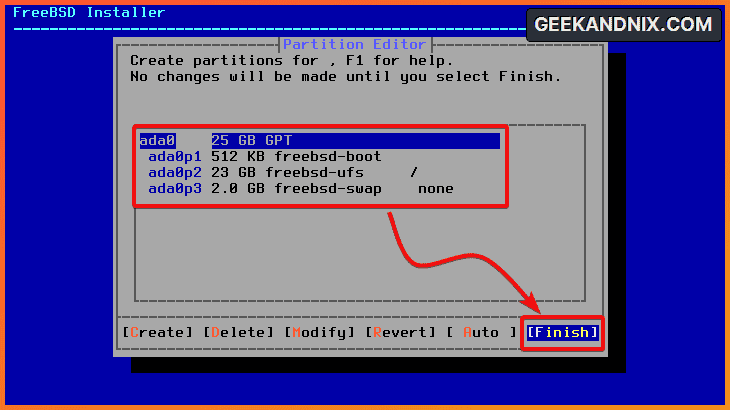
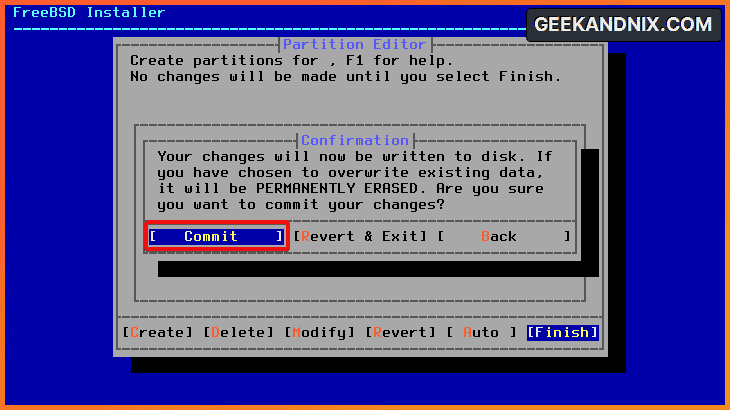
Then, select Commit to confirm and format your disk with the new partition layout.
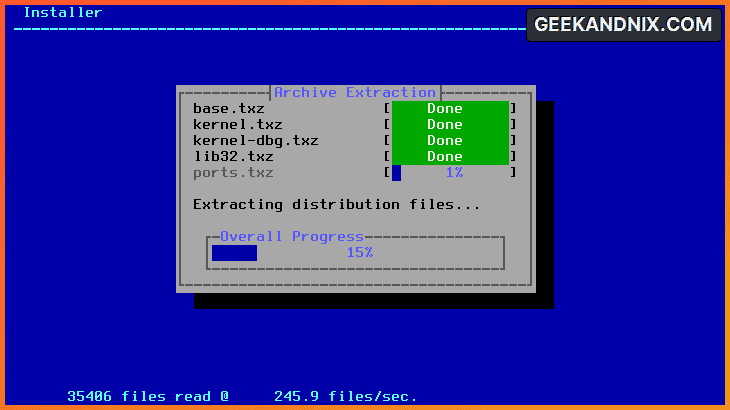
Step 8 – Started: Installation of FreeBSD Base System
Now the FreeBSD installation should be started.
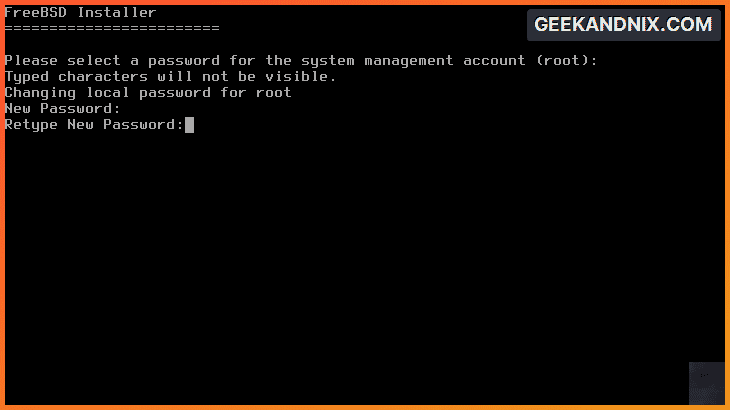
Step 9 – Setting Up root Password
Once the installation is finished, you will be prompted to create the FreeBSD root password. Input the new root password for FreeBSD and repeat.
Step 10 – Setting up Networking
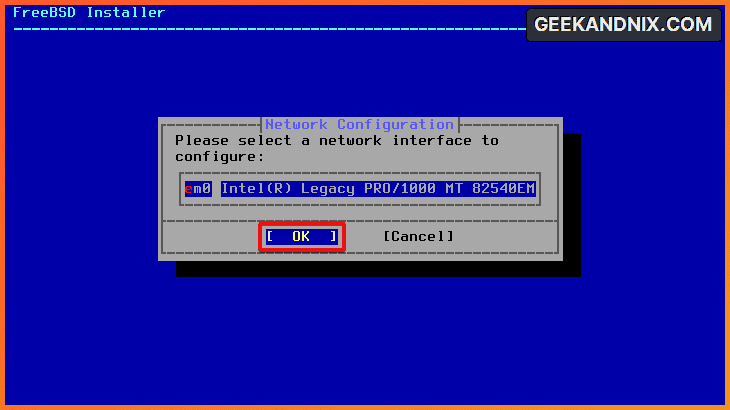
To set up networking, choose your network interface and select OK. In this case, the interface em0 is automatically detected by the bsdinstall.
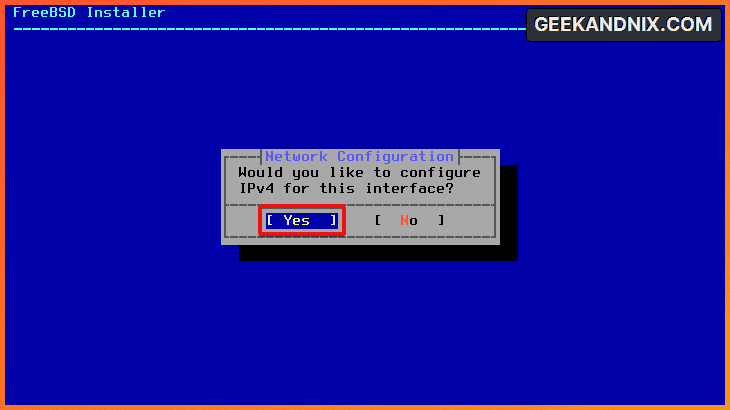
Select Yes when asked to set up IPv4.
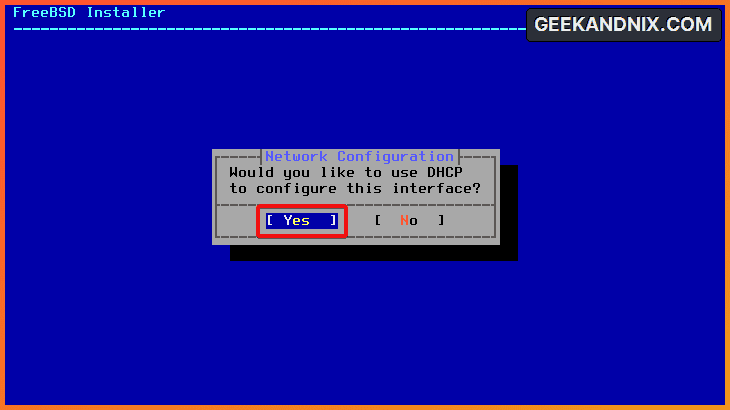
Select Yes to set up an IP address via DHCP. In this case, we’ll be using DHCP to automatically set up an IP address for the FreeBSD.
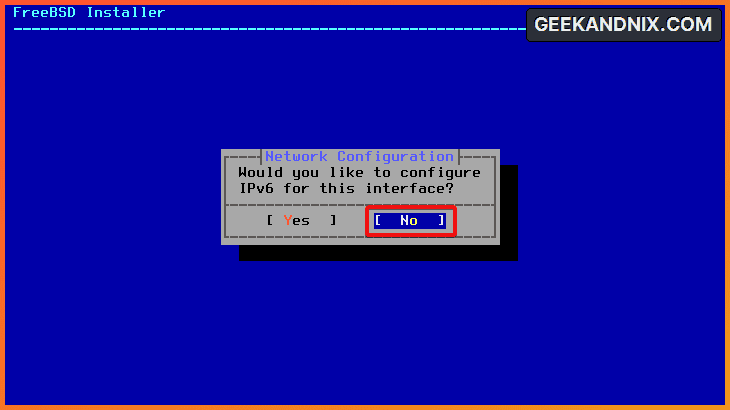
For the IPv6 configuration, select No. In this case, we’ll disable IPv6.
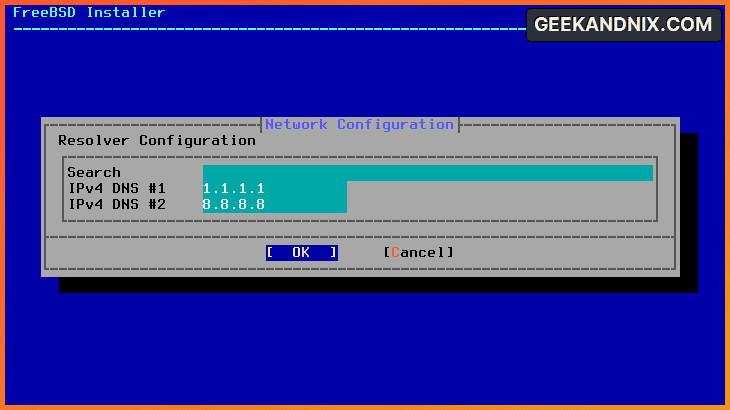
Lastly, input your local domain name and the default DNS resolver, then select OK to continue. In this case, we’ll be using DNS resolver from Cloudflare (1.1.1.1) and Google (8.8.8.8).
Step 11 – Setting up Time zone
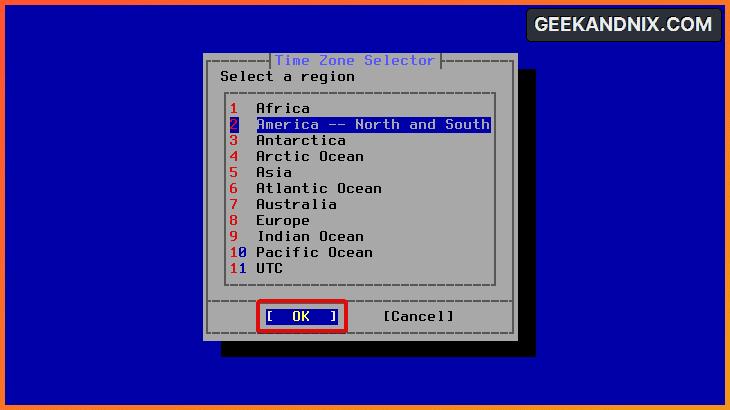
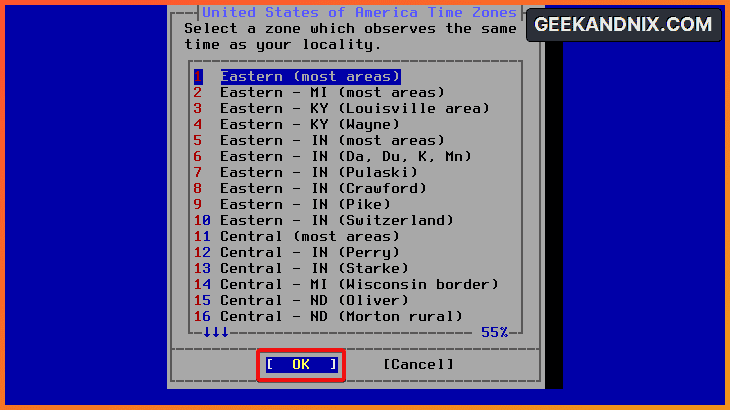
After setting up networking, let’s configure the default region and time zone. Be sure to select the time zone nearest your location.
First, choose your region and select OK.
Choose the time zone nearest your location, then OK.
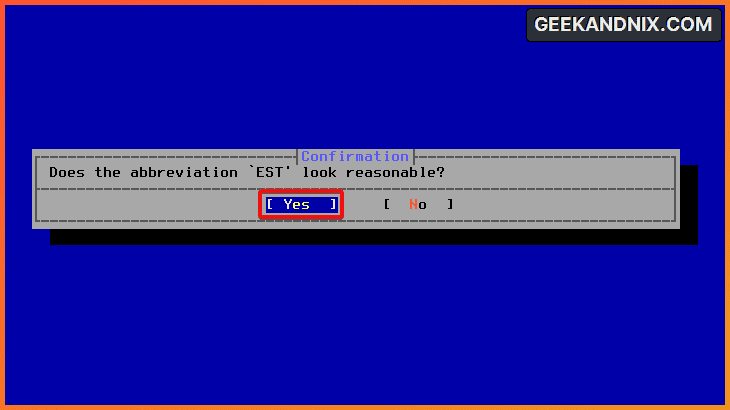
Now select Yes to confirm the time zone configuration.
Step 12 – Setting Up Date and Time
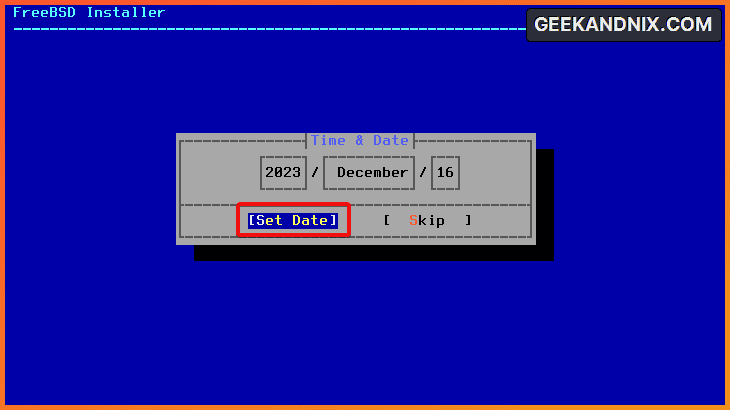
To set up a date, adjust the date, month, and year, then select Set Date.
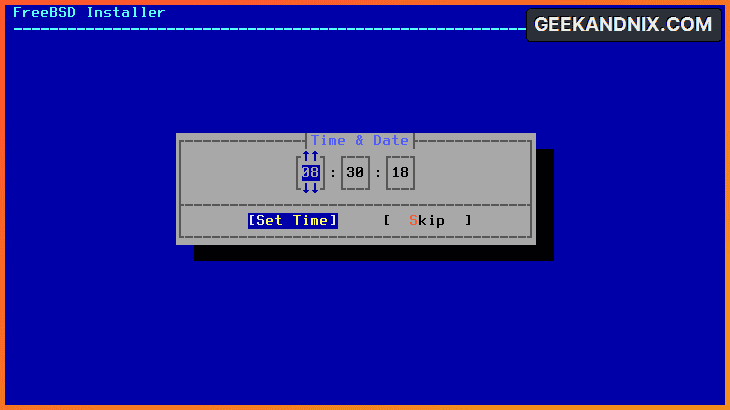
After that, adjust the time with your local time and select Set Time.
Step 13 – Adding Services to Run at Boot
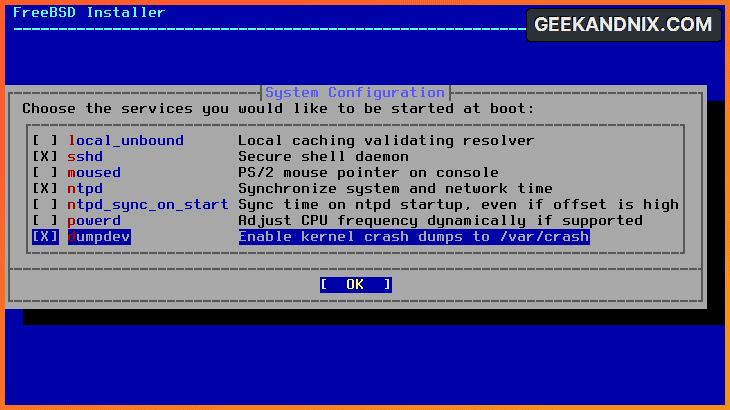
In this stage, select the desired services that will start at boot using the SPACE button. In this case, we’ll enable sshd and ntpd services, then select OK to confirm.
Step 14 – Securing FreeBSD via System Hardening
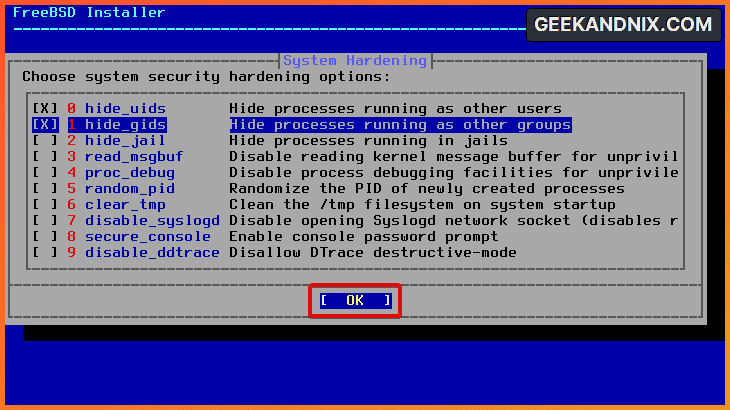
For the System Hardening section, choose the option as you need and select OK. In this case, we’ll enable system hardening via hid_uids and hide_gids to hide processes from different users and groups.
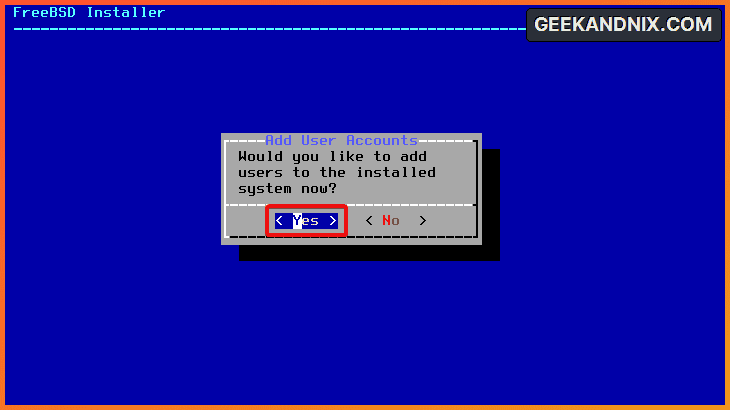
Step 15 – Adding New User
Select Yes when asked to create a new user.
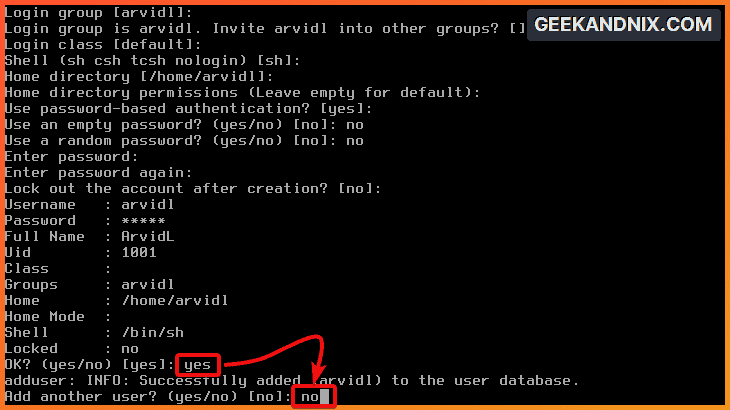
Input details of your user like this:
- Username: arvidl (adjust the Username with your user).
- Full Name: ArvidL (adjust the Full Name).
- Login group, shell, home directory, and permission: Leave it blank to use as default.
- Use password-based authentication: yes.
- Use an empty and random password: no.
- Enter a new password for your user and repeat.
- Input yes to confirm.
- Input no when asked to create another user.
Step 16 – Complete the FreeBSD Installation and Reboot
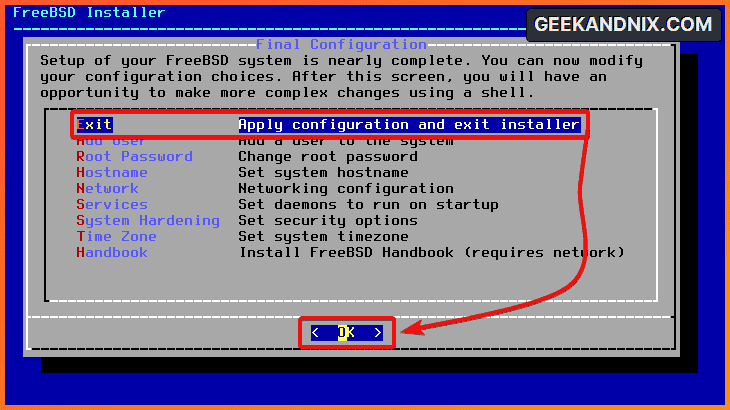
Now that you’ve created a new user, you will be shown the Final Configuration of the FreeBSD installation.
Choose Exit to apply your configuration to FreeBSD and exit the bsdinstall, then select OK to confirm.
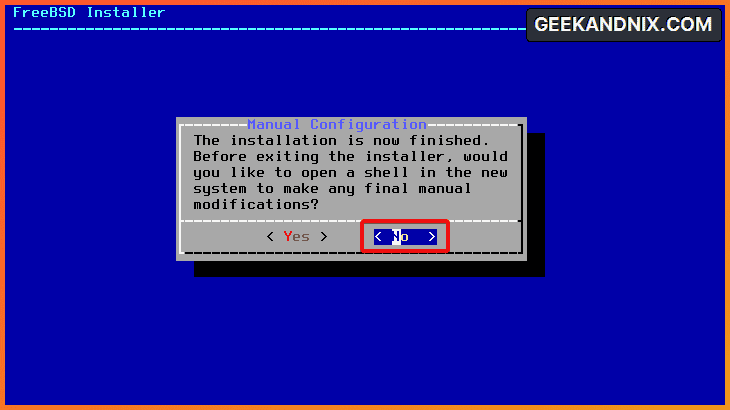
Select No when asked about the Manual Configuration via shell.
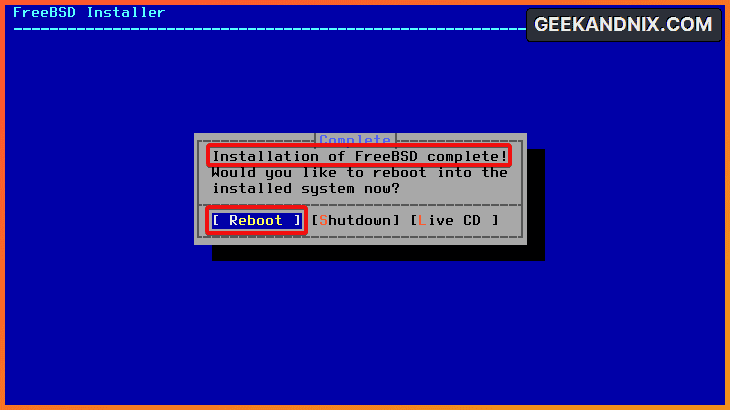
At the final stage, you will see the confirmation Installation of FreeBSD complete!. Select Reboot to restart your machine and boot up to the FreeBSD system.
Step 17 – Logging Into FreeBSD
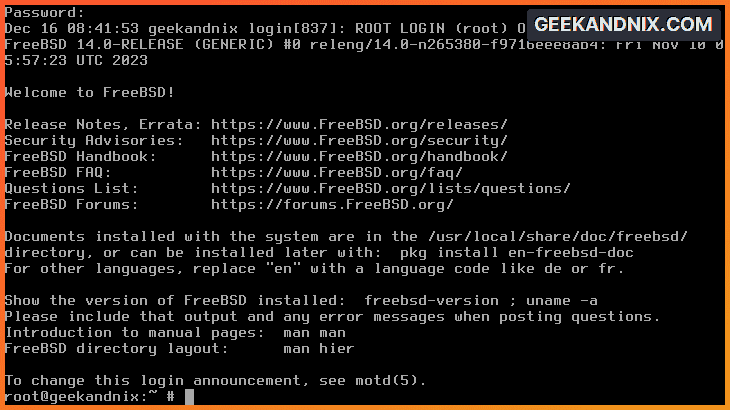
Once you’ve rebooted to your FreeBSD installed, log in with your root user and password.
If you have the correct username and password, you will be logged in to FreeBSD and you will see the default motd from FreeBSD.
Step 18 – Updating FreeBSD Base System
The first thing to do after you’ve installed FreeBSD is to check for any update for the FreeBSD base system, then install the update when available.
Execute the freebsd-update command below to download and install updates for your FreeBSD base system.
freebsd-update fetch
freebsd-update install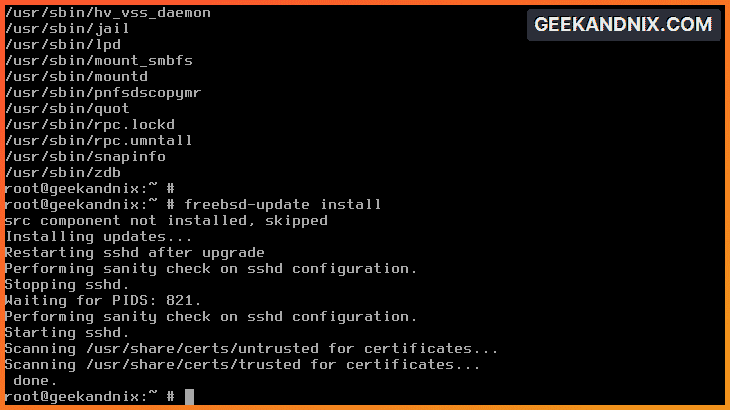
Step 20 – Installing pkg Package Management Tool
After you’ve installed updates of the FreeBSD base system, run the following command to install the pkg package manager, update the package index, and then upgrade packages to the latest version.
pkg update
pkg upgrade
At first, you will be asked to install the pkg package manager. Input y to proceed and install the pkg on your FreeBSD system.
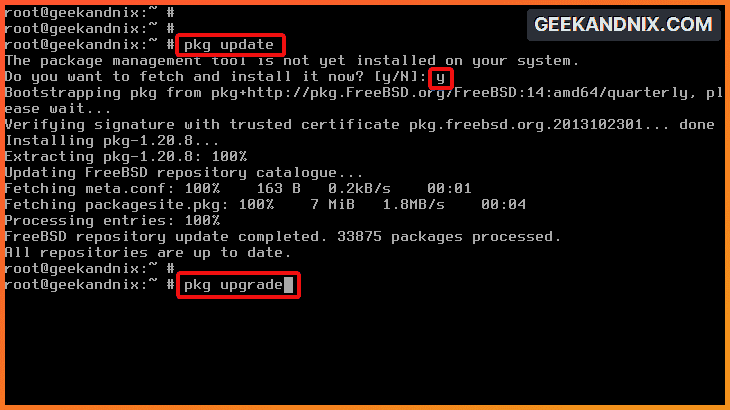
Once the process is finished, you’ve now completed the FreeBSD 14 installation.
Conclusion
You’ve now finished the FreeBSD 14 installation on your machine. From here, go further to the next level with the following:
