How to Install Fail2ban with UFW on Ubuntu 22.04
Are you looking to learn how to install Fail2ban? Look no further! In this tutorial, we will guide you through the step-by-step process of installing Fail2ban on an Ubuntu 22.04 server. We’ll cover configuring the basic jail, protecting the SSH service via Fail2ban, and then teach you the basic usage of the fail2ban-client utility.
For FreeBSD users, check out our new guide on How to Install Fail2ban with PF on FreeBSD 14.
Prerequisites
To complete this tutorial, you will need:
- Linux server running Ubuntu 22.04.
See also: 15 Steps to Install Ubuntu 22.04 LTS - Administrative privileges or access to the sudo command.
- UFW (Uncomplicated Firewall) running and enabled.
See also: Master the UFW Firewall: 17 Practical Examples
Step 1 – Installing Fail2ban on Ubuntu
First, you will install the fail2ban package via the official Ubuntu repository. By the end of this section, you will have the fail2ban installed on your Ubuntu system.
1. Before installing fail2ban, run the following command to update and refresh your Ubuntu package index. This ensures that you install the latest version of the package from the Ubuntu repository.
sudo apt update
2. After that, install fail2ban by running the command below.
sudo apt install fail2banInput Y when prompted and press ENTER to confirm.
3. Once fail2ba is installed, run the following command to start and enable the fail2ban service. Then, verify the fail2ban status to ensure that the service is running.
sudo systemctl enable --now fail2ban
sudo systemctl status fail2ban
The expected output should look something like this:
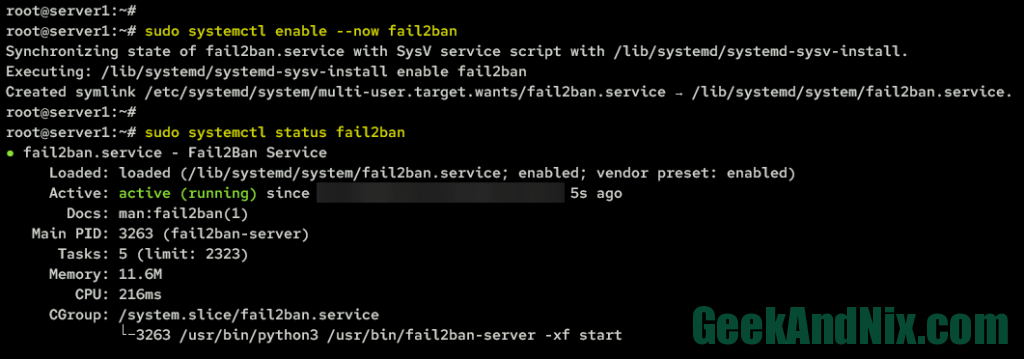
The fail2ban service is enabled means the service will start automatically at system startup, while the status is running means the service is running.
Step 2 – Configuring Fail2ban on Ubuntu
To configure fail2ban, you need to copy the default configuration jail.conf to jail.local, which is located in the /etc/fail2ban directory.
In this section, you will make changes to the following fail2ban options:
- bantime: The default bantime or suspension for hosts/clients is 10 minutes, but you can increase or decrease it as needed.
- maxretry: This determines how many failed login attempts a user is allowed, with the default value set to 3.
- findtime: This refers to the amount of time during which failed login attempts are counted. For example, if you set maxretry to 5 and findtime to 10 minutes, then an IP address that fails to log in 5 times within 10 minutes will be banned.
- banaction: This determines the default banaction that you will be using. Fail2ban supports multiple ban actions such as using IP Tables, UFW, Shareowall, pf (Package Filter for BSDs), and many more.
- action: This specifies the action that fail2ban will take after detecting an IP address. The default is to ban IP addresses, but you can also set up reporting via email address using the option
action_mworaction_mwl. Not to mentions, you can also integrate with Cloudflare to ban IP addresses using the actionaction_cf_mwl, and also integrate with external API blocklist.de, badips.com, and abuseipdb.com to ban IP addresses.
1. First, copy the default fail2ban configuration jail.conf to jail.local by running the following command.
sudo cp /etc/fail2ban/jail.conf /etc/fail2ban/jail.local2. Then, open the file /etc/fail2ban/jail.local using your preferred editor. This example uses vim.
sudo vim /etc/fail2ban/jail.localChange the default configurations with the following lines. In this example, you will set up the bantime to 1 hour, findtime to 10 minutes, and the maxretry to 5 times. This means that if a user attempts to log in 5 times within 10 minutes and fails, the user’s IP address will be blocked for 1 hour.
bantime = 1h
findtime = 10m
maxretry = 5
Change the default banaction and the default action with the following lines. In this case, the ufw will be used as the banaction and used to ban attackers IP addresses. Also, you will enable reporting when the IP address gets banned via email address, from sender to the destmail parameters. The action_mwl option allows you to enable reporting and send the log and whois reports from detected IP addresses to the destemail.
banaction = ufw
action = %(action_mwl)s
destemail = [email protected]
sender = [email protected]
By following these steps, you should now successfully configure fail2ban to ban IP addresses for 1 hour via the UFW firewall, and enable reporting via email address. Next, move on to securing and protecting SSH with fail2ban.
Step 3 – Protecting SSH, Apache, and FTP with Fail2ban
To protect and secure services with fail2ban, you must create a jail, which is a specific configuration that will monitor particular services for potential security threats. A jail can include rules for monitoring specific log files, the number of failed login attempts, and the duration of the ban. In the default fail2ban configuration, multiple jails are included by default, for example, jails for SSH service, Apache web server, FTP server, and many more.
Complete the following tasks to enabled fail2ban jail and protecting your SSH server from brute-force attacks.
1. Within the jail.local file, find the following configuration at line 279, and you should get jail called sshd. Add the new parameter enabled = true to activate the sshd jail.
[sshd]
port    = ssh
logpath = %(sshd_log)s
backend = %(sshd_backend)s

# add this parameter to enable the jail
enabled = true
2. Additionally, if you have another service that you want to secure, find the jail configuration and add the parameter enabled = true to activate it.
As shown below is an example of jail to securing the Apache basic auth.
[apache-auth]
port     = http,https
logpath  = %(apache_error_log)s

# add this parameter to enable the jail
enabled = true
Similarly for the ProFTPd service that will secure the ProFTPd.
[proftpd]
port     = ftp,ftp-data,ftps,ftps-data
logpath  = %(proftpd_log)s
backend  = %(proftpd_backend)s

# add this parameter to enable the jail
enabled = true
Save the file and exit the editor when finished.
3. Lastly, run the following command to restart the fail2ban service and apply the changes that you have made.
sudo systemctl restart fail2banAt this point, you have now successfully secured SSH with fail2ban. With this, any brute-force attacks against your server will be blocked by fail2ban via UFW. In the next step, you will verify the fail2ban jail status to ensure that the enabled jails are running.
Step 4 – Checking Fail2ban Jail Status
In this section, you will learn how to use the fail2ban-client utility to check if the fail2ban jail is running, view the details of the fail2ban jail, and check the list of IP addresses banned by fail2ban. With the fail2ban-client utility, you can interact with the fail2ban service from your command line. You can check the status of the fail2ban service, add and remove IP addresses, view the current configuration settings, enable and disable jails, and also test the fail2ban configuration and reload the fail2ban service.
1. First, type the following command to check and verify the status of fail2ban to ensure that it’s running. When you get the output Server replied: pong, it confirms that fail2ban is running.
sudo fail2ban-client ping2. Secondly, check the list of enabled jails on your fail2ban using the below command. If you’re following along with this guide, you will have the sshd jail enabled and available on the Jail list section.
sudo fail2ban-client status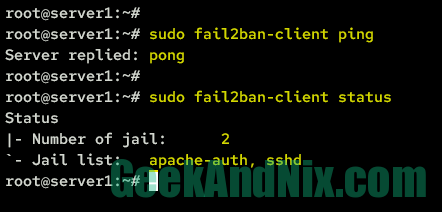
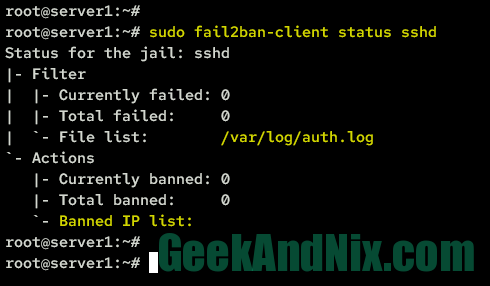
3. Next, run the following command to check the specific jail status. For example, you will check the sshd jail.
sudo fail2ban-client status sshdIn the Filter section, you can see the log file that is being monitored by fail2ban, the total number of failed login attempts, and the currently ongoing failed login attempts. While on the Actions section, you should be able to view the list of IP addresses that have been banned by fail2ban along with the total number of banned IP addresses.
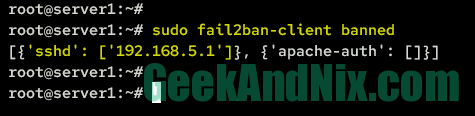
4. Furthermore, you can also use the following command to check the list of banned IP addresses in fail2ban in a Python dictionary format.
sudo fail2ban-client bannedAs can be seen, you get the output of banned IP addresses in Python Dictionary format.
Step 5 – Unbanning IP Address from Fail2ban
After you learn how to check fail2ban jail status via the fail2ban-client utility, you will next learn how to use fail2ban-client to unban the IP address. If you’re an administrator, you must know this so you can easily unban specific client IP addresses.
1. To unban an IP address from fail2ban, run the following fail2ban-client unban command. In this case, you will unban explicitly the IP address 192.168.5.1.
sudo fail2ban-client unban 192.168.5.1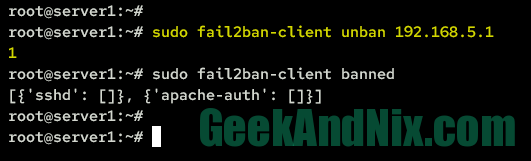
2. Furthermore, you can also unban all banned IP addresses by running the following command.
sudo fail2ban-client unban --allConclusion
In conclusion, this guide has provided you with step-by-step instructions on how to install and configure Fail2ban on Ubuntu 22.04. By following the steps outlined in this guide, you have successfully secured your Ubuntu server by blocking malicious IP addresses and preventing unauthorized access to your server.
By configuring the appropriate jails and settings, you can ensure that your server is safe from brute-force attacks and other types of malicious activity. With this in mind, you’re ready to install your application such as Apache or Nginx to your server.
Furthermore, you can also enable more jails for your services and regularly check fail2ban logs to stay ahead of any potential threats.
System administrator and devops enthusiast, leveraging over 10+ years of Linux expertise to optimize operations. Proficient in FreeBSD, VMWare, KVM, Proxmox, PfSense, Ansible, Docker, and Kubernetes.


