How to Install OpenLDAP and LAM on Ubuntu 24.04/22.04 Server
Enhance the infrastructure security by installing the OpenLDAP on Ubuntu 24.04 server. The OpenLDAP is an open-source implementation of LDAP protocol that allows you to centralize user authentications and supports integration with various network services.
For FreeBSD users, check our latest guide on How to Install OpenLDAP and LAM on FreeBSD 14.
This article will guide you through the installation of the OpenLDAP server on the Ubuntu system. Not only that, this also guides you to the installation of LAM (LDAP Account Manager) with Apache web server and its integration with the OpenLDAP server. By completing this guide, you will have the OpenLDAP server installed and you can manage it easily via the graphical interface with LAM.
Prerequisites
Before you jump in, ensure you have the following:
- An Ubuntu 24.04 server.
See more: How to Install Ubuntu 24.04 LTS Server - A non-root user with sudo or administrator privileges.
Setting Up FQDN (Fully Qualified Domain Name)
Before installing the OpenLDAP server, you must ensure that you have a proper FQDN (Fully Qualified Domain Name) that points to the correct IP address of your server. In the first section, you will set up the fqdn of your system via the hostnamectl utility and /etc/hosts file.
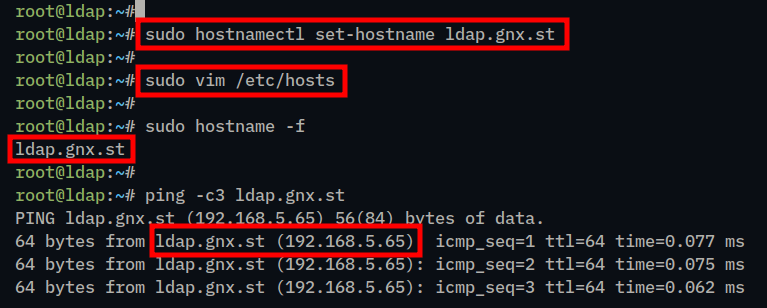
1. Run the hostnamectl command below to set up the fqdn your system to ldap.gnx.st.
sudo hostnamectl set-hostname ldap.gnx.st2. Use the following vim editor to open the /etc/hosts file.
sudo vim /etc/hostsInsert the following configuration and be sure to change the details of the IP address, fqdn, and the system hostname.
192.168.5.65 ldap.gnx.st ldapWhen finished, save and exit the file.
3. Lastly, run the following command to verify the fqdn and ensure it is pointed to the correct IP address.
sudo hostname -f
ping -c3 ldap.gnx.st
The following output indicates that fqdn ldap. is pointed to the IP address gnx.st192.168.5.65.
Installing OpenLDAP on Ubuntu Server
Now that the fqdn is configured, the next step is to install the OpenLDAP server to your Ubuntu machine and verify the OpenLDAP version.
1. Before installing OpenLDAP, execute the apt update command below to update and refresh your Ubuntu package index.
sudo apt update
2. Install the OpenLDAP packages slapd and ldap-utils using the apt install command below. Type y to confirm and proceed the proceed the installation.
sudo apt install slapd ldap-utils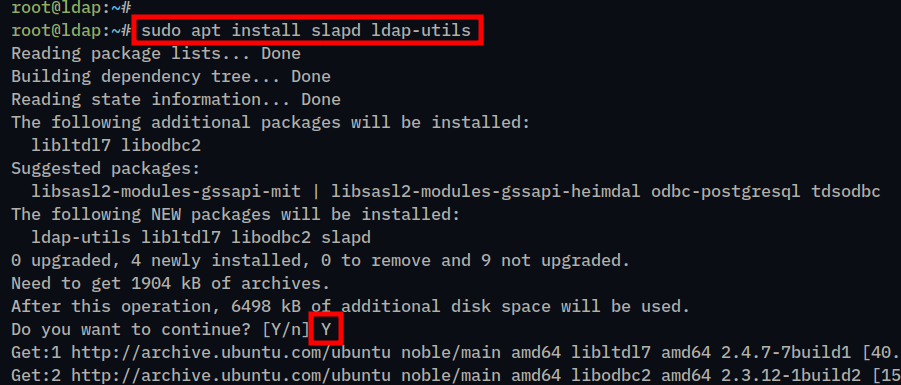
3. During the installation, you should be asked to configure the admin password for the OpenLDAP server. Input your password and select OK.
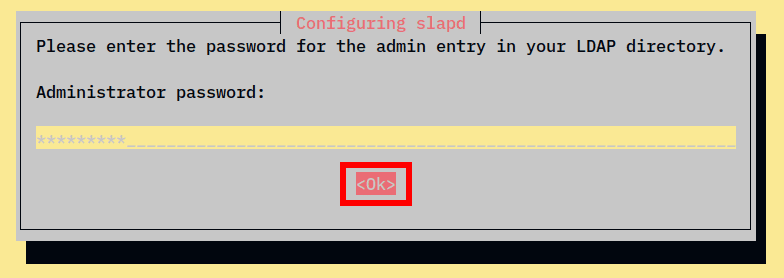
4. Repeat the password and select OK again to complete the installation.

5. After OpenLDAP is installed, check the OpenLDAP version in your Ubuntu using the slapd command below.
slapd -VVIn this case, we’ve installed OpenLDAP 2.6.7 via the official Ubuntu repository.

Configuring OpenLDAP on Ubuntu Server
After installing the OpenLDAP server, you will set up the OpenLDAP domain name or base domain, admin password, and the OpenLDAP database. To achieve that, you must reconfigure the OpenLDAP package slapd.
1. First, execute the following command to configure the OpenLDAP installation using interactive mode.
sudo dpkg-reconfigure slapd2. Now, select No when asked to omit the OpenLDAP configuration.

3. Then, input the domain name of your OpenLDAP server and select OK. In this case, the domain name or base domain for the OpenLDAP server is ldap..gnx.st

4. Next, Input the organization name of your OpenLDAP server and select OK to continue.

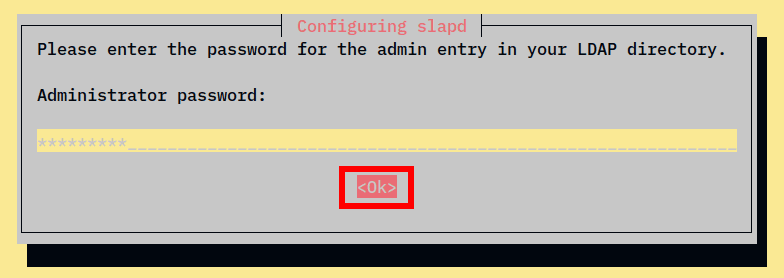
5. Input your OpenLDAP admin password and repeat the password.

6. After that, select No when asked to remove the old database of the OpenLDAP server.

7. Lastly, select Yes to move the old database to a new location.

When the process is finished, you should get the following output:

Adding Base Domain to OpenLDAP Server
Now that you’ve reconfigured OpenLDAP with the proper base domain. Moving forward, you will modify the OpenLDAP configuration file /etc/ldap/ldap.conf, restart the slapd service to apply the changes, then verify the OpenLDAP server base domain.
1. To start, run the following vim editor command to open the OpenLDAP configuration file /etc/ldap/ldap.conf.
sudo vim /etc/ldap/ldap.confChange the BASE and URI parameters with the domain name of your OpenLDAP server.
BASE dc=ldap,dc=gnx,dc=st
URI ldap://ldap.gnx.st
When you’re done, save and exit the file.
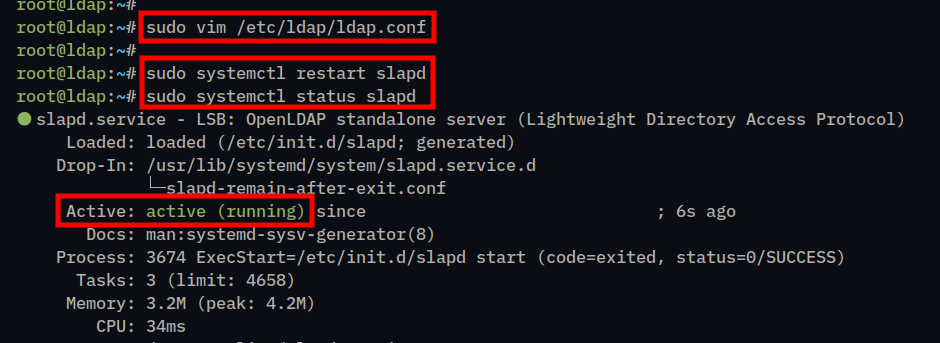
2. Now run the following systemctl command to restart the OpenLDAP server and apply the changes that you’ve made. Then, verify the OpenLDAP server to ensure that the service is running.
sudo systemctl restart slapd
sudo systemctl status slapd
The following output confirms the OpenLDAP server is running.
3. Next, you can also check the OpenLDAP port 389 via the ss command below.
ss -tulpn | grep slapdIf OpenLDAP running, then port 389 should be in the LISTEN state.

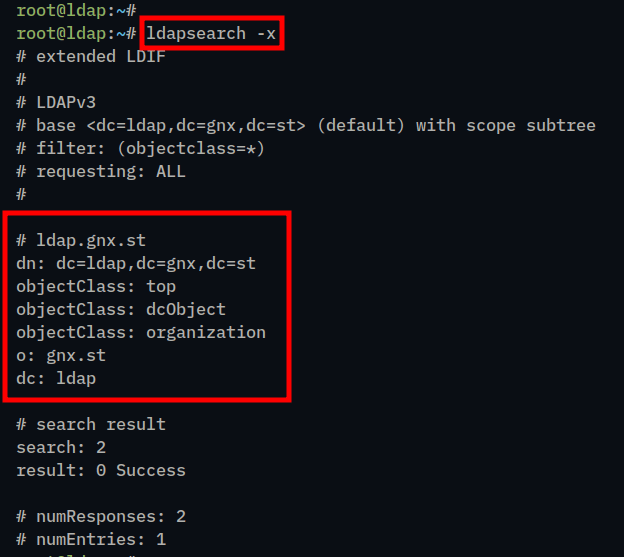
4. Lastly, run the ldapsearch command below to check the default domain name of your OpenLDAP server.
ldapsearch -xIf everything goes well, your OpenLDAP server should be configured with the new domain name.
Installing LAM (LDAP Account Manager)
At this point, you’ve installed the OpenLDAP server with basic configuration. In the next step, you will install the LAM (LDAP Account Manager) via APT. The LAM or LDAP Account Manager is a web application written in PHP for managing the OpenLDAP server via web browser, and it’s available by default on the Ubuntu repository.
Note: The LAM or LDAP Account Manager is a PHP web application. So, this will install both PHP and Apache web server to your Ubuntu system.
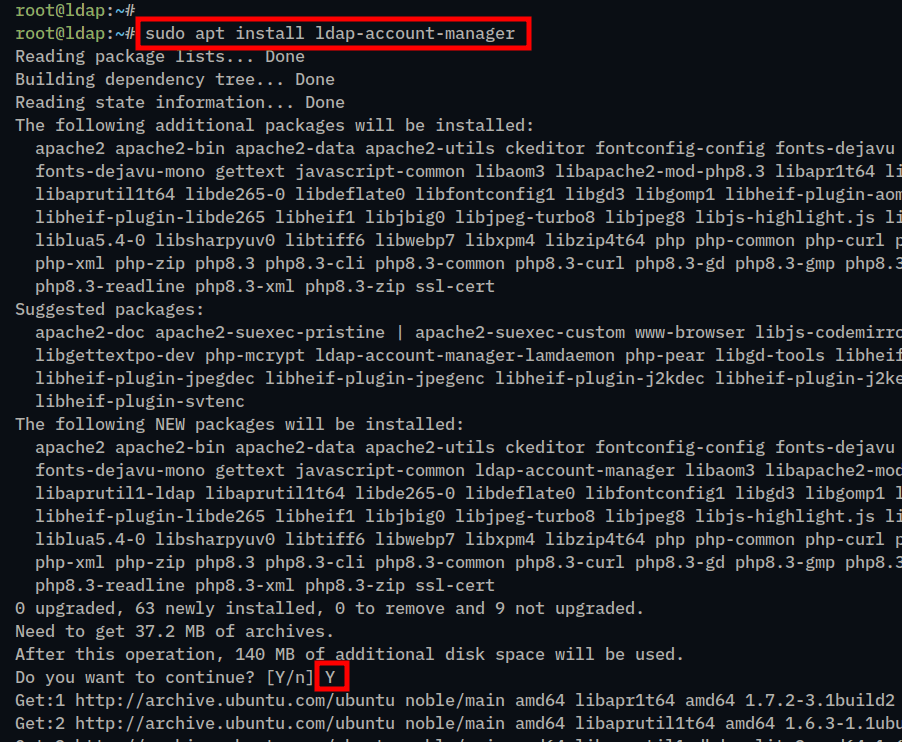
1. Install the LDAP Account Manager (LAM) using the apt install command below.
sudo apt install ldap-account-managerType y to proceed with the installation.
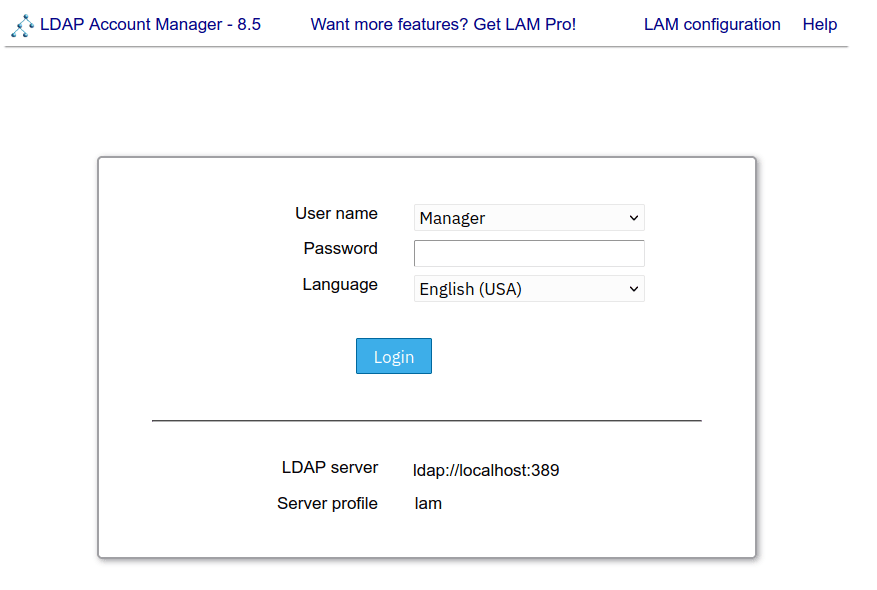
2. After you’ve installed LAM (LDAP Account Manager), launch your web browser and visit the server IP address with the path URL /lam like this: http://192.168.5.65/lam/. If successful, you should get the login page of the LAM application.
Integrating LAM with OpenLDAP Server
After the LAM is installed, you must integrate LAM with your OpenLDAP server, which can be done from the LAM administration dashboard.
1. On the LAMP login page, click on the LAM configuration menu to integrate LAM with the OpenLDAP server.

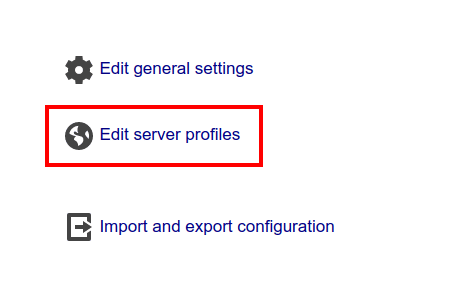
2. Now, select Edit server profiles to continue.
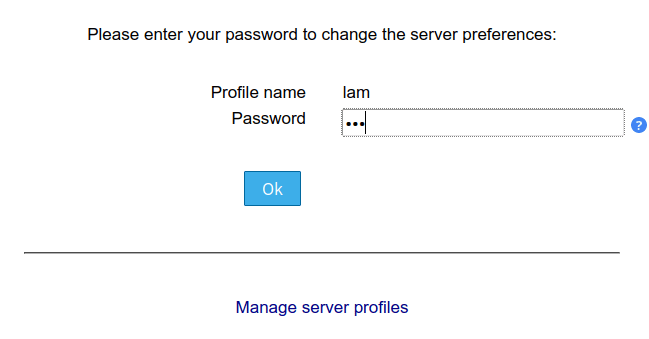
3. Then, input the default password lam when asked and click OK.
4. Within the LAM dashboard, you should see tabs menu such as General settings, Account types, Modules, and Module settings.

General Settings
On the General Settings tab, configure the following:
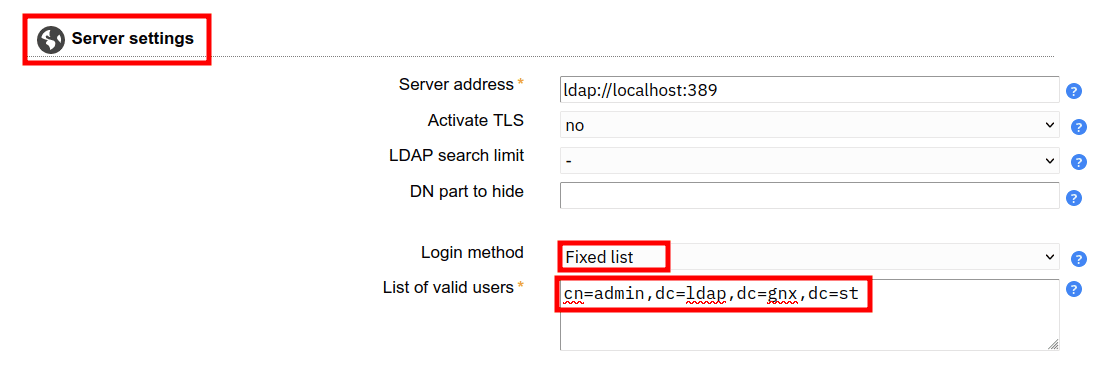
1. In the Server settings section, select the Login method as Fixed list and input the default OpenLDAP admin user with the following format cn=admin,dc=ldap,dc=gnx,dc=st.
2. In the Tool settings section, input the base domain of your OpenLDAP server.

3. Next, scroll down and move to the Profile password section to change the default password. Then click Save to confirm.

Account Types
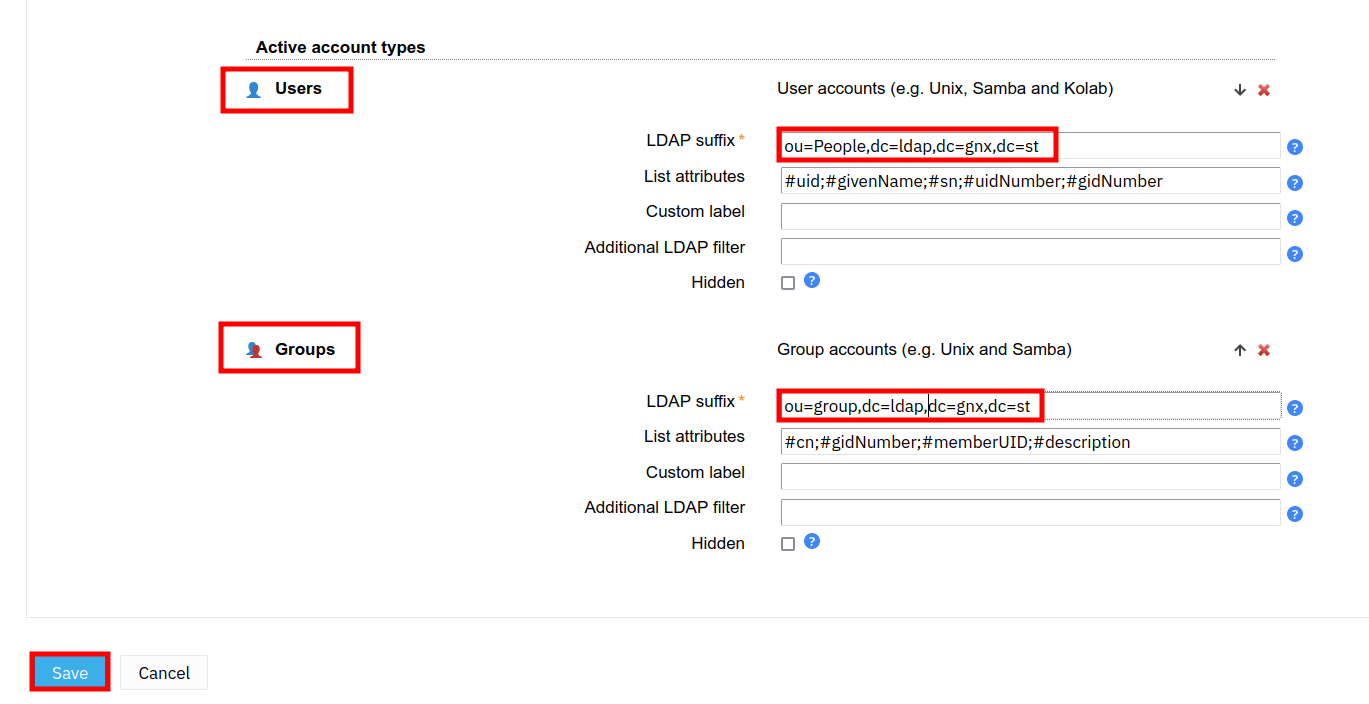
Log in again to the LAM configuration. Then click on the Account types tab, and configure the Active account types like the following:
1. Within the Users section, input the default base domain for storing LDAP users, such as ou=People,ldap=dc,dc=gnx,dc=st.
2. Within the Groups section, input the default base domain for storing groups, such as ou=group,dc=ldap,dc=gnx,dc=st.
3. When finished, scroll down and click Save to apply.
4. If the changes are successful, you should get the following confirmation. Also, you will be redirected to the LAM login page again.
Applying LAM (LDAP Account Manager) Configuration
At this point, you’ve completed the integration of LAM (LDAP Account Manager) with the OpenLDAP server. Now, time to apply the changes and verify the integration of the LAM and OpenLDAP server.
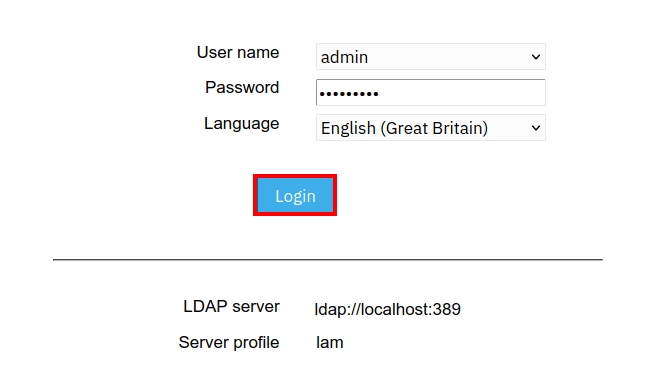
1. First, input your OpenLDAP admin user and password, then click LOGIN.
2. Now, when asked to create a base domain for users and groups, click Create to proceed.

3. Next, click on the Tools menu and select Tree view to verify the base domain, user, and group of your OpenLDAP Server installation.
If everything goes well, you should see the base domain dc=ldap,dc=gnx,dc=st with the base users ou=People and base group ou=group.

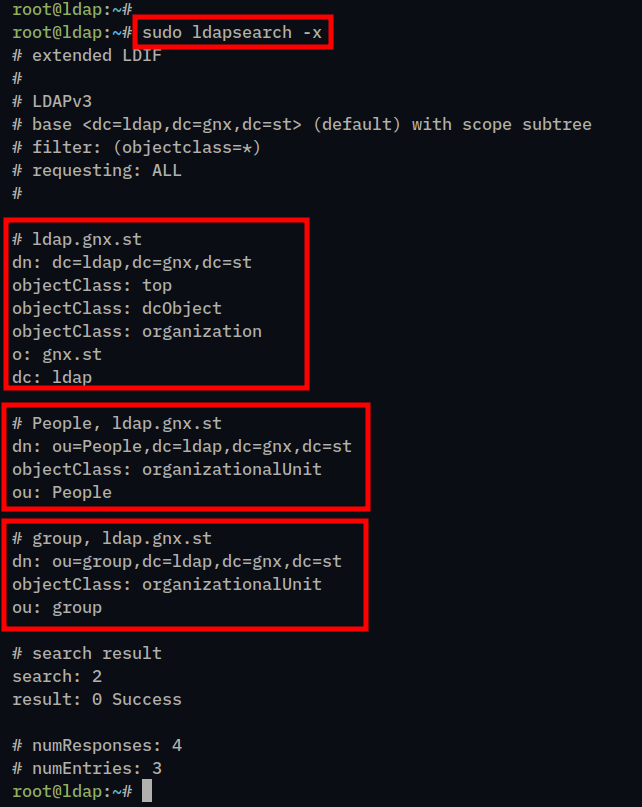
4. Lastly, back to your terminal server and execute the ldapsearch command below to verify OpenLDAP server configuration.
sudo ldapsearch -xIf the OpenLDAP installation is successful, you should see OpenLDAP Server with base domain dc=ldap,dc=gnx,dc=st, base user ou=People,dc=ldap,dc=, and base group gnx,dc=stou=group,dc=ldap,dc=gnx,dc=st.
Conclusion
Well done! You’ve followed all the stops and installed the OpenLDAP server on your Ubuntu machine. You’ve also installed the LAM (LDAP Account Manager) and integrated it with your OpenLDAP server. You can now configure your OpenLDAP server easily with a graphical interface via the LAM dashboard.


