How to Install OpenLDAP and LAM on FreeBSD 14
OpenLDAP is an implementation of LDAP protocol for Unix (like FreeBSD) and Unix-like operating systems. It provides a centralized place for maintaining users and directory services.
In this guide, I will show you how to install the OpenLDAP server on FreeBSD 14. I also cover how to secure OpenLDAP with TLS, the installation of LAM (LDAP Account Manager), and its integration with the OpenLDAP server.
Straight to the point, let’s start.
Prerequisites
Confirm that you have the necessary items before starting:
- A FreeBSD 14 server initialized with FQDN and sudo privileges.
- Apache24 web server and PHP installed – This will be used for LAM (LDAP Account Manager)
- pf (Packet Filter) firewall up and running.
Installing OpenLDAP on FreeBSD
OpenLDAP is an open-source and commercial-grade LDAP solution for creating centralized user management. On FreeBSD, you can install OpenLDAP via pkg or compile manually via Ports.
Follow these actions to install OpenLDAP on FreeBSD:
1. To start, run the pkg update command below to update the FreeBSD package index.
pkg update2. Now, run the following command to install OpenLDAP and OpenSSL. Input y to proceed with the installation.
pkg install openldap26-server openssl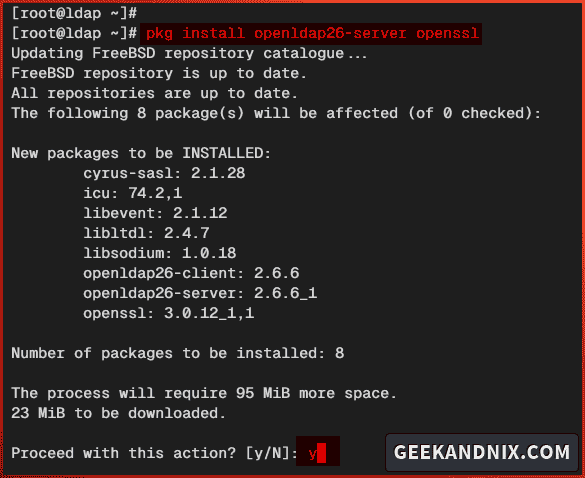
3. Next, run the command below to enable OpenLDAP service slapd and set up additional flags/options when starting slapd.
sysrc slapd_enable="YES"
sysrc slapd_flags="-4 -h 'ldap:/// ldaps:///'"
4. Lastly, run the command below to verify the list of enabled slapd parameters to ensure the OpenLDAP is enabled.
sysrc -a | grep slapd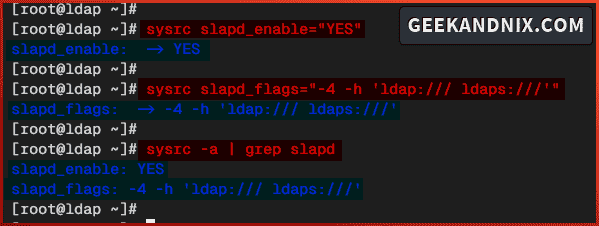
Opening LDAP/LDAPS and HTTP ports via pf firewall
After installing OpenLDAP, let’s open ports for ldap, ldaps, and http services via pf (Packet Filter). Perform these actions to open ports ldap, ldaps, and http via pf:
1. Run the vim editor to open the file /etc/pf.conf.
vim /etc/pf.confAdd services ldap, ldaps, and http to the list of services like the following:
tcp_services = "{ ssh, http, https, domain, ldap, ldaps}"
udp_services = "{ domain, ldap, ldaps }"
Save and exit the file.
2. Now, run the command below to reload pf and apply your modification.
service pf reload3. Lastly, run the pfctl command below to verify your current rules. Make sure the services ldap, ldaps, and http is available on pf.
pfctl -srGenerating TLS certificates
In this guide, you will install OpenLDAP with TLS enabled. So you must generate TLS certificates on your FreeBSD server, and this can be done via OpenSSL.
Complete the following tasks to generate TLS certificates for the OpenLDAP server:
1. First, run the command below to create a new directory /usr/local/etc/openldap/tls/ and move into it. This directory will be used for storing OpenLDAP certificates.
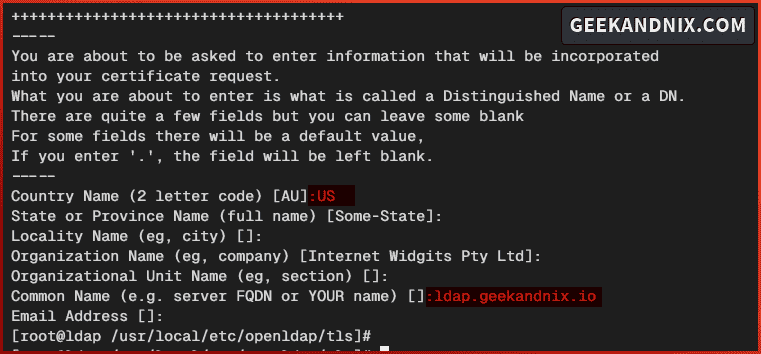
mkdir -p /usr/local/etc/openldap/tls/; cd /usr/local/etc/openldap/tls/2. Afterward, run the following command to generate CA (Certificate Authority). Input your certificate details when asked, most importantly for the Common Name to server FQDN.
openssl req -days 3650 -nodes -new -x509 -keyout /usr/local/etc/openldap/tls/ca.key -out /usr/local/etc/openldap/tls/ca.crtIn this example, I only set up the default Country Name to US and Common Name with the server FQDN.
3. Now, run the command below to generate a certificate request for the OpenLDAP server.
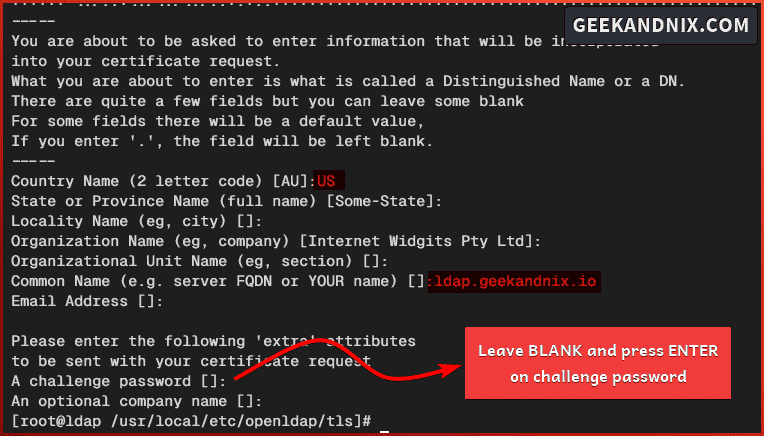
openssl req -days 3650 -nodes -new -keyout /usr/local/etc/openldap/tls/server.key -out /usr/local/etc/openldap/tls/server.csrI did the same thing and set up the Country Name to the US and the Common Name to the FQDN server. Also, leave the password challenge blank.
4. Next, run the command below to sign the TLS certificate for the OpenLDAP server with the CA (Certificate Authority).
openssl x509 -req -days 3650 -in /usr/local/etc/openldap/tls/server.csr -out /usr/local/etc/openldap/tls/server.crt -CA /usr/local/etc/openldap/tls/ca.crt -CAkey /usr/local/etc/openldap/tls/ca.key -CAcreateserialAfter the command is executed, your signed certificate will be available at /usr/local/etc/openldap/tls/server.crt.

5. Lastly, run the command below to set up proper permission and ownership for your TLS certificates.
Here’s public certificate ca.crt and server.crt should have permission 0600, while private keys ca.key and server.key must have permission 0400. Then the /usr/local/etc/openldap/tls directory should be owned by the ldap user.
chmod 600 /usr/local/etc/openldap/tls/{ca.crt,server.crt}
chmod 400 /usr/local/etc/openldap/tls/{ca.key,server.key}
chown -R ldap:ldap /usr/local/etc/openldap/tls
Configuring OpenLDAP server on FreeBSD
After successfully generating TLS certificates, you’re now ready to configure the OpenLDAP server.
You will modify the slapd configuration /usr/local/etc/openldap/slapd.conf and the LDAP client configuration /usr/local/etc/openldap/ldap.conf. Then, you will start the OpenLDAP server on your FreeBSD machine.
To configure the OpenLDAP server, proceed as follows:
1. First, run the command below to generate the OpenLDAP server password. This password will be used for the OpenLDAP rootdn/admin user.
slappasswdInput your password and repeat, then copy the hashed password.

2. Now, run the vim editor to edit the slapd configuration /usr/local/etc/openldap/slapd.conf.
vim /usr/local/etc/openldap/slapd.confInput the following configuration to include basic schemas to the OpenLDAP server.
include /usr/local/etc/openldap/schema/cosine.schema
include /usr/local/etc/openldap/schema/inetorgperson.schema
include /usr/local/etc/openldap/schema/nis.schema
Add this configuration to set the default SSF (Security Strength Factors) to AES 128 and enable a secure OpenLDAP server via TLS.
security ssf=128

TLSCertificateFile /usr/local/etc/openldap/tls/server.crt
TLSCertificateKeyFile /usr/local/etc/openldap/tls/server.key
TLSCACertificateFile /usr/local/etc/openldap/tls/ca.crt
Change the default suffix and rootdn/admin for your OpenLDAP server like the following. Also, be sure to change the rootpw with your hashed password.
...
suffix "dc=geekandnix,dc=io"
rootdn "cn=Manager,dc=geekandnix,dc=io"

rootpw {SSHA}w81cQ4xgx8+TpVGAyfOQA77vrprRSRMR
password-hash {SSHA}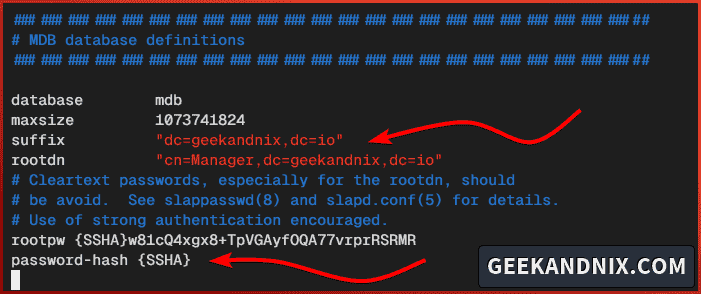
Save and exit the file when you’re done.
3. Then, open the LDAP client configuration /usr/local/etc/openldap/ldap.conf using vim.
vim /usr/local/etc/openldap/ldap.confChange the default LDAP client configuration with the following:
# Connect to BASE with ldap and ldaps
BASE dc=geekandnix,dc=io
URI ldap:// ldaps://

# client connections via LDAPv3 and secure TLS connections
LDAP_VERSION 3
TLS_CACERT /usr/local/etc/openldap/tls/ca.crt
TLS_REQCERT allow

# SIZELIMIT 0 indicates unlimited search size
SIZELIMIT 0
TIMELIMIT 15
DEREF never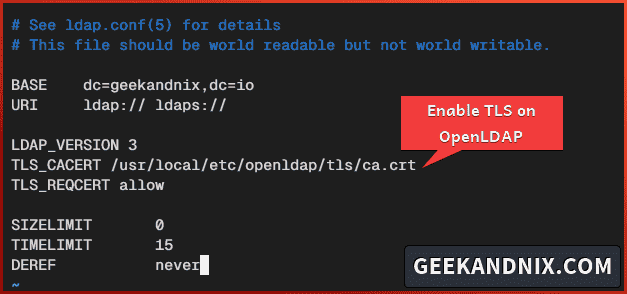
When finished, save and exit the file.
4. Next, run the command below to start and verify the slapd service.
service slapd start
service slapd status
You can see below the slapd service running with PID 2325.

5. Additionally, run the following command to verify ports for the OpenLDAP server.
sockstat -4 | grep slapdBelow you can see the OpenLDAP server is running on port 389 for ldap protocol, and port 636 for secure ldaps protocol.

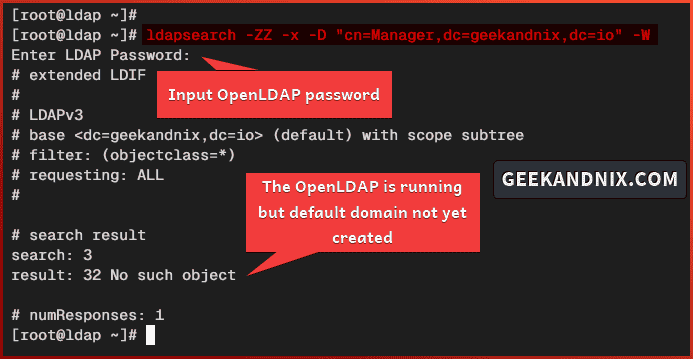
6. Lastly, run the ldapsearch command below to verify your OpenLDAP server configuration. Input your OpenLDAP admin user when prompted.
# via -ZZ to force StartTLS
ldapsearch -ZZ -x -D "cn=Manager,dc=geekandnix,dc=io" -W

# explicit OpenLDAP host via LDAPS
ldapsearch -x -D "cn=Manager,dc=geekandnix,dc=io" -W -H ldaps://ldap.geekandnix.io
If the configuration was successful, you should get the following output:
Note: Basically, the command will dump every object on your OpenLDAP server. But, because you don’t have any object yet, you get an output result: 32 No such object.
Creating base domain for OpenLDAP server via LDIF file
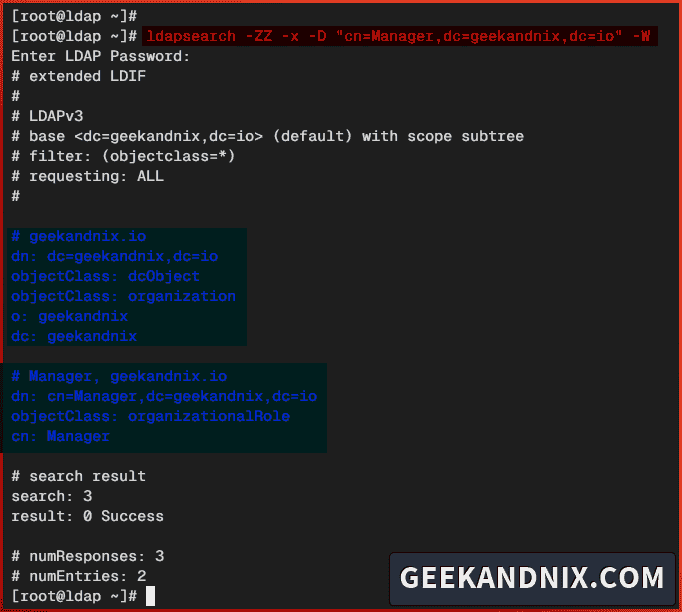
At this point, you have the OpenLDAP server up and running on FreeBSD. But without any objects, such as base domain and rootdn. So now you will create the base domain of your OpenLDAP server via LDIF file.
LDIF (LDAP Data Interchange Format) is a format of a file representing LDAP objects in text and readable format.
Carry out these tasks to create the base domain for your OpenLDAP server via the LDIF file:
1. To begin, run the vim editor to create a new LDIF file /usr/local/etc/openldap/domain.ldif.
vim /usr/local/etc/openldap/domain.ldifAdd the base domain and manager configuration below. Also, be sure to change detailed information with your OpenLDAP server.
dn: dc=geekandnix,dc=io
objectclass: dcObject
objectclass: organization
o: geekandnix
dc: geekandnix

dn: cn=Manager,dc=geekandnix,dc=io
objectclass: organizationalRole
cn: Manager
Save and exit the file when you’re done.
2. Next, run the command below to add your base domain to the OpenLDAP server. Input your OpenLDAP password when asked.
ldapadd -Z -D "cn=Manager,dc=geekandnix,dc=io" -W -f /usr/local/etc/openldap/domain.ldifIf successful, you should get the following output:

3. Finally, run the ldapsearch command below to get the list of objects on your OpenLDAP server.
ldapsearch -ZZ -x -D "cn=Manager,dc=geekandnix,dc=io" -WAs can be seen, you have configured base domain and rootdn/manager of the OpenLDAP server.
Installing LAM (LDAP Account Manager) on FreeBSD
Given that you have completed the OpenLDAP installation on FreeBSD. Up to the next level, you will install LAM (LDAP Account Manager) on your FreeBSD server, and then integrate it with your OpenLDAP server installation.
To install LAM (LDAP Account Manager) on FreeBSD, execute the following steps:
1. Run the following command to install LAM (LDAP Account Manager) on FreeBSD. Input y to proceed with the installation.
pkg install ldap-account-manager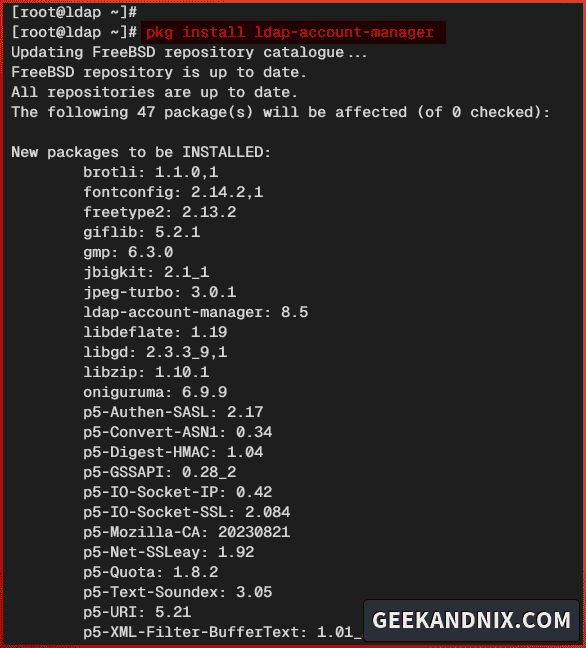
2. Once the installation is complete, run the vim editor to edit the Apache24 configuration /usr/local/etc/apache24/httpd.conf.
vim /usr/local/etc/apache24/httpd.confUncomment the following line to enable the mod_rewrite module.
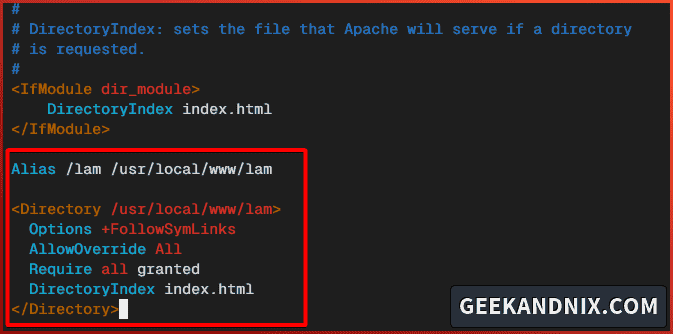
LoadModule rewrite_module libexec/apache24/mod_rewrite.soAdd the following configuration to integrate LAM with Apache24. With this, your LAM installation should be accessible via URL path /lam.
Alias /lam /usr/local/www/lam

<Directory /usr/local/www/lam>
  Options +FollowSymLinks
  AllowOverride All
  Require all granted
  DirectoryIndex index.html
</Directory>
Save the file and exit the editor.
3. Lastly, run the command below to change permission for the LAM source code to user www. This allows Apache24 to read and write to the LAM directory /usr/local/www/lam.
chown -R www:www /usr/local/www/lamIntegrating OpenLDAP with LAM (LDAP Account Manager)
So now you have installed LAM (LDAP Account Manager), let’s move on to the crucial part which is integrating your OpenLDAP server into the LAM (LDAP Account Manager).
Follow through on these steps to integrate the OpenLDAP server with LAM (LDAP Account Manager):
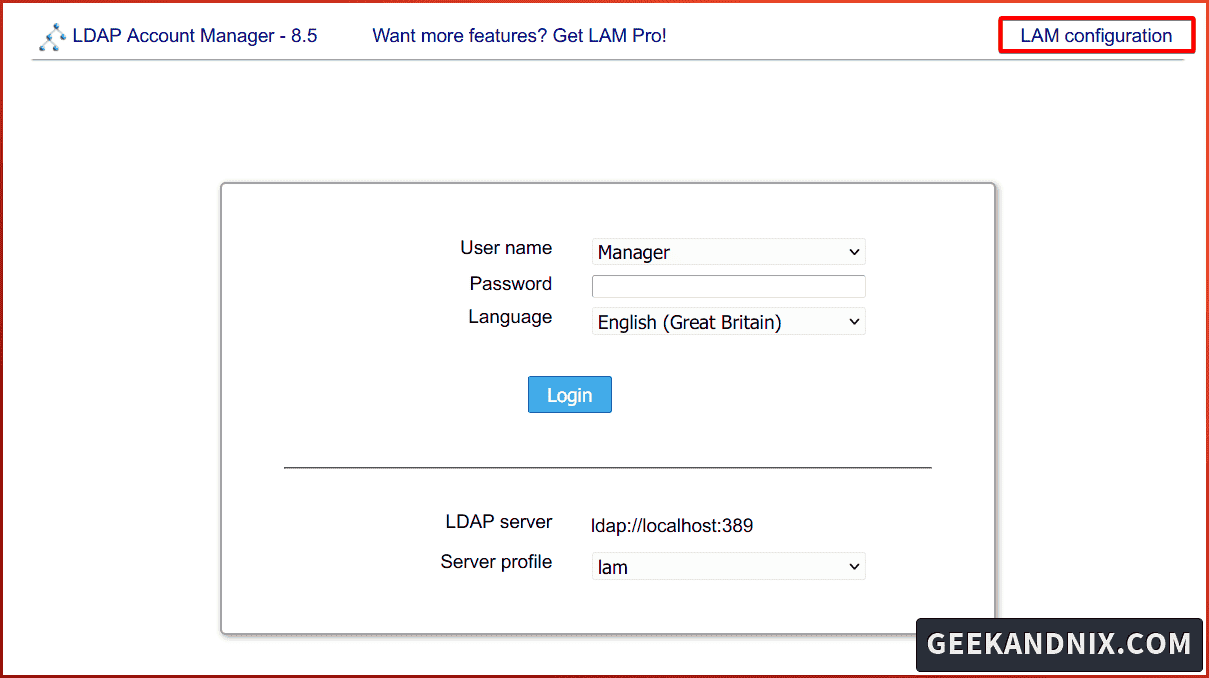
1. Open your web browser, visit http://192.168.5.80/lam and you should see the LAM login page.
Click on the LAM configuration at the top-right.
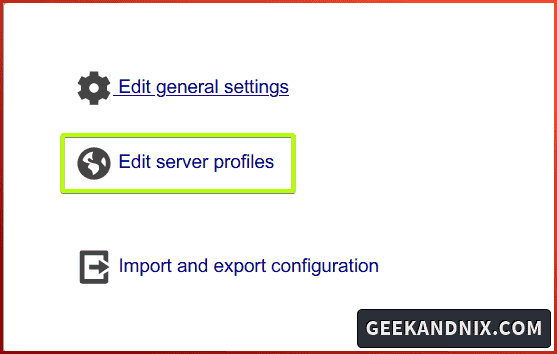
2. Click Edit server profiles to continue.
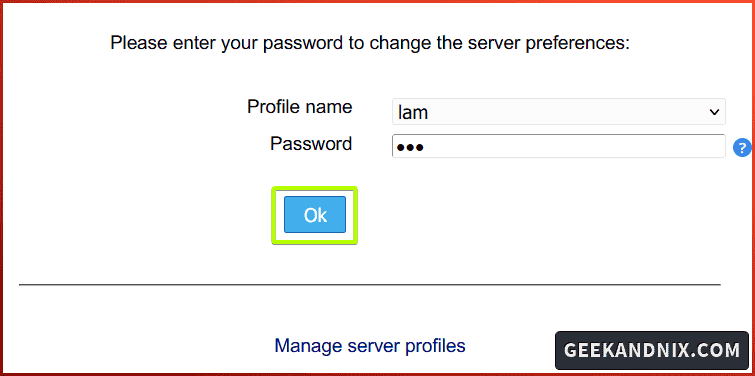
3. Log in with the default user and password lam, then click Ok.
From here, you will integrate the OpenLDAP server with LAM (LDAP Account Manager).
General settings
To begin with, click on the General settings tab, and you will add the OpenLDAP server to LAM, set up the default tree suffix, and then set up the profile password for LAM.
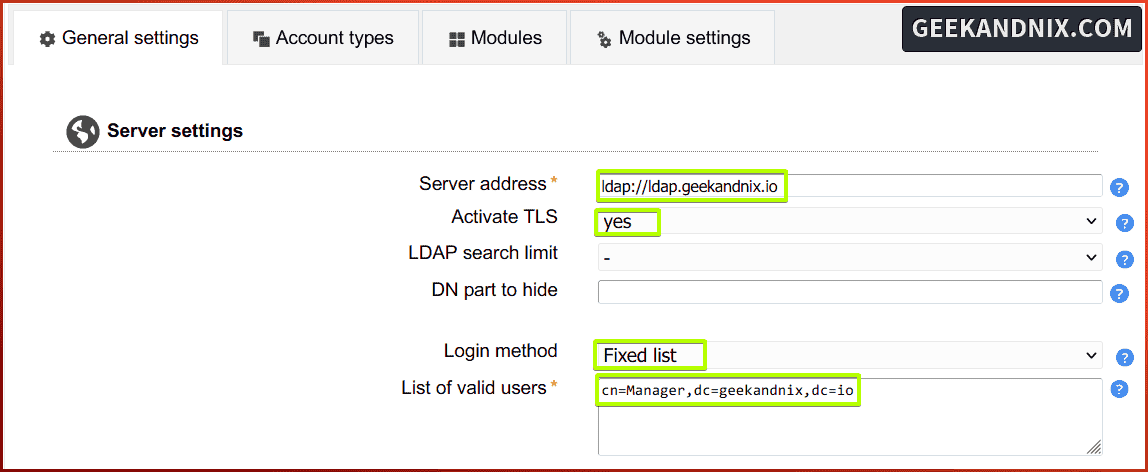
1. On the Server settings, configure the following:
- Server address: ldap://ldap.geekandnix.io
- Activate TLS: yes
- Login method: Fixed list
- List of valid users: cn=Manager,dc=geekandnix,dc=io
2. Next, move to the Tool settings section and change the default Tree suffix like the following:

3. Lastly, input the new password for the default LAM profile.

Account types
Secondly, click on the Account types tab, then move to the Active account types section.
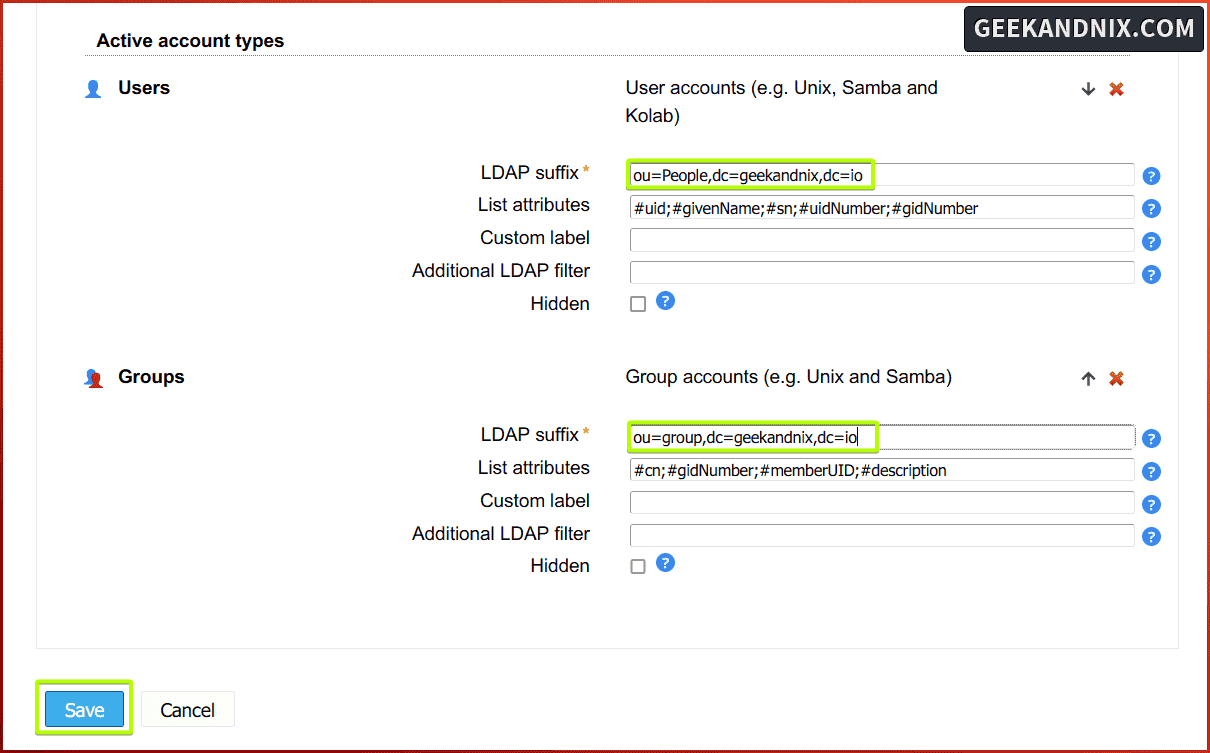
1. On the Users section, set up the default active users to LDAP suffix: ou=People,dc=geekandnix,dc=io.
2. Then, on the Groups section, set up the default active groups to LDAP suffix: ou=group,dc=geekandnix,dc=io. Then, click Save to apply your modification.
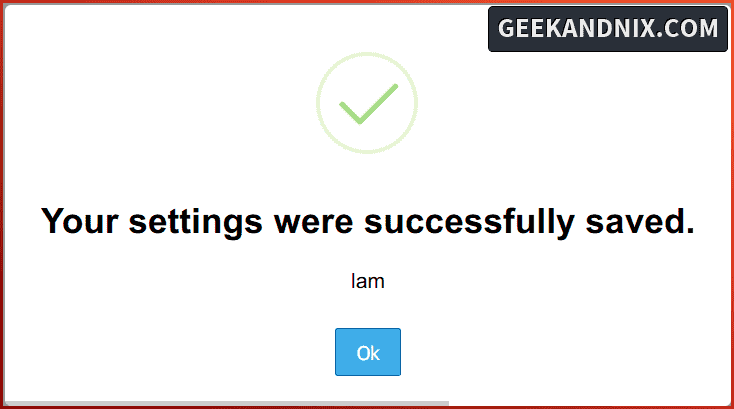
3. Once the changes are saved, you should get the confirmation Your settings were successfully saved. Click Ok and you will be directed to the LAM login page again.
Logging into LAM with OpenLDAP credentials
Given that you’ve integrated the OpenLDAP server with LAM, you should be able to log in to the LAM dashboard using OpenLDAP credentials. From there, you can easily manage LDAP entries from your web browser.
Proceed as follows to verify the integration of the OpenLDAP server with LAM (LDAP Account Manager):
1. On the LAM login page, select the username Manager and input your OpenLDAP server password, then, click Login.
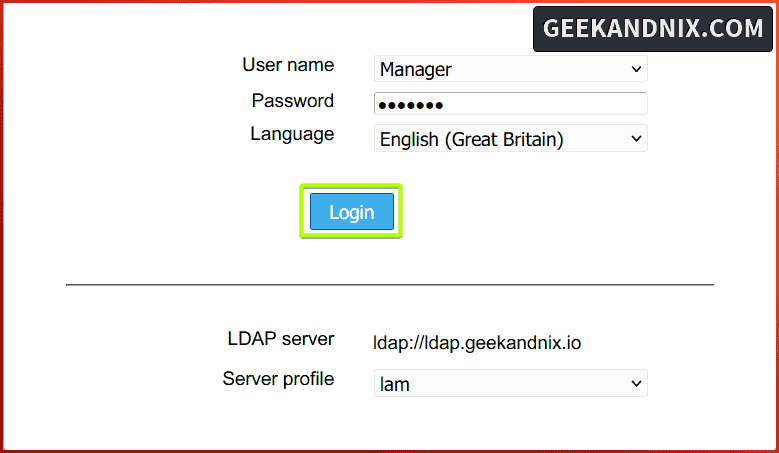
2. If your integration is successful, you will be presented with the LAM dashboard.
As your first login, you will be asked to create the base users and groups based on the Account types configuration.
Click Create to confirm.

3. Now you will see the message All changes were successful on the LAM dashboard.

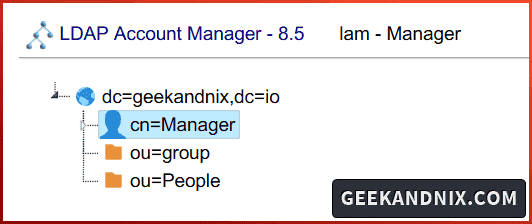
4. Next, click on the Tools > Tree view menu to verify your configuration.
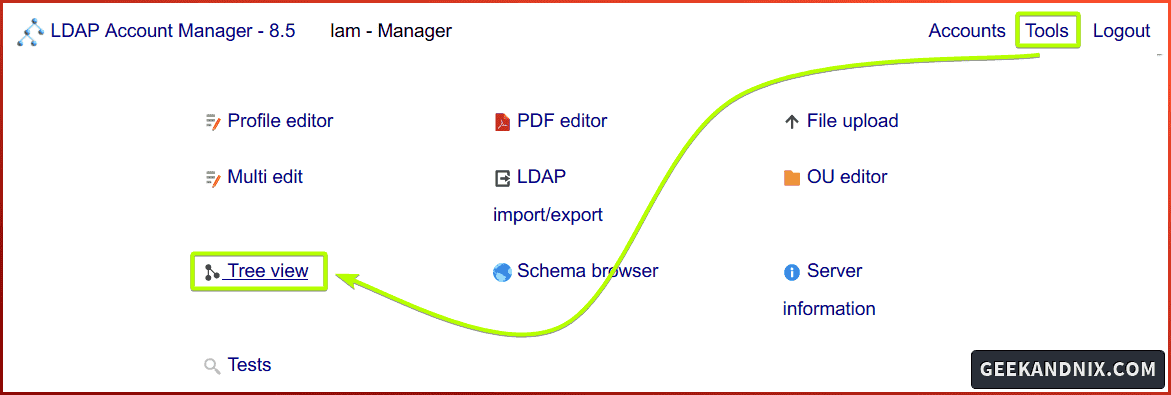
And you will get the base users People and base groups group created.
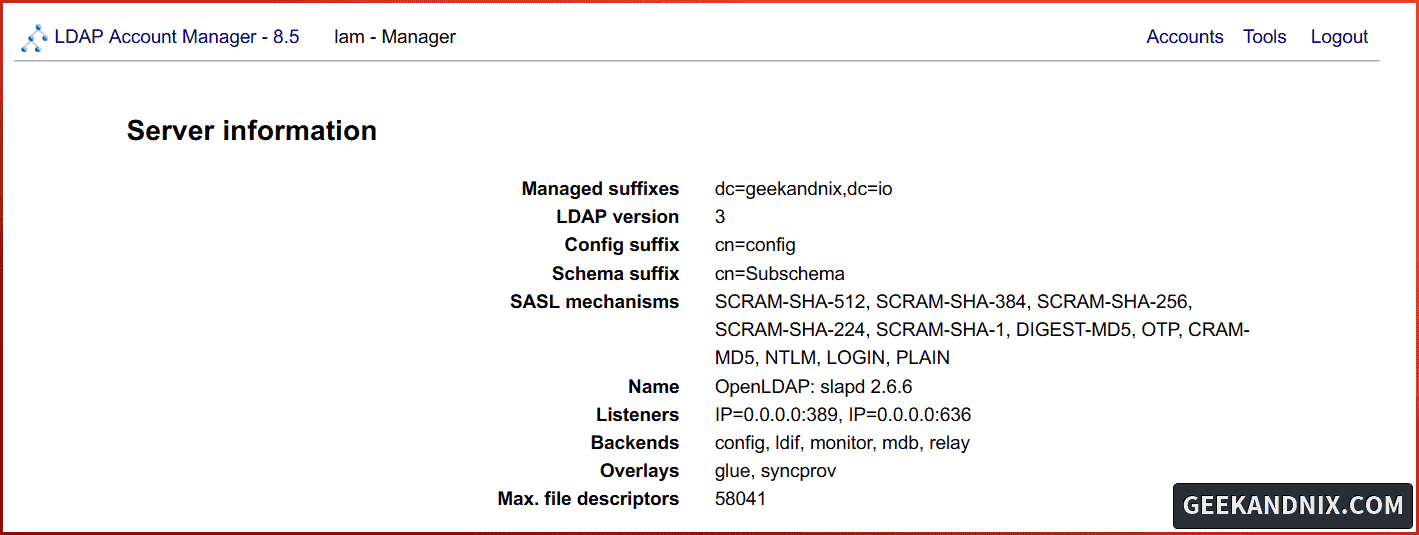
5. Lastly, click on the Tools > Server information menu to get detailed information about your OpenLDAP server.
Conclusion
Well done! You have completed the installation of the OpenLDAP server and LAM (LDAP Account Manager) on FreeBSD 14. More over, you also have created a secure LDAP server with OpenLDAP and TLS enabled on the FreeBSD server.
From here, you can now create a new OpenLDAP user via LAM. Then, connect client computer such as Linux or Windows machine to the OpenLDAP server.
