How to Install PHP (8.3, 8.2, 8.1, or 8.0) on FreeBSD 14
In this guide, I will show you how to install PHP (8.3, 8.2, 8.1, or 8.0) on FreeBSD 14.
So if you want to deploy PHP web applications on FreeBSD, you can use this guide which provides detailed instructions for installing PHP, integration with Apache and Nginx web server, and installation of additional PHP extensions.
Let’s dive in.
Prerequisites
To proceed with this guide, have on hand the following:
- A FreeBSD 14 server.
Read more: FreeBSD 14: Step-by-Step Installation (With Screenshot) - A root user or non-root user with sudo privileges.
- Have Apache or Nginx web server installed.
Read more:
Apache: A Guide to Install and Configure on FreeBSD 14
How to Install and Configure Nginx on FreeBSD 14
Installing PHP on FreeBSD
On FreeBSD, there are multiple versions of PHP versions, such as 8.3, 8.2, 8.1, and 8.0. This gives you the flexibility to choose between PHP versions as needed for your application.
To install PHP on your FreeBSD server, go through these actions:
1. To get started, execute the pkg commands below to update your FreeBSD repository and search for packages containing php. You will see multiple PHP versions, including PHP 8.3, 8.2, 8.1, and 8.0 available on the FreeBSD repository.
# update FreeBSD package index
pkg update

# search packages contain php
pkg search php
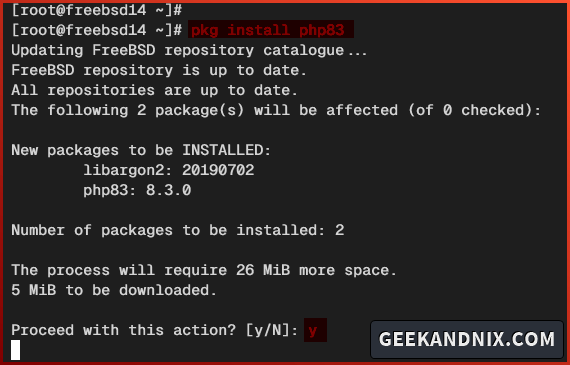
2. Now run the pkg command below to install PHP. Be sure to select the PHP version you need. In this case, I will install PHP 8.3 on FreeBSD.
# install PHP 8.3
pkg install php83

# install PHP 8.2
pkg install php82

# install PHP 8.1
pkg install php81

# install PHP 8.0
pkg install php80
Input y to proceed with the installation.
3. Once PHP is installed, run the command below to copy the sample of php.ini to /usr/local/etc/php.ini.
sudo cp /usr/local/etc/php.ini-production /usr/local/etc/php.ini4. Lastly, check your PHP version using the command below.
php -vAs seen in the following, the PHP 8.3 is installed.

Guide to PHP Configuration Files and Directories
Before configuring PHP, take a look at the following PHP configuration files and directories:
- /usr/local/etc/php.conf: Contain informations related your PHP installation.
- /usr/loca/etc/php.ini: The php.ini file where you can manage your PHP installation.
- /usr/local/etc/php: This directory is the extensions directory of PHP. Most files in this directory with the format
.so. - /usr/local/etc/php-fpm.conf: The default PHP-FPM configuration file.
- /usr/local/etc/php-fpm.d: The directory for additional PHP-FPM configuration. In this directory, you will see the file
www.confwhich is the default PHP-FPM pool configuration.
Integrating PHP with Apache Web Server on FreeBSD
If you’re using an Apache web server, perform these tasks to integrate PHP with your Apache installation:
1. First, run the pkg command below to install the mod_php package. Be sure to adjust the mod_php version with your current PHP version.
# install mode_php for PHP 8.3
pkg install mod_php83

# install mode_php for PHP 8.2
pkg install mod_php82

# install mode_php for PHP 8.1
pkg install mod_php81

# install mode_php for PHP 8.0
pkg install mod_php80
Input y and press ENTER to proceed.
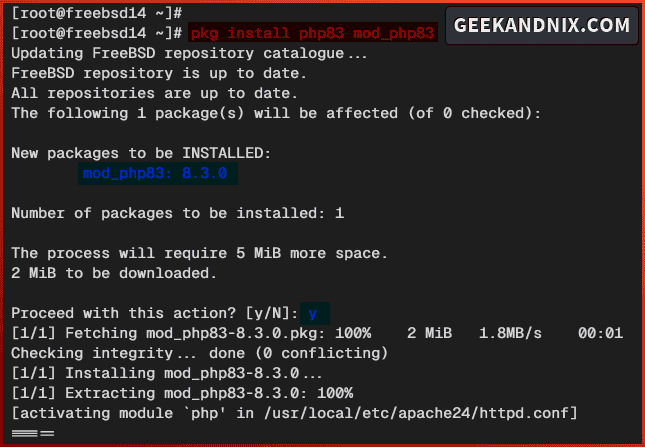
2. Once the mod_php module is installed, run the command below to verify it. If the installation is successful, you’ll see an output such as php_module.
apachectl -M | grep php
3. Now that php_module is loaded, run vim editor below to create a new create a new file /usr/local/etc/apache24/modules.d/001_mod-php.conf. This file will be used as the configuration of php_module for the Apache web server.
NOTE: The naming of the Apache module on FreeBSD must start with 3 digit number, followed by the underscore _, then ended with the .conf format – In this example is 001_mod-php.conf.
vim /usr/local/etc/apache24/modules.d/001_mod-php.confInsert the following configuration into the file.
<FilesMatch "\.php$">
    SetHandler application/x-httpd-php
</FilesMatch>
<FilesMatch "\.phps$">
    SetHandler application/x-httpd-php-source
</FilesMatch>
When finished, save and exit the file.
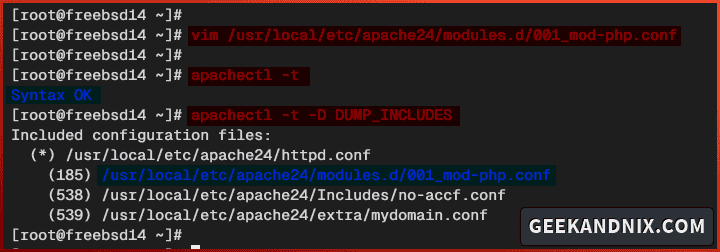
4. After that, run the command below to verify your Apache syntax and list of loaded configurations.
# checking Apache syntax
apachectl -t

# checking enabled configuration on Apache
httpd -t -D DUMP_INCLUDES
If you’ve proper Apache syntax, you will get an output Syntax OK. Then, you will also see the file 001_mod-php.conf is loaded by Apache.
5. Next, run the service command below to restart the apache24 service and apply your modifications.
service apache24 restart6. Now execute the following command to create a new file info.php to the default document root directory /usr/local/www/apache24/data.
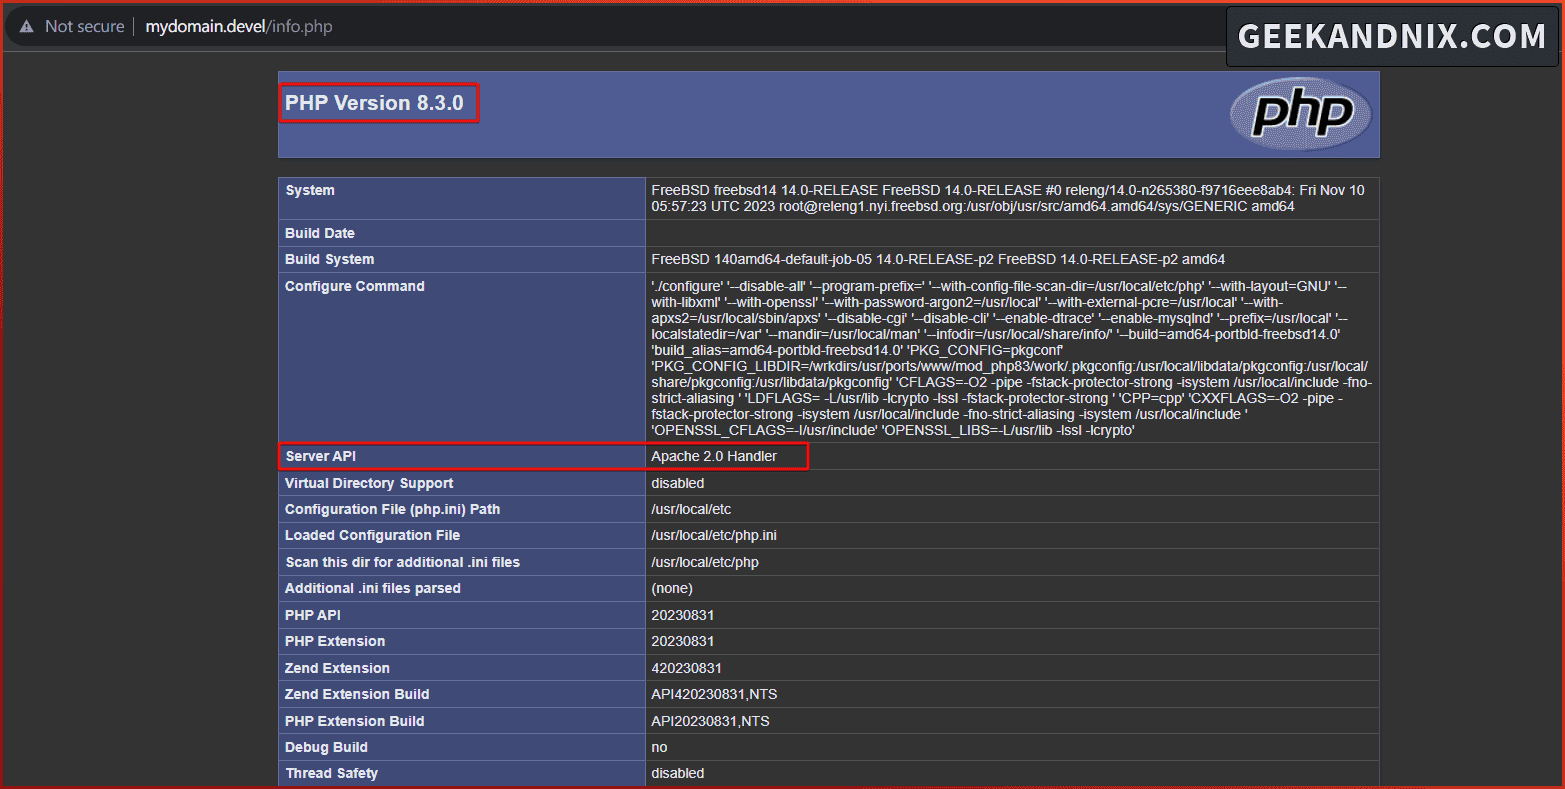
sudo -u www echo "<?php phpinfo(); ?>" > /usr/local/www/apache24/data/info.php7. Lastly, open your web browser and visit your server IP address following the info.php file, such as http://192.168.5.80/info.php. If your integration of PHP with the Apache web server is successful, you should get the PHPINFO page like the following:
On this page, you can see that PHP 8.3 is running via Apache 2.0 Handler server API.
Integrating PHP with Nginx Web Server on FreeBSD
For Nginx users, here is how to integrate PHP with your Nginx installation:
NOTE: On FreeBSD, the php-fpm has been included in php packages. So, if you’re coming from Linux, you don’t need to install a package like php-fpm.
1. First, run the command below to enable and verify the php_fpm service.
sysrc php_fpm_enable="YES"
sysrc -a | grep php
2. Open the default PHP-FPM configuration /usr/local/etc/php-fpm.d/www.conf using vim.
vim /usr/local/etc/php-fpm.d/www.confChange the default listen parameter to /var/run/php83-fpm.sock. In this case, you will be running PHP-FPM as a sock file, which is faster than via IP and port.
listen = /var/run/php83-fpm.sockChange the default listen.owner and listen.group to the user www. This will ensure that Nginx can access files related to PHP-FPM. Also, be sure to change the default listen.mode to 0660 to ensure the read and write access for the www user.
listen.owner = www
listen.group = www
listen.mode = 0660
Save the file and exit the editor when finished.
3. Now run the command below to start and verify the php-fpm service.
service php-fpm start
service php-fpm status
If everything goes well, you should see the PHP-FPM is running. In this case, PHP-FPM is running on PID 6969.

4. Then, run the sockstat command below to check the PHP-FPM sock file /var/run/php83-fpm.sock.
sockstat -l | grep phpIf PHP-FPM is running, you will see an output of PHP-FPM service running within the stream of sock file /var/run/php83-fpm.sock under the user www.

5. Now that PHP-FPM is running, open the default Nginx configuration /usr/local/etc/nginx/nginx.conf using vim. You will modify the Nginx configuration to set up the integration of PHP-FPM with Nginx.
vim /usr/local/etc/nginx/nginx.confInsert the following configuration in between the server {...} directive.
  location ~ \.php$ {
    root /usr/local/www/nginx;
    fastcgi_pass unix:/var/run/php83-fpm.sock;
    fastcgi_index index.php;
    fastcgi_param SCRIPT_FILENAME $document_root$fastcgi_script_name;
    include fastcgi_params;
  }
Save and close the file when you’re done.
6. Then, run the following command to verify your Nginx syntax and restart the nginx service to apply your changes.
# checking Nginx syntax
nginx -t

# restart Nginx service
service nginx restart
7. After that, create a new PHPINFO file info.php using the command below.
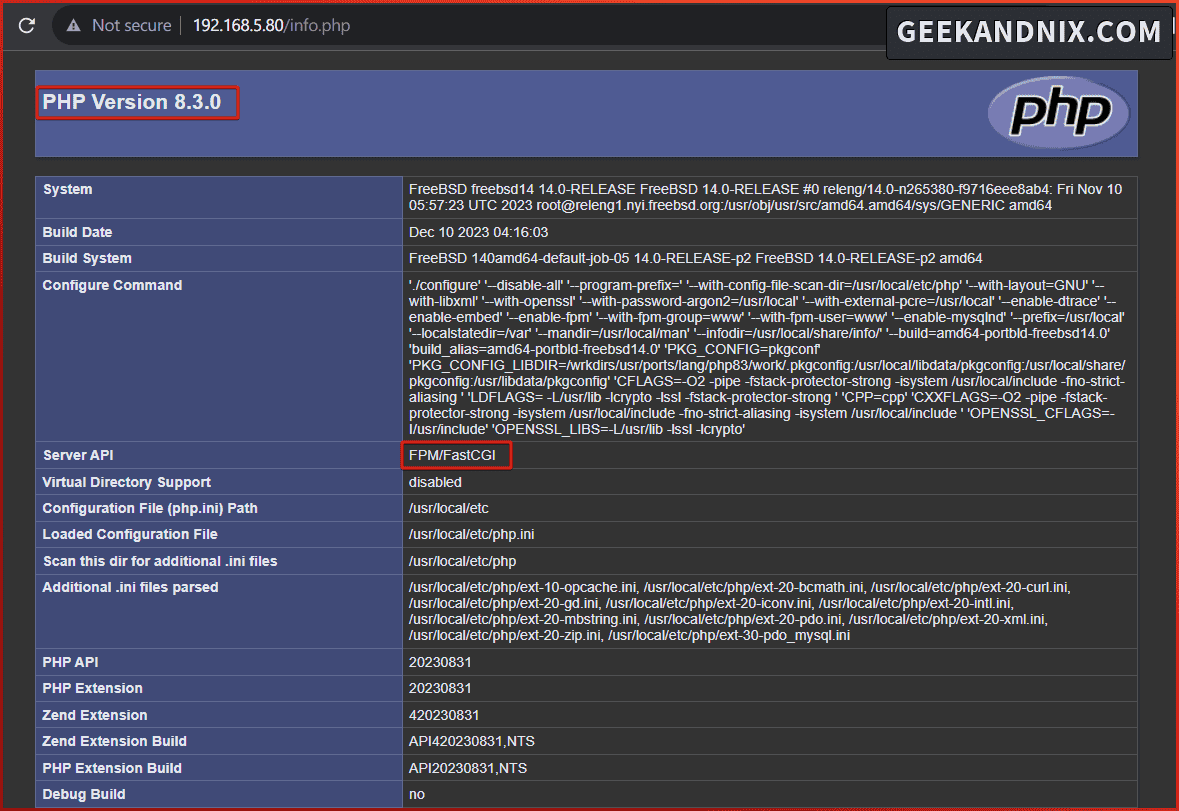
sudo -u www echo "<?php phpinfo(); ?>" > /usr/local/www/nginx/info.php8. Lastly, launch your web browser and visit your server IP address followed by the file info.php, such as http://192.168.5.80/info.php. If your integration of PHP with the Nginx web server is successful, you will see the PHPINFO page like the following:
On this page, you can see the PHP 8.3 is running with Nginx web server via FPM/FastCGI server API.
Installing PHP Extensions on FreeBSD
Having successfully installed and integrated PHP with the Apache/Nginx web server, let’s move on to install additional PHP extensions.
Follow these instructions to install PHP extensions to your FreeBSD system:
1. Before installing the PHP extension, run the command below to find an available extension for your PHP version. You can also parse the output for only pattern match via grep. In this case, I will find a PHP extension for PHP 8.3.
# find php extensions for PHP 8.3
pkg search php83

# find extensions for PHP 8.3
# filter output to only print mysql, redis, and memcached
pkg search php83 | grep 'mysql\|redis\|memcached'
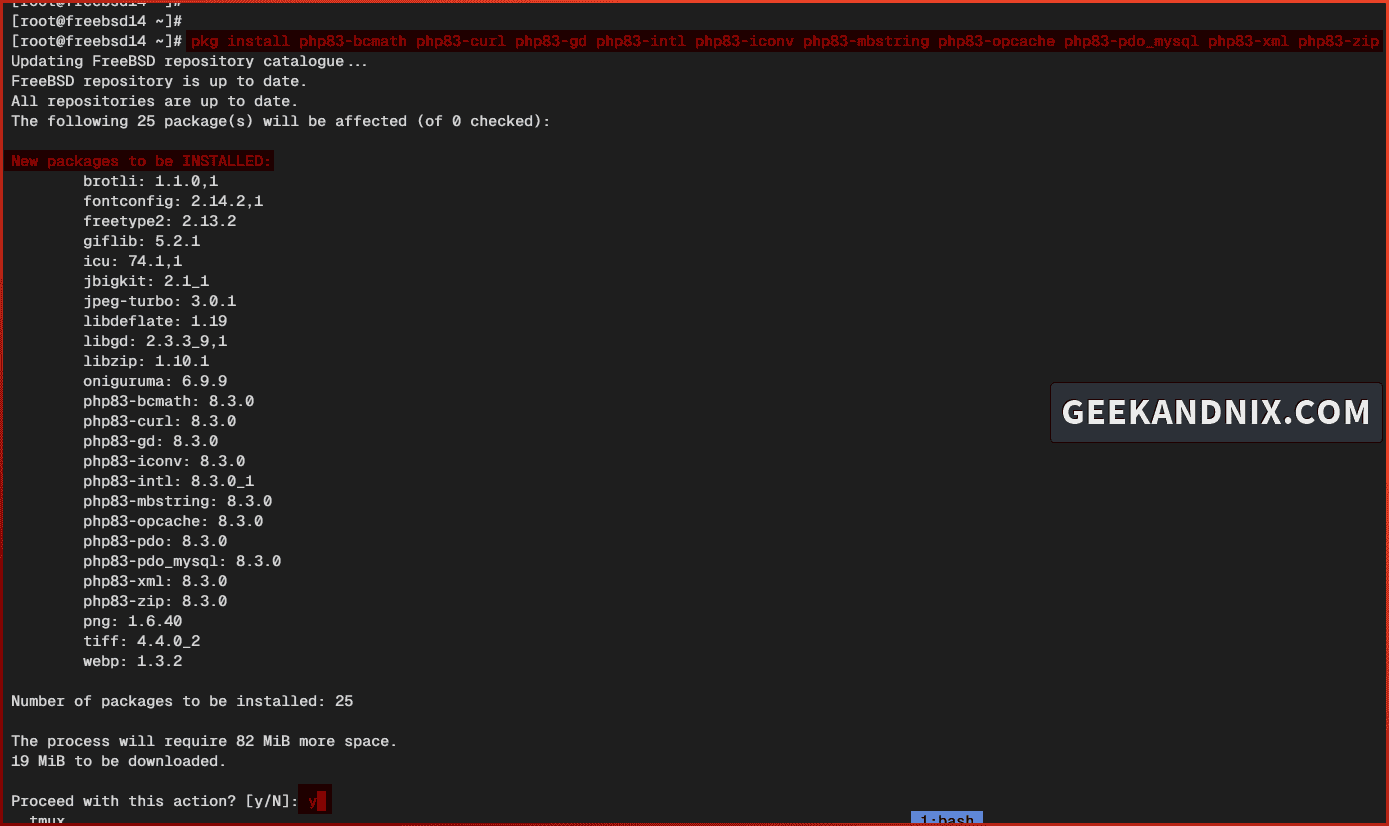
2. Now run the pkg command below to install the PHP extension to your FreeBSD system. Be sure to change the PHP version and adjust the list of extensions as needed for your applications.
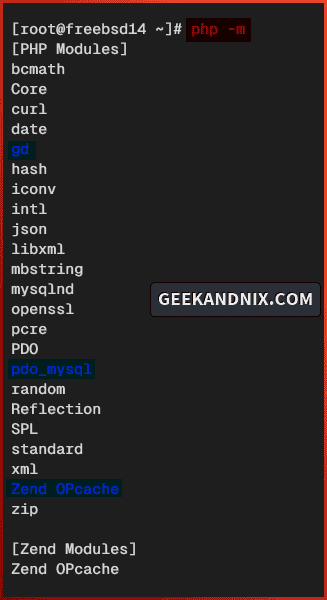
pkg install php83-bcmath php83-curl php83-gd php83-intl php83-iconv php83-mbstring php83-opcache php83-pdo_mysql php83-xml php83-zipType y to proceed with the installation.
3. Once the installation is complete, run the command below to verify the list-enabled PHP extensions on your system.
php -mBe sure that each extension for your application is installed.
Uninstalling PHP from FreeBSD
1. First, run the command below to stop and disable the PHP-FPM service.
service php-fpm stop
sysrc -x php_fpm_enable
2. Now remove PHP packages using the pkg delete command below.
pkg delete php83 php83-bcmath php83-curl php83-gd php83-intl php83-iconv php83-mbstring php83-opcache php83-pdo_mysql php83-xml php83-zip3. Furthermore, run the pkg autoremove command below to delete the orphaned/unused package from your FreeBSD machine.
pkg autoremove4. Lastly, run the command below to delete configuration files and directories for PHP.
rm -rf /usr/local/etc/php.{.conf,ini,-fpm.conf,-fpm.d}Common Error During PHP Installation and Integration
During the process of integrating PHP-FPM with the Nginx web server, I got an error FastCGI sent in stderr: "Primary script unknown".
To resolve this error, add your document root directory to the location {...} directive of PHP-FPM integration.
  location ~ \.php$ {
    # add the document root directory
    root /usr/local/www/nginx;
    fastcgi_pass unix:/var/run/php83-fpm.sock;
    ...
    ...
    ...
  }
Then, restart both Nginx and PHP-FPM services using the command below.
service php-fpm restart
service nginx restart
Conclusion
In summary, you have successfully installed PHP (8.3, 8.2, 8.1, or 8.0) on FreeBSD 14 server. You have also integrated PHP with Apache or Nginx web server and also installed additional PHP extensions to FreeBSD.
From here, you’re now ready to deploy your PHP web applications. And if you still don’t have database like MySQL/MariaDB on your system, follow our guide to install it:
