How to Install and Configure Nginx on FreeBSD 14
In this post, you are going to learn exactly how to install and manage the Nginx web server on FreeBSD 14, step-by-step.
Nginx is the fastest web server solution for delivering your applications. Most notable case, Nginx combined with FreeBSD, powered Netflix video stream and delivered up to 400GB/s of TLS-encrypted video traffic.
Without further ado, let’s get started.
Prerequisites
Before you proceed, confirm you have the following:
- A FreeBSD 14 server.
Read more: FreeBSD 14: Step-by-Step Installation (With Screenshot) - A root user or non-root user with root/administrator privileges.
- A pf (Packet Filter) firewall is enabled on your FreeBSD system.
Read more: How to Set Up and Manage PF Firewall on FreeBSD 14 - A domain name – Local domain or Public domain.
Step 1 – Installing Nginx on FreeBSD
There are two different ways to install Nginx on FreeBSD, you can install it via the pkg package repository, or via ports collections. For generic installation, you can use the FreeBSD package repository. As for customization, use the ports collection.
Follow these actions to install Nginx via the FreeBSD repository:
1. To get started, run the pkg command below to update the FreeBSD package index.
pkg update
2. Now run the command below to install the nginx to your FreeBSD system. Input y to proceed with the installation.
pkg install nginx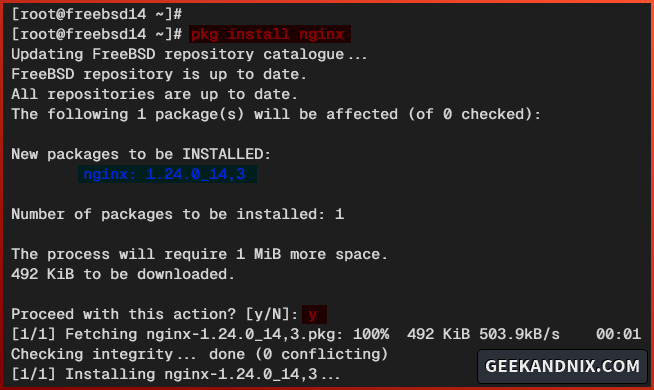
3. Once the installation is complete, run the sysrc command below to enable and verify the nginx service.
sysrc nginx_enable="YES"
sysrc -a | grep nginx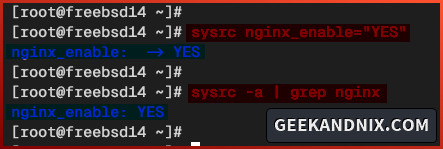
4. Lastly, run the nginx command below to verify the Nginx version that you’ve just installed.
nginx -v
nginx -V
As seen in the following, you’ve now installed Nginx 1.24 on FreeBSD 14 server. In addition to that, you can also see the detailed compile parameters/arguments of the Nginx package. This is useful, especially to check the specific features of Nginx.

Step 2 – Managing Nginx Service
Now that you’ve installed and enabled Nginx, let’s start and run the Nginx service. Complete the following steps for managing the nginx service on FreeBSD:
1. Run the service command below to start the nginx. This action will verify the Nginx syntax before starting. When you’ve proper syntax, the Nginx service will be started, otherwise, Nginx can’t be started.
service nginx start2. Once started, run the following command to verify the nginx service.
service nginx statusThis will ensure that Nginx is running and will show you the PID (Process ID) of the nginx service.

3. Now if you need to stop the nginx service, execute the command below.
service nginx stop4. Lastly, restart the nginx service using the following command whenever making changes to the Nginx configuration.
service nginx restartStep 3 – Allow Nginx Traffic via PF (Packet Filter)
This guide uses the FreeBSD with pf (packet Filter) enabled. So, you need to open both HTTP and HTTPS services to allow Nginx traffic.
Perform the following tasks to allow Nginx traffic via pf on FreeBSD:
1. Open the default pf configuration /etc/pf.conf using vim.
vim /etc/pfAdd both http and https protocols to allow traffic to the Nginx web server. This will allow traffic on port 80 and 443.
tcp_services = "{ ssh, http, https, domain}"
...
pass in proto tcp to port $tcp_services keep state
Save and exit the file when finished.
2. Now run the command below to reload the pf service and apply your modifications.
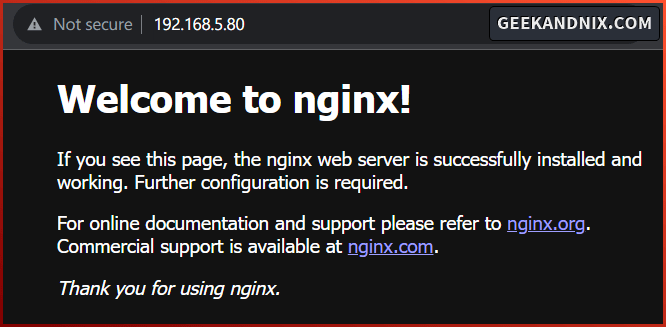
service pf reload3. Lastly, launch your web browser and visit the server IP address (i.e: http://192.168.5.80/) to verify your Nginx installation.
If your installation is successful, you will see the default index.html page of the Nginx web server.
Step 3 – Understanding Nginx Configuration Files and Directories
Before moving forward, it’s important to understand Nginx configuration files and directories. Below Nginx configuration files and directories you must know:
- /usr/local/etc/nginx: The main configuration directory for Nginx.
- /usr/local/etc/nginx/nginx.conf: The main configuration file for Nginx. In this file, you can set up the default Nginx port and include additional configurations such as snippets and server blocks a.k.a virtual hosts.
- /usr/local/www/nginx: The default document root for the Nginx web server.
- /usr/local/libexec/nginx: The directory where additional Nginx modules are stored.
- /var/log/nginx/: The default directory for Nginx logs. You can use this directory to store logs of your server block configurations.
- /var/log/nginx/access.log: The default access log file for Nginx.
- /var/log/nginx/error.log: The default access log file for Nginx.
Step 4 – Creating Additional Directory for Nginx Server Blocks
Before creating Nginx server blocks a.k.a virtual hosts, let’s create directory layouts for the Nginx server blocks. With this, instead of adding server blocks to the nginx.conf directly, you can easily create a .conf file in a specific directory that will be loaded automatically by Nginx.
1. First, run the command below to create a new directory that will be used for storing Nginx server blocks. In this case, Nginx server blocks will be saved at the /usr/local/etc/nginx/server-blocks/ directory.
mkdir -p /usr/local/etc/nginx/server-blocks/2. Execute the vim editor to open the Nginx configuration /usr/local/etc/nginx/nginx.conf.
vim /usr/local/etc/nginx/nginx.confInsert the following configuration in between the http {...} section. This tells Nginx to load .conf files within the directory /usr/local/etc/nginx/server-blocks/.
http {
    ...
    ...
    include server-blocks/*.conf;
}
Save the file and exit the editor when finished.
3. Lastly, run the nginx command below to verify your Nginx syntax. This will ensure that you have the correct configuration before applying the changes.
nginx -tStep 5 – How to Add Nginx Server Blocks (Virtual Hosts) on FreeBSD?
The server block on Nginx is the virtual host on Apache. With the Nginx server block, you can host multiple domain names on a single IP address or server. Before creating the Nginx server block, ensure you’ve prepared the following:
- Domain Name: Target domain name of your server block configuration. This can be a local domain or your registered domain name.
- Document Root: This is where you store your application. For testing, it may contain only an index.html page.
- Log Files: On every server block configuration, be sure to specify the access and error log files for easier debugging when an error occurs.
In this example, you will create a new server block configuration with the following:
| Domain Name | Document Root | Log Files |
|---|---|---|
mydomainapp.com | /usr/local/www/mydomainapp | /var/log/nginx/mydomainapp-access.log/var/log/nginx/mydomainapp-error.log |
Setting Up Document Root and Index Page
To set up the document root and index.html page, follow these actions:
1. First, run the command below to create a new document root directory /usr/local/www/mydomainapp. Your application should be stored in this directory.
mkdir -p /usr/local/www/mydomainapp2. Run the command below to create a new /usr/local/www/mydomainapp/index.html file.
echo "<h1><center>Server Block: mydomainapp.com - Nginx FreeBSD</center></h1>" > /usr/local/www/mydomainapp/index.html3. Lastly, change the ownership of the /usr/local/www/mydomainapp directory to the user and group www. This action will ensure that Nginx can access your application.
chown -R www:www /usr/local/www/mydomainappCreating Nginx Server Block Configuration
With the Document root and index.html created, let’s now create the Nginx server block configuration with the following steps:
1. Execute the vim editor to create a new server block configuration /usr/local/etc/nginx/server-blocks/mydomainapp.conf.
vim /usr/local/etc/nginx/server-blocks/mydomainapp.confInsert the following configuration and be sure to change the domain name, document root, and path of log files with your information.
server {
    listen 80;

    # domain name
    server_name mydomainapp.com;

    # web root directory and default index
    root /usr/local/www/mydomainapp;
    index index.html index.htm;

    access_log /var/log/nginx/mydomainapp-access.log;
    error_log /var/log/nginx/mydomainapp-error.log;

    location / {
        # First attempt to serve request as a file, then
        # as directory, then fall back to displaying a 404.
        try_files $uri $uri/ =404;
    }
}
When finished, save the file and exit the editor.
2. Now run the command below to verify your Nginx syntax. If you have the correct syntax, you will get an output such as ... syntax is ok - ... test is successful.
nginx -t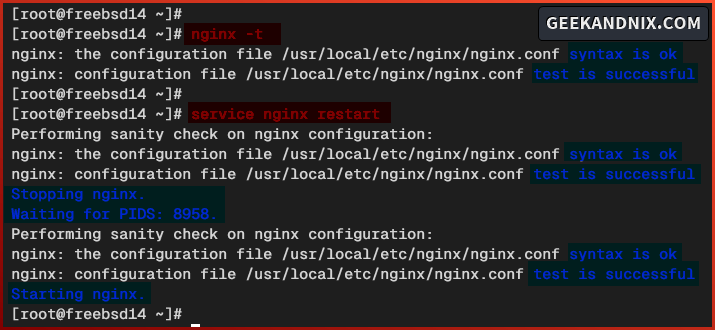
3. Lastly, run the service command below to restart the Nginx and apply your modifications. These actions will load your Nginx server block configuration within the /usr/local/etc/nginx/server-blocks/ directory.
service nginx restartStep 6 – Verifying Nginx Server Blocks Configuration
At this point, you’ve created a Nginx server block for your domain name. Let’s verify your configuration by visiting the target domain name of your Nginx server block.
1. If you’re using the local domain name, insert the following configuration to the /etc/hosts file (for Linux users) or C:\Windows\System32\drivers\etc\hosts file (for Windows users).
192.168.5.80 mydomainapp.com2. After that, visit your domain name http://mydomainapp.com/ via your web browser. If your Nginx server block configuration is successful, you will get the index.html page that you’ve created on top.

Uninstalling Nginx
If you want to uninstall and remove Nginx from FreeBSD, follow these actions:
1. Before uninstalling Nginx, run the command below to stop and disable the nginx service.
service nginx stop
sysrc -x nginx_enable
2. Once Nginx stops, run the pkg delete command below to uninstall/remove Nginx. Furthermore, run the pkg autoremove command to remove orphaned or unused packages.
pkg delete nginx
pkg autoremove
3. Lastly, run the following command to delete Nginx directories – main configuration directory and Log files.
rm -rf /usr/local/etc/nginx /var/log/nginxConclusion
In conclusion, you have now installed the Nginx web server on the FreeBSD 14 server. Furthermore, you have also allowed Nginx HTTP and HTTPS traffic via pf (Packet Filter) and created Nginx server blocks (virtual hosts) on the FreeBSD server.
From here, you can now install your web application such as WordPress. Combined with PHP-FPM and MySQL/MariaDB, you will have powerful site hosting for PHP applications.
