How to Install PHP (8.3, 8.2, 8.1) on Ubuntu 24.04/22.04
PHP is an open-source server-side programming language for developing web applications. It is a widely-used programming language on the internet, a CMS (Content Management System) like WordPress or eCommerce software like Magento is written in PHP. This tutorial will walk you through the process of installing PHP on your Ubuntu 24.04 system.
FreeBSD users, don’t miss out on How to Install PHP (8.3, 8.2, 8.1, or 8.0) on FreeBSD 14.
Prerequisites
Before proceeding, make sure you have the following:
- A Linux server running Ubuntu 24.04.
See also: How to install Ubuntu 24.04 server (step-by-step) - A non-root user with sudo/root privileges.
Installing PHP on Ubuntu
Before installing PHP, you must decide which PHP version that suitable for your web applications or your developments.
As I write this, the latest stable version of PHP is 8.3.6 and available by default on the Ubuntu repository. Now here you must pay attention:
- For the latest PHP version, it is recommended to install via the Ubuntu repository. This way, you do not need to add the third-party repository, but also sometimes you will miss some of the PHP extensions.
- If your application requires PHP 8.2 or 8.1, then you must install it via the PPA repository. Yes, you need to add the third-party repository, but also you have advantages with the most updated PHP versions, multiple PHP versions, and additional PHP extensions that may not be available on the Ubuntu repository.
Installing PHP 8.3 via the Ubuntu repository
To install PHP 8.3 via the Ubuntu repository, proceed as follows:
1. First, run the following command to update and refresh your Ubuntu repository and package index information.
sudo apt update
2. Now, run the apt install command below to install PHP 8.3 on your Ubuntu system. Type y and press ENTER to confirm.
sudo apt install php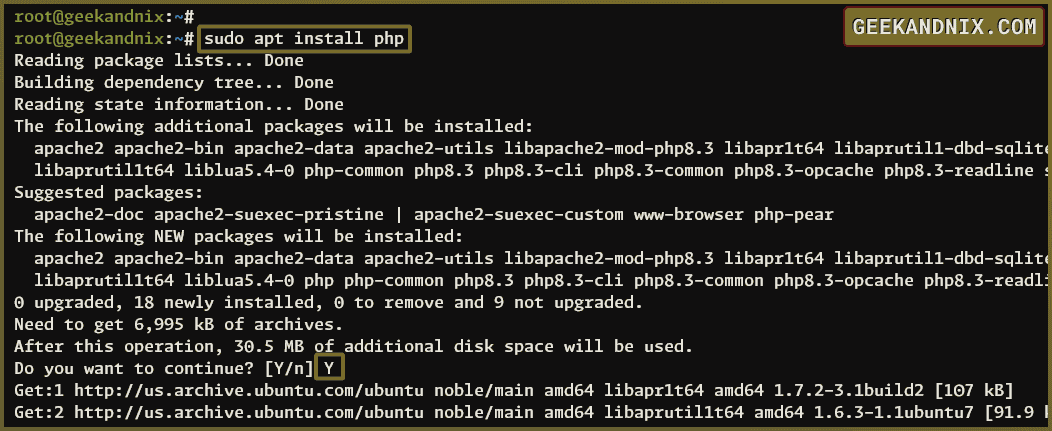
3. Lastly, if PHP is installed, enter the following command to check the PHP version.
php -vAfter executing the command, you should expect an output like this:

Installing PHP 8.2 or 8.1 via PPA Repository
Now, if you need to install PHP 8.2 or 8.1 on your Ubuntu system, complete the following actions:
1. Run the following command to install package dependencies that will be used for managing repositories. Input y when prompted and press ENTER.
sudo apt install software-properties-common ca-certificates lsb-release apt-transport-https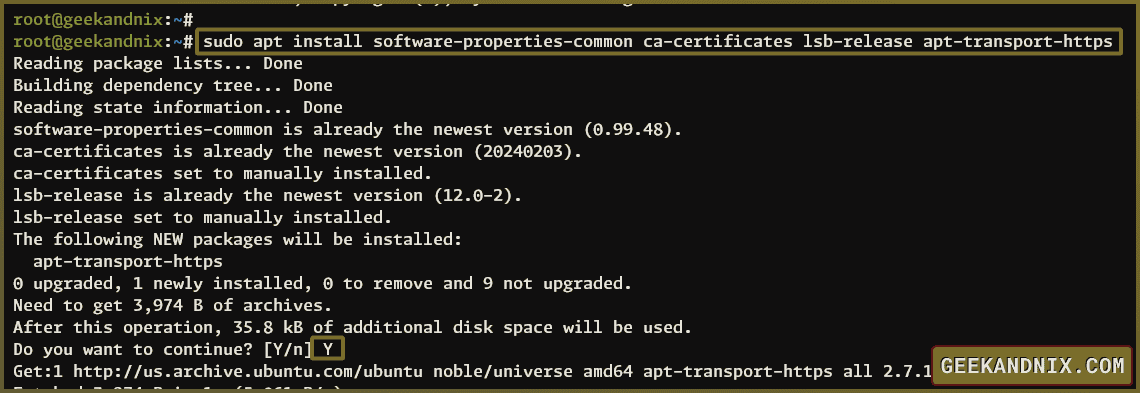
2. Now, enter the following command to add the PHP PPA repository and refresh your Ubuntu package index.
sudo add-apt-repository ppa:ondrej/php -yYou should expect an output like this when the PPA repository is added.
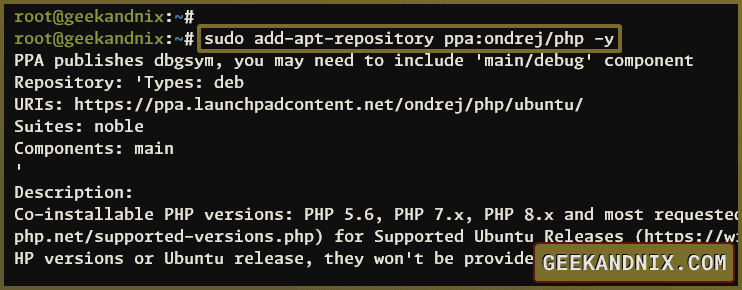
3. Once the PPA repository is added, run the command below to install the PHP 8.2 or 8.1 package. Type y to confirm the installation, then press ENTER.
# installing php 8.2 via PPA
sudo apt install php8.2

# installing php 8.1 via PPA
sudo apt install php8.1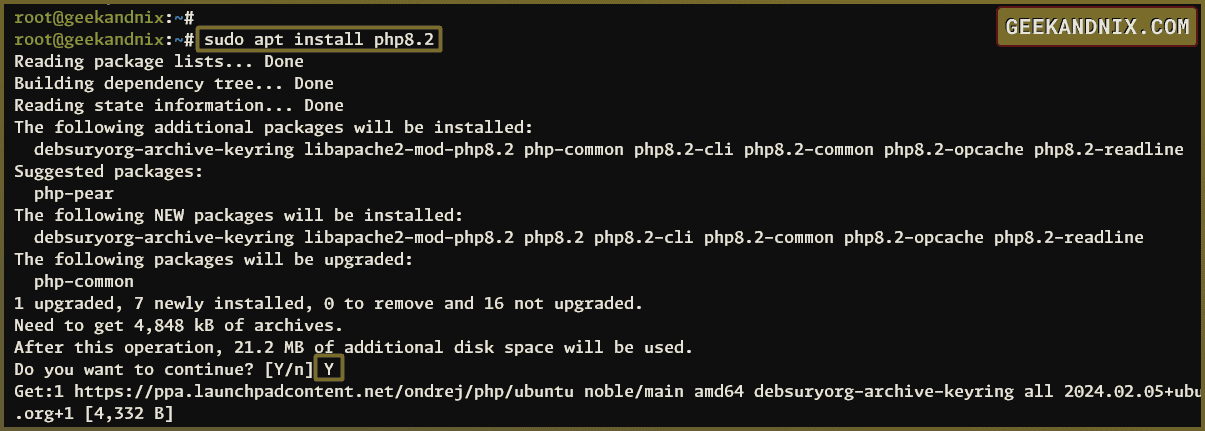
4. After PHP 8.2 is installed, execute the following command to verify the PHP version.
php -vYou should expect to see PHP 8.2.18 installed like this:

Configuring PHP with Apache or Nginx
PHP is a server-side programming language mainly used for developing web applications. Although you can run PHP code via CLI or command-line/terminal, the most convenient way to run PHP is by using a web server.
The following steps will guide you through configuring PHP with either Apache or Nginx, depending on your current web server.
Configuring PHP with Apache
If you’re using Apache, complete the following actions to set up PHP with the Apache web server.
See also: Complete Guide to Install and Manage Apache on Ubuntu 24.04
1. Run the following command to install the Apache module libapache2-mod-php on your system. This action will add a new Apache module called php8.3 or php8.2, depending on your current PHP version.
sudo apt install libapache2-mod-php
2. To avoid confusion, you must disable the current PHP module version and only enable one module you want to use. In this case, you’ll enable php8.2, so run the command below:
# Disable PHP 8.2
sudo a2dismod php8.2

# Disable PHP 8.1
sudo a2dismod php8.1
3. Now, run the command below to restart the Apache service and apply the changes.
sudo systemctl restart apache2Tip: If you have multiple PHP versions on your server, you can set up the default versions of PHP for both PHP CLI and by executing the command sudo update-alternatives --config php.
Configuring PHP with Nginx
Now, if you’re using the Nginx web server, then you must install PHP-FPM (FastCGI Process Manager). It is an alternative to PHP FastCGI, but with more features and can handle high-traffic websites.
See also: Complete Guide to Install and Manage Nginx on Ubuntu 24.04
Execute the following process to set up PHP with Nginx.
1. First, run the following command to install the PHP-FPM package. Type y when prompted to confirm the installation.
sudo apt install php-fpm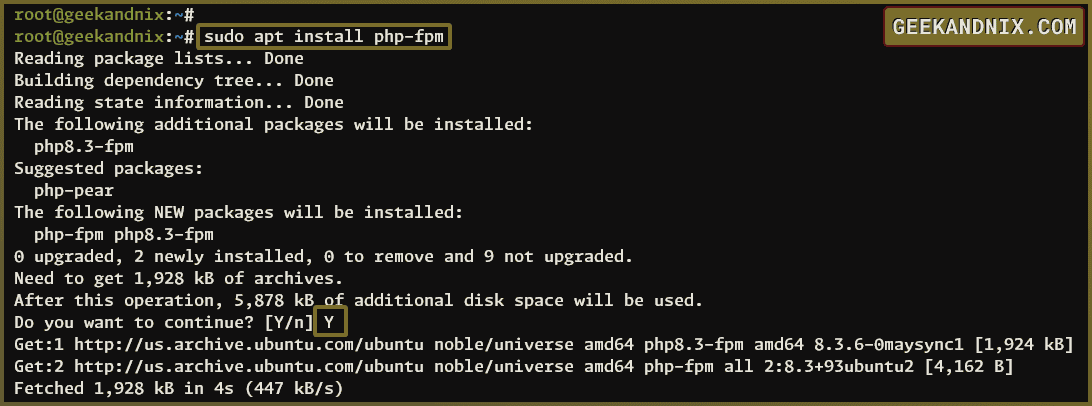
2. Now, execute the command below to ensure the PHP-FPM server is running and enabled. This example uses PHP-FPM 8.3.
# Checking if php8.3-fpm enabled and running
sudo systemctl is-enabled php8.3-fpm
sudo systemctl status php8.3-fpm

# Checking if php8.2-fpm enabled and running
sudo systemctl is-enabled php8.2-fpm
sudo systemctl status php8.2-fpm
If successful, you should expect an output like this:
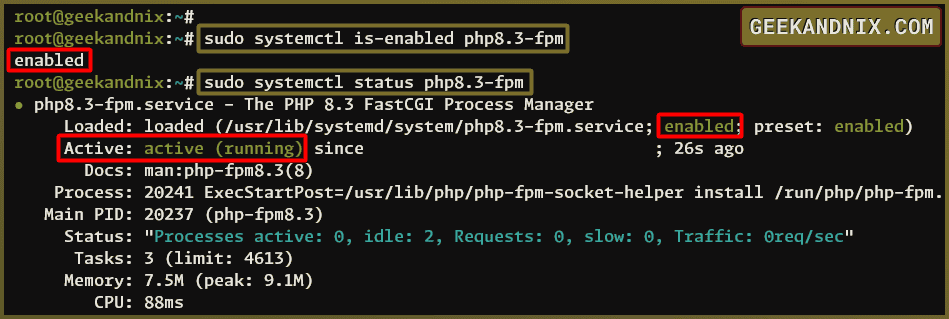
3. Then, enter the following command to check the PHP-FPM socket. If you’re running PHP-FPM 8.x, the PHP-FPM service should be running on a Unix socket.
ss -tulpn | grep phpThe following output indicates that the PHP-FPM 8.3 is running within the Unix socket /run/php/php8.3-fpm.sock.

4. Next, open the default Nginx server block configuration using the vim.
sudo vim /etc/nginx/sites-available/defaultInsert the following configuration within the server {...} directive. Change the fastcgi_pass parameter with the path of your PHP-FPM Unix socket.
server {
   ....
   ....

   location ~ \.php$ {
      include snippets/fastcgi-php.conf;
      fastcgi_pass unix:/run/php/php8.3-fpm.sock;
   }
}
Save the changes and close the editor.
5. Lastly, run the following command to restart the Nginx service and apply the changes.
sudo systemctl restart nginxEnsuring PHP is Working
Having the PHP installation configured with a web server, the next task is to ensure that your configuration is successful.
1. Run the following command to create a new PHP file info.php to the document root directory /var/www/html.
echo "<?php phpinfo(); ?>" > /var/www/html/info.php2. Now, launch your web browser and navigate to your server server IP address followed by the path file info.php (i.e: http://192.168.5.30/info.php).
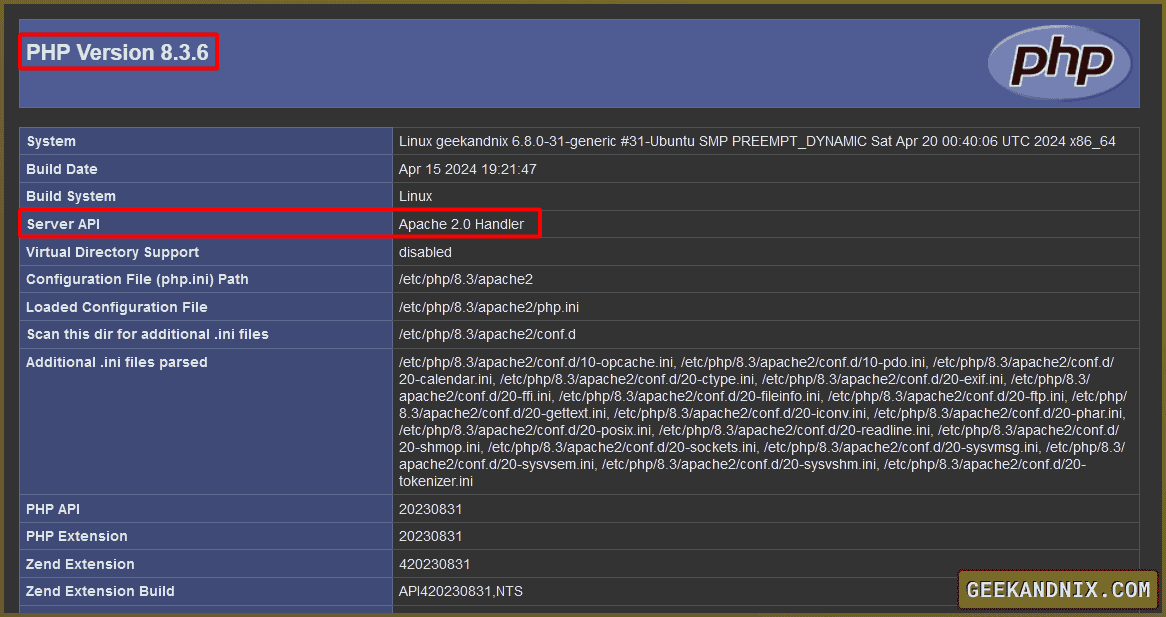
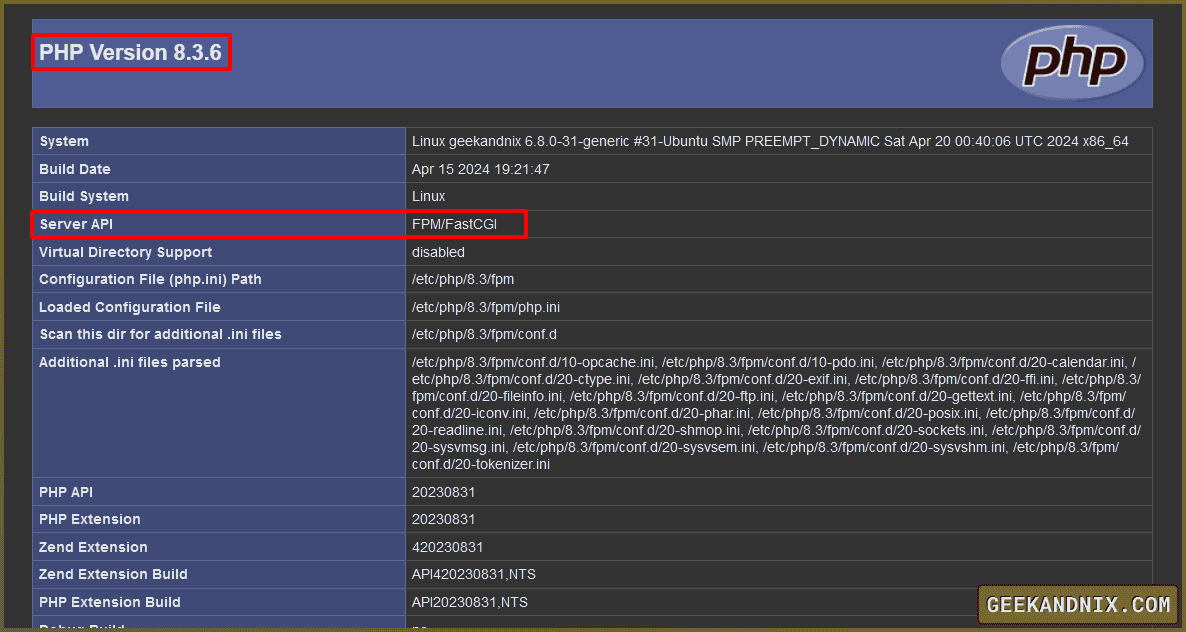
Upon successful operation, you will see detailed information on your PHP installation.
The PHP 8.3 running with Apache web server:
The PHP-FPM 8.3 as the FPM/FastCGI with Nginx web server:
Installing and Managing PHP Extensions on Ubuntu
One of the key factors for a successful PHP web application deployment is knowing which PHP extensions are required by your web application.
Most popular CMS and web applications provide a list of required PHP extensions in their documentation. For example, take a look at the WordPress requirements.
After you have identified the extensions required for your application, you can install PHP extensions in the following way:
1. Run the following apt command to install PHP extensions or modules. When prompted, type y to confirm.
sudo apt install php-cli php-curl php-gd php-intl php-mbstring php-bcmath php-mysql php-xml php-zip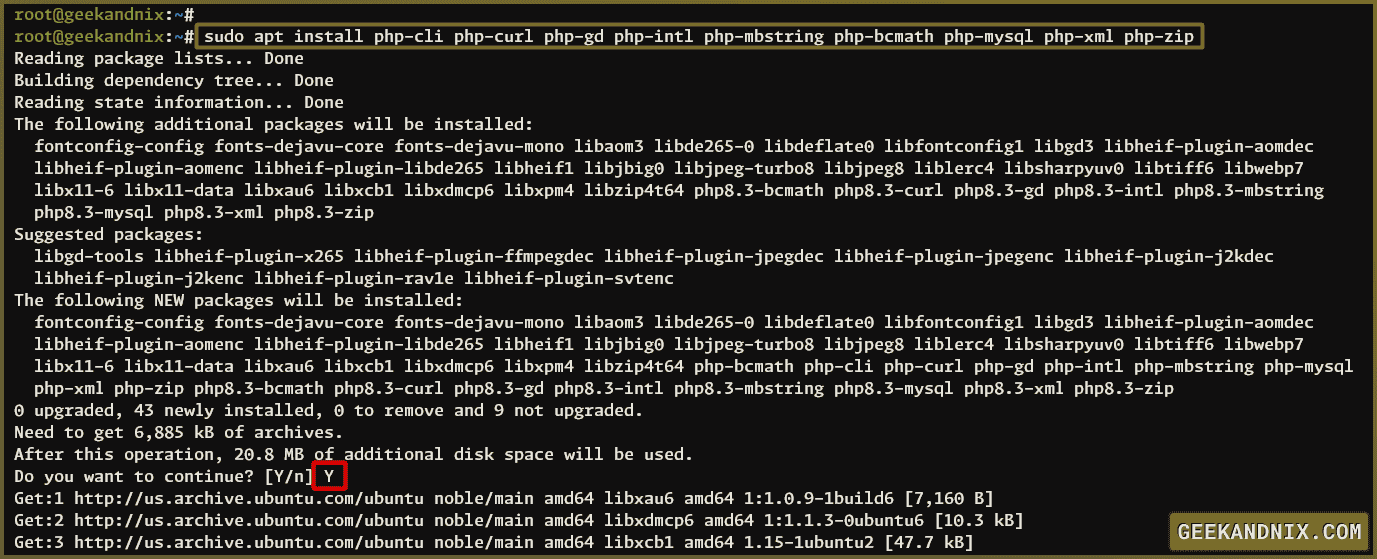
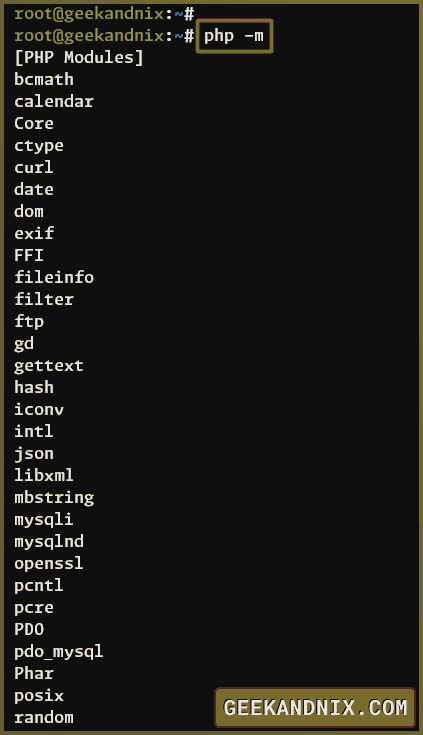
2. Once PHP extensions are installed, type the command below to check enabled PHP modules.
php -mYou should expect an output like this:
3. Furthermore, you can also enable PHP extensions via the phpenmod utility. If you want to disable the specific module, use the phpdismod command.
# Enable PHP extension
phpenmod extension_name

# Disable PHP extension
phpdismod extension_name
4. Lastly, If you need to disable PHP extensions for a specific PHP version, you can add the -v parameter followed by the PHP version to both phpenmod and phpdismod utilities.
# Enable PHP extension for specific version PHP
phpenmod -v VERSION extension_name

# Disable PHP extension for specific version PHP
phpdismod -v VERSION extension_name
Exploring the Structure of PHP Configuration
In Ubuntu, the default PHP configuration is saved in the /etc/php directory. This directory contains a subdirectory for each installed PHP version on your system.
For instance, if you have PHP version 8.3 installed on your system, its configuration files will be in the /etc/php/8.3 directory. Similarly, if you have PHP version 8.2 installed, its configuration files will be in the /etc/php/8.2 directory.
Below are some important PHP configuration files and directories you should be familiar with:
- apache2: The main configuration directory for PHP and Apache.
- cli: The main configuration directory for PHP CLI.
- fpm: The main configuration directory for PHP-FPM
- mods-available: This directory contains configuration files for available PHP modules that can be installed and enabled.
Within the apache2 and cli directory, you should see the following:
- conf.d: The configuration directory where PHP modules are enabled.
- php.ini: The main PHP configuration file.
Within the fpm directory, you will the following:
- conf.d: The configuration files for enabled PHP-FPM modules.
- php.ini: The main PHP configuration file.
- php-fpm.conf: The configuration for managing PHP-FPM service.
- pool.d: PHP-FPM pool configuration. The default PHP-FPM pool is
www, which is stored in thewww.conffile.
Uninstalling PHP from Ubuntu
1. If you want to uninstall PHP from your Ubuntu machine, run the following command.
sudo apt remove php php-fpm2. Then, if you’re using the PPA repository for your installation, remove it using the command below.
sudo add-apt-repository --remove ppa:ondrej/php -y3. Lastly, enter the following command to remove the orphaned (unused) package.
sudo apt autoremoveConclusion
Great job! You’ve successfully installed PHP 8.3, 8.2, and 8.1 on your Ubuntu 24.04 machine. You also configured PHP with your web server, whether Apache or Nginx. And last but not least, you now have a proficient understanding of PHP configuration files and directories, and how to install and manage PHP modules.
You’re now ready to install MySQL/MariaDB database, then you can host PHP web applications like WordPress and Magento, or develop PHP web applications with PHP frameworks such as Laravel and Symfony. Happy journey and give me feedback about this guide or suggest me another content idea.
