How to Install MySQL 8 on Ubuntu 24.04
If you have an Ubuntu server and want to host web applications such as WordPress and Drupal, ensure you have the MySQL Server in place. The MySQL Server is a reliable database with more than 20 years of development and is easy to use. It can be used for small and large deployment projects.
FreeBSD enthusiasts? we’ve covered also How to Install and Use MySQL Server on FreeBSD 14.
Throughout this guide, you will learn how to install MySQL Server on Ubuntu 24.04. In addition to that, you will also delve into the basic usage of MySQL by connecting to MySQL via MySQL client and then creating the first database and user.
Let’s dive in.
Prerequisites
To follow along with this demonstration, ensure that you have the following:
- A Linux server running Ubuntu 24.04.
- An administrative user or a non-root user with sudo/root privileges.
See also:
How to install Ubuntu 24.04 server (step-by-step)
Mastering PHP Installation on Ubuntu: A Comprehensive Tutorial
Step 1 – Installing MySQL 8 on Ubuntu
There are two different sources for installing MySQL on Ubuntu:
- via the official Ubuntu repository.
- via the official MySQL repository.
Select your preferred source to install MySQL Server on Ubuntu, and move on to the next step once you have completed the installation.
Installing MySQL 8.0 via Ubuntu Repository
MySQL is one of the most popular RDMS (Relational Database Management System) for major operating systems such as Linux, macOS, and Windows. Almost every Linux distribution provides MySQL server packages, and on Ubuntu, you can install it from the official Ubuntu repository via the APT package manager.
1. First, run the apt command below to update your Ubuntu repository and get the latest version of package information.
sudo apt update
2. Now, run the apt install command below to install the MySQL server. Input y when prompted, then press ENTER.
sudo apt install mysql-server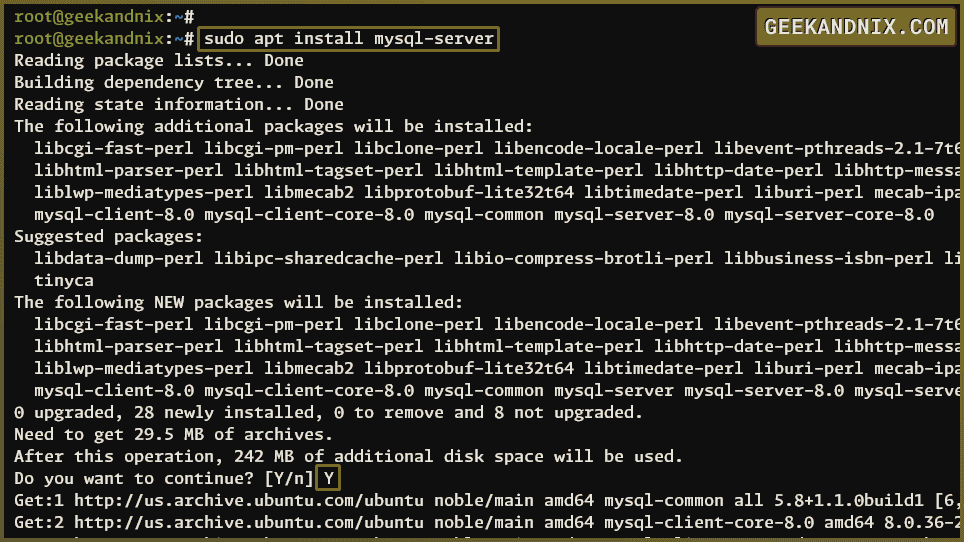
3. Once the MySQL server is installed, run the following systemctl commands to check and verify the mysql service and ensure that it is running.
# Checking if mysql is enabled
sudo systemctl is-enabled mysql

# Checking mysql service status
sudo systemctl status mysql
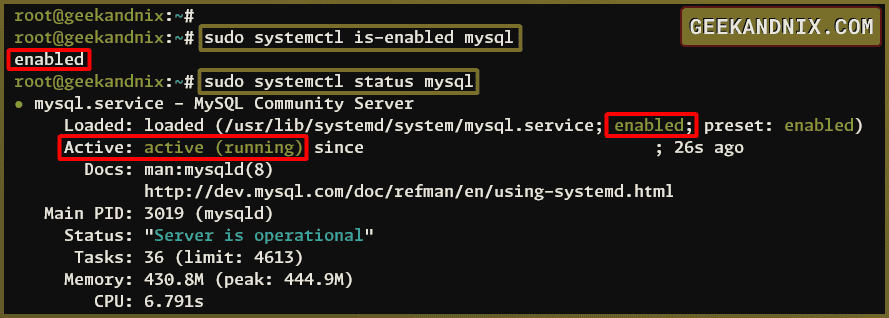
The following output indicates that the mysql service is enabled and will start automatically at system startup. And the status of the mysql service is running.

4. Lastly, execute the command below to verify the MySQL server version.
sudo mysql --versionThe MySQL server 8.0 is installed on your Ubuntu system.

Installing MySQL 8.4 LTS via MySQL Repository
If you choose to install a MySQL server via an MySQL repository, then you must add the MySQL APT repository and selecting the default MySQL version to install.
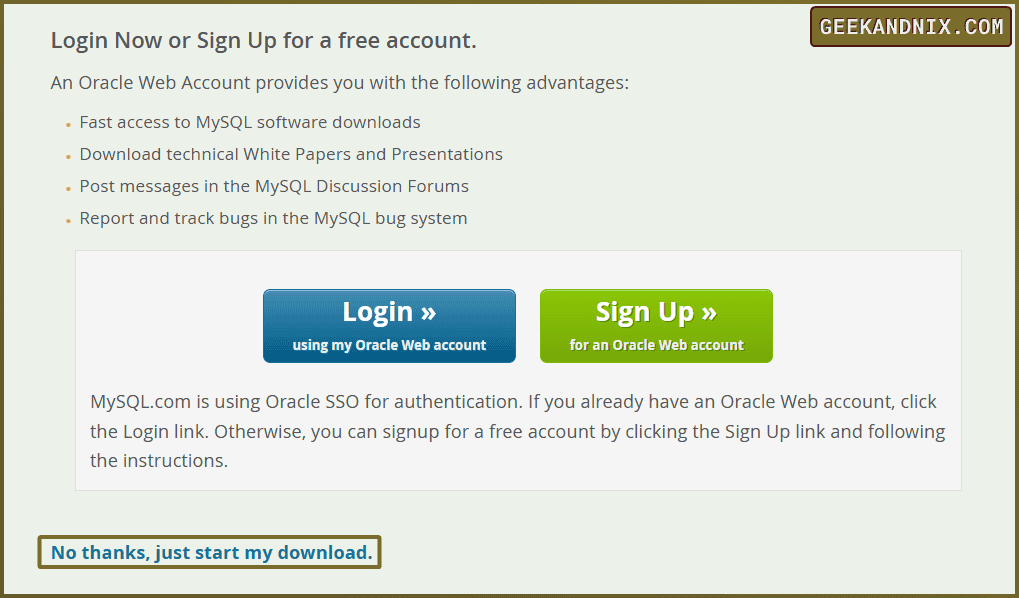
1. Visit the official MySQL server repository download page and click the Downloads button. Then you will see the MySQL server download page.
Right-click on the link “No thanks, just start my download.” and select Copy Link.
2. Now, type the wget command and paste the download link for the MySQL repository.
wget https://dev.mysql.com/get/mysql-apt-config_0.8.30-1_all.deb3. After downloading the MySQL repository, run the following dpkg command to add the official MySQL server repository. As you proceed, you will be prompted with the MySQL repository configuration.
sudo dpkg -i mysql-apt-config_0.8.30-1_all.debOn the MySQL Server & Cluster option, ensure that the mysql-8.4-lts is selected. Then, move the cursor to OK with the down arrow key, press TAB to select OK, and press ENTER to proceed.

4. After the MySQL repository is added, run the apt update command to refresh your package index.
sudo apt update
5. Next, install the MySQL server package using the apt install command below. Input y when prompted, then press ENTER.
sudo apt install mysql-server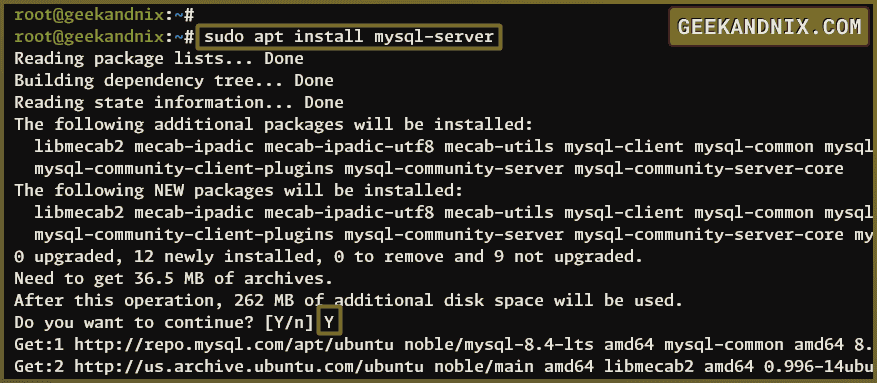
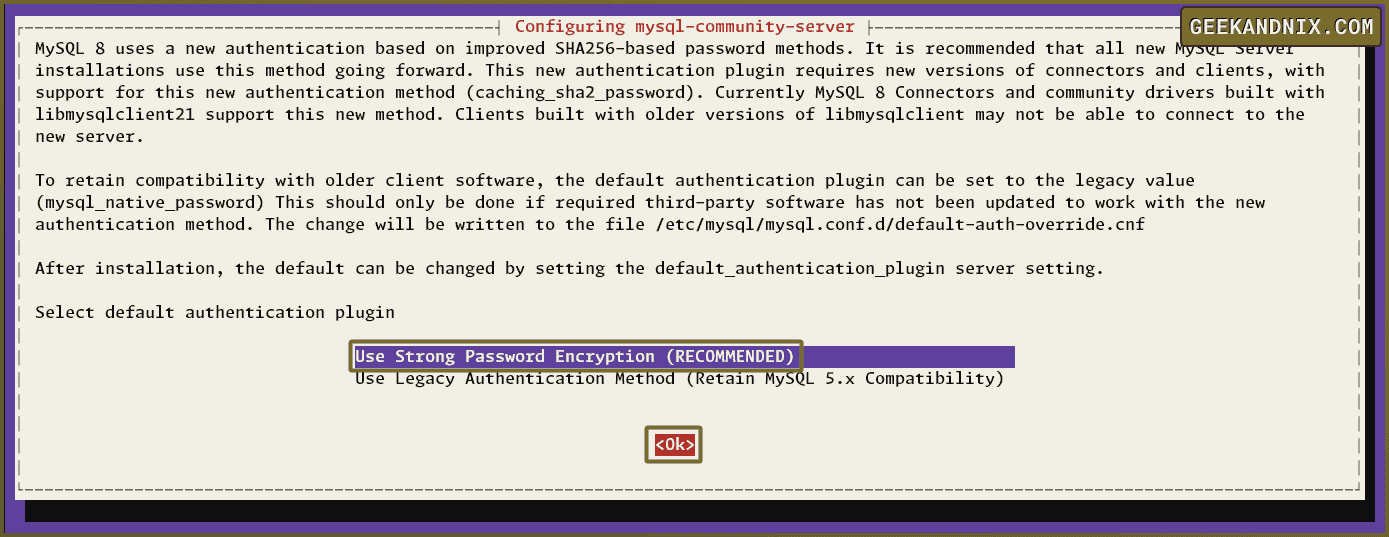
Now you will be prompted to set up the password for the MySQL root user and set up the default authentication plugin.
Input a new password and select OK, then repeat.


For the authentication plugin settings, select Use Strong Password Encryption (RECOMMENDED), then select OK.
6. Now, when the MySQL server installation is finished, run the following command to verify the mysql service and ensure that the service is running.
# Checking if mysql service enabled
sudo systemctl is-enabled mysql

# Checking mysql service status
sudo systemctl status mysql
If everything goes smoothly, you should see the output similar to:
Step 2 – Changing MySQL Root Password
Note: If you choose to install MySQL server via the official MySQL repository, skip this step.
Now that the MySQL server is up and running, the next step is to configure the password for the MySQL root user. To accomplish this, you will be utilizing the mysql client utility
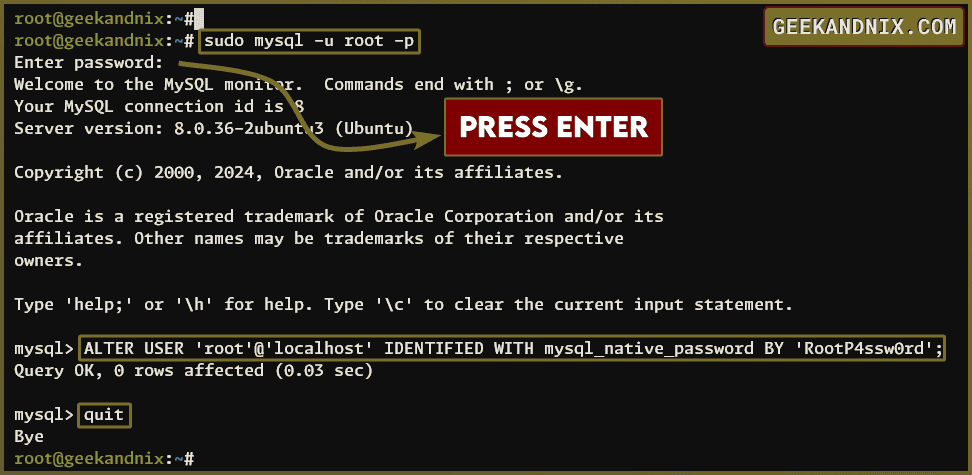
1. Log in to the MySQL shell using the default root user with the mysql command below. When prompted for a password, press ENTER to continue.
sudo mysql -u root -p2. Now, execute the following query to set up the MySQL root password. Make sure you modify the password p4ssw0rd accordingly.
ALTER USER 'root'@'localhost' IDENTIFIED WITH mysql_native_password BY 'p4ssw0rd';3. Lastly, type quit to exit from the MySQL shell.
Step 3 – Securing MySQL Server Deployment
After configuring the MySQL root password, it’s time to secure your MySQL server deployment. The default MySQL server package comes with the utility mysql_secure_installation that helps you secure your MySQL deployment.
The mysql_secure_installation utility helps you secure the MySQL server by setting up the MySQL root password, disabling remote login for the root user, removing the default anonymous user, and also removing the default database test.
1. Run the mysql_secure_installation command below to secure MySQL server deployment.
sudo mysql_secure_installation2. When prompted for a password, input your MySQL root password.
3. Now, input Y to enable the VALIDATE PASSWORD COMPONENT. Then, enter the number of password policies that you want to use, 0 for LOW, 1 for MEDIUM, and 2 for STRONG.
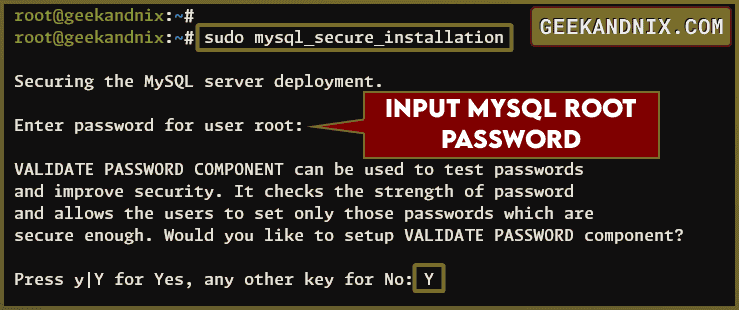
Once the VALIDATE PASSWORD is enabled, the mysql_secure_installation utility will check the strength of your current MySQL root password. If the password strength is below 100, you will be asked to change your current password.
Press ENTER to leave the MySQL root password as you have configured above.

4. Next, input Y to remove anonymous users from your MySQL server.

5. Input Y again to disable remote login for MySQL root user. For security reasons, you should now allow the MySQL root user connect remotely from the remote host.

6. Now input Y to remove the default database test from your MySQL server.
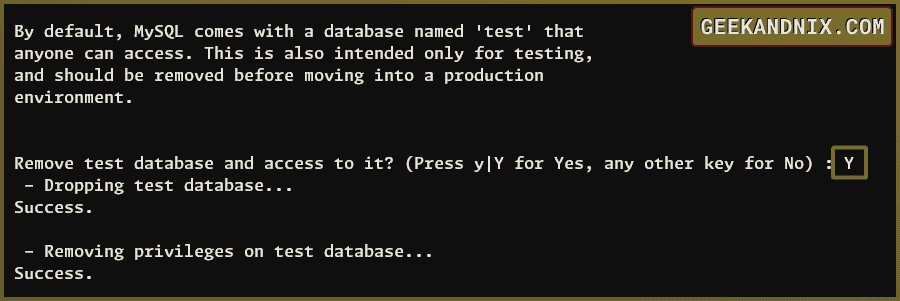
7. Lastly, input Y again to reload the table privileges and apply the changes. When the process is finished, you can expect an output such as All done!.

If you’ve followed the instructions so far, you should now have the secured MySQL server up and running with the root password configured. Now, move on to the basic usage of MySQL server by creating the first database and user.
Step 4 – Creating User and Database in MySQL Server
This section will focus on the basic usage of MySQL server queries by creating the first database and user. By the end of this section, you will have a better grasp of some MySQL queries for managing users and databases.
1. First. log in to the MySQL shell via the root user using the mysql command below. Input the MySQL root password when prompted.
sudo mysql -u root -p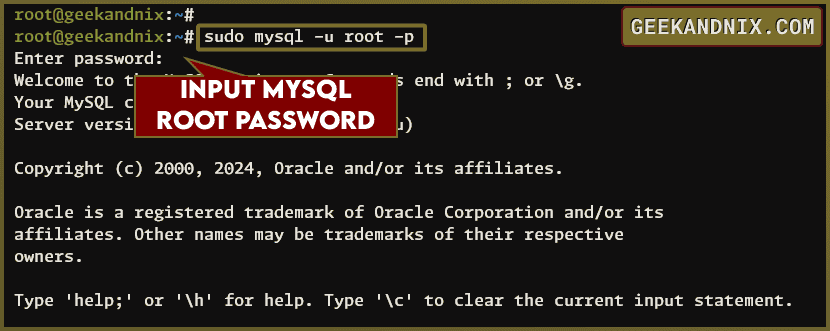
2. Once logged in, run the query CREATE DATABASE to create a new database myappdb on MySQL. Then, run the query SHOW DATABASES to check the list of available databases on the MySQL server.
# Create new MySQL database
CREATE DATABASE myappdb;

# Checking list databases
SHOW DATABASES;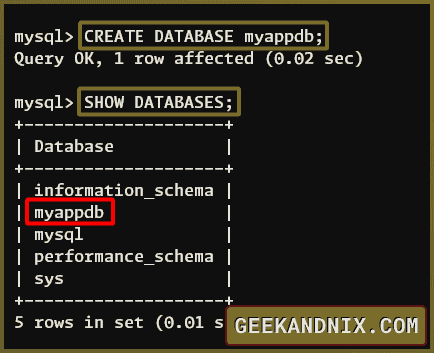
3. Now, run the query CREATE USER to create a new MySQL user called myappuser, and be sure to update the password. Then, run GRANT ALL PRIVILEGES to allow the user myappuser@localhost to access the database myappdb. Lastly, reload the table privileges with the query FLUSH PRIVILEGES to apply the changes.
# Create MySQL User
CREATE USER myappuser@localhost IDENTIFIED BY 'Strongp4ssw0rd!#';

# Grant MySQL user privileges to specific database
GRANT ALL PRIVILEGES ON myappdb.* TO myappuser@localhost;

# Reload table privileges
FLUSH PRIVILEGES;
4. After you’ve MySQL user created, run the following query to check the list of users on the MySQL server. The output should display the MySQL user myappuser on the list.
SELECT user FROM mysql.user;5. Now run the following query to verify the privileges of the MySQL user myappuser@localhost. You will notice that the user myappuser@locahost has been granted privileges for accessing and managing the database myappdb.
SHOW GRANTS FOR myappuser@localhost;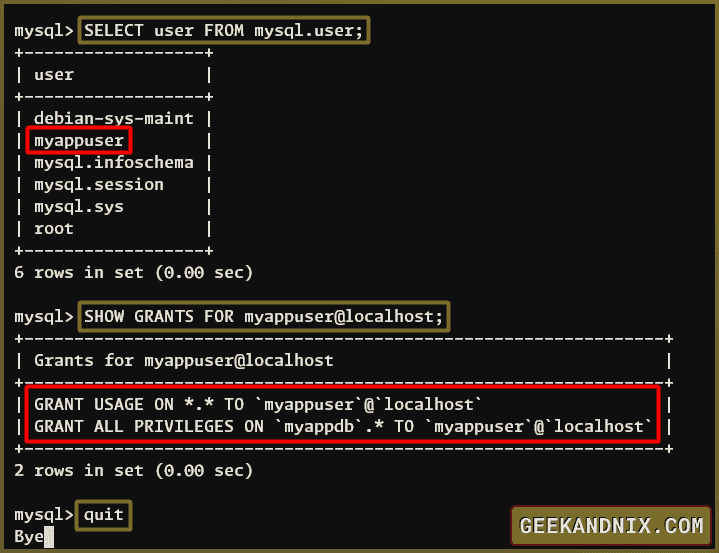
6. Type quit to exit from the MySQL shell.
quitStep 5 – mysql cli: Connecting to Specific Database and User
Now that you have created a MySQL database and user, the next step is to ensure that you can log in to the MySQL server via a new user.
1. Run the following mysql command to connect to the MySQL server via user myappuser@localhost to the target database myappdb. When prompted, input the password for the user appuser@localhost.
sudo mysql -h localhost -u appuser -D appdb -p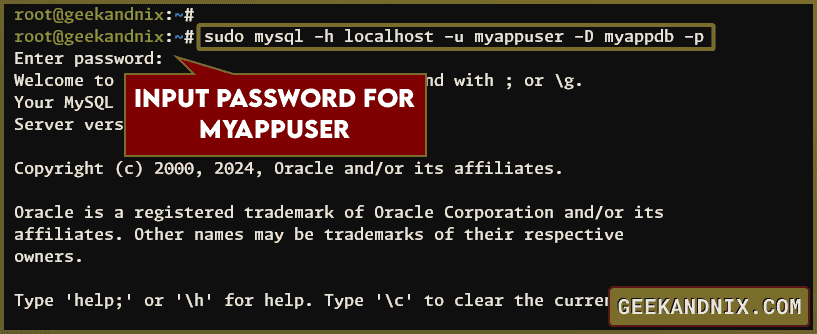
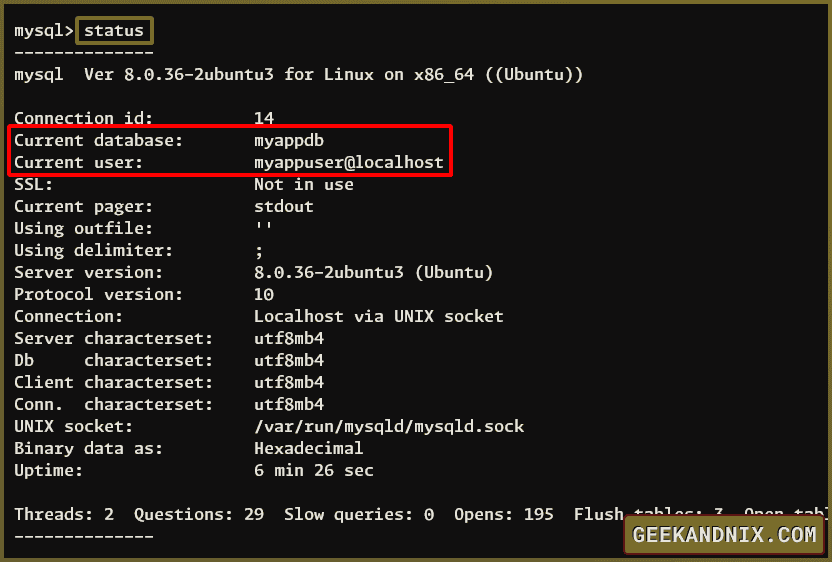
2. Now, run the query status to check the details of the current connection to the MySQL server.
statusAfter executing the query, you should receive an output like this: You have connected to the MySQL server with the user myappuser@localhost to the database myappdb. The output also shows the current version of the MySQL server that running on your system.
Conclusion
In conclusion, by following the steps outlined in this guide, you should now have a good understanding of how to install MySQL server on Ubuntu 24.04. You have learned two methods for installing MySQL server, via the official Ubuntu repository, and the official MySQL repository.
After that, you have also configured MySQL root password and secured MySQL server deployment by utilizing the mysql_secure_installation utility. Furthermore, you have also learned the basic usage of MySQL server for creating users and databases.
With this in mind, why not take a closer look at how to secure MySQL server via SSL/TLS, or setting up a MySQL cluster to achieve high availability for your database server?
