Step-by-Step Guide: Install and Use MariaDB on Ubuntu 22.04
The MariaDB is fully open-source drop-replacement to MySQL and default database on Major Linux distributions, including Ubuntu, Debian, and RHEL. It’s supports more storage engines than MySQL, supports both row and columnar storage, and provides backwards compatibility with older versions.
FreeBSD users, get ready to level up with our newest guide How to Install and Use MariaDB Server on FreeBSD 14.
This step-by-step guide will walk you through the process of installing MariaDB on Ubuntu 22.04. Furthermore, this guide also covers security settings for MariaDB and the basic usage of MariaDB for creating databases and users.
Prerequisites
To get the most out of this guide, ensure that you have the following:
- A Linux server running Ubuntu 22.04
See also: 15 Steps to Install Ubuntu Server 22.04 LTS - An administrative user or non-root user with sudo privileges.
Step 1 – Installing MariaDB to Ubuntu Server
There are two different methods that you can use to install MariaDB:
- Installing MariaDB via Ubuntu repository – To simplify your MariaDB installation.
- Installing MariaDB via the official MariaDB repository – If you want to install a specific version or the latest version of MariaDB, follow this method.
Choose the right method for yourself and let’s get started.
Installing MariaDB via Ubuntu Repository
By default, the MariaDB server packages are available in most Linux distributions’ repositories, including Ubuntu. This will simplify MariaDB installation because you don’t need to add a third-party repository to your system.
As of now, the official Ubuntu repository universe/database provides MariaDB Server 10.6. If you prefer to install MariaDB via the Ubuntu repository, take the following steps:
1. To start, use the following apt update command to refresh your package index and ensure that you have the latest version of package information.
sudo apt update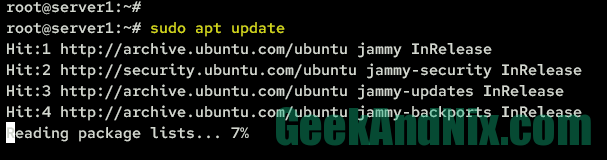
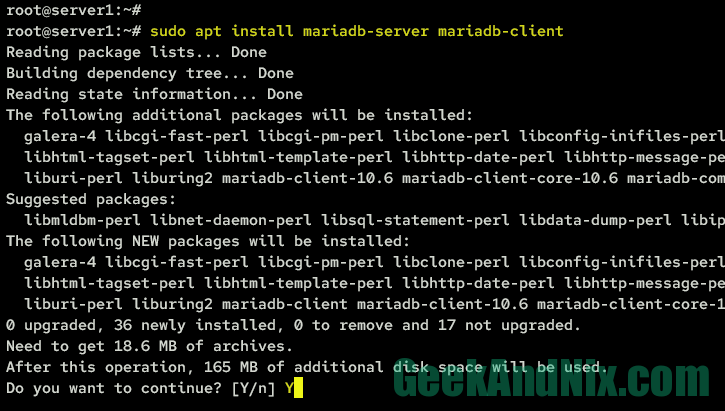
2. Now, install the MariaDB server using the apt install command below.
sudo apt install mariadb-server mariadb-clientWhen prompted, input y to confirm, then press ENTER.
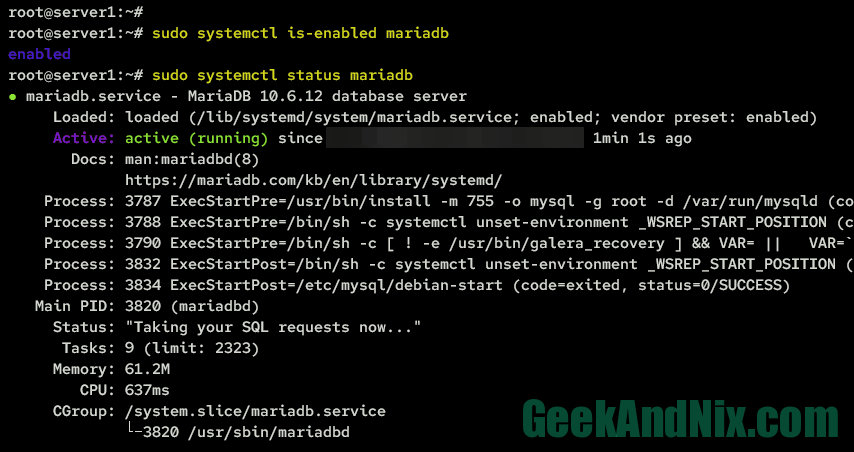
3. After MariaDB is installed, check the MariaDB service status using the systemctl command below.
# Checking if mariadb service enabled
sudo systemctl is-enabled mariadb

# Checking mariadb service status
sudo systemctl status mariadb
If the MariaDB server running, you should expect an output such as active (running). And if you see the MariaDB server enabled, that indicates that the MariaDB will start automatically at system startup.
4. Lastly, run the following command to check the MariaDB version on your system.
mariadb --version
Installing MariaDB via the Official MariaDB Repository
If you want to install a specific version of MariaDB, you can install it via the official MariaDB repository. The official MariaDB repository provides multiple versions of MariaDB server, including MariaDB 10.6, 10.7, 10.8, 10.9, 10.10, and 10.11.
Follow these steps if you want to install the specific version or to get the latest version of the MariaDB server.
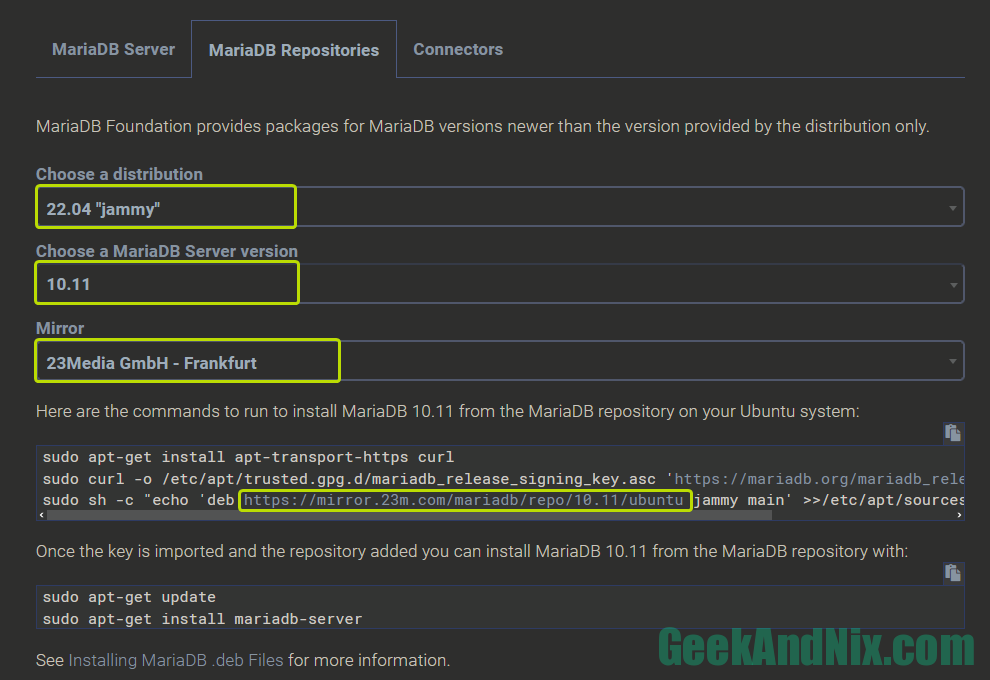
1. Visit the MariaDB repository setup page to generate repository configuration. Then, choose the distribution to 22.04 "jammy", the desired MariaDB version that you want to install, and the mirror repository nearest your location.
This example will be installing MariaDB 10.11 via the MariaDB Japanese mirror server. So, take note of the generated link of the MariaDB repository mirror.
2. Run the following command to install the package apt-transport-https and curl.
sudo apt install apt-transport-https curl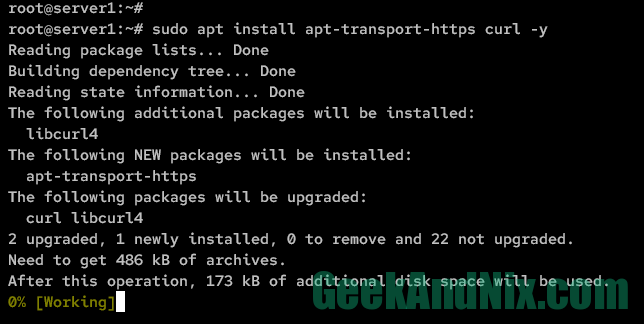
3. Now, run the command below to add the MariaDB GPG key and repository to your system. Make sure to modify the repository URL https://mirrors.xtom.jp/mariadb/repo/10.11/ubuntu with your generated URL repository.
# Adding GPG Key for MariaDB repository
sudo curl -fsSL https://mariadb.org/mariadb_release_signing_key.asc | sudo gpg --dearmor -o /usr/share/keyrings/mariadb.gpg

# Adding MariaDB repository
sudo sh -c "echo 'deb [arch=amd64,arm64 signed-by=/usr/share/keyrings/mariadb.gpg] https://mirrors.xtom.jp/mariadb/repo/10.11/ubuntu jammy main' > /etc/apt/sources.list.d/mariadb.list"
4. Next, run the following command to update and refresh your Ubuntu repositories.
sudo apt update
5. Install the MariaDB server package via the official MariaDB repository using the following apt install command. Input y when prompted, then press ENTER to proceed.
sudo apt install mariadb-server
6. Once MariaDB is installed, run the following command to ensure that the MariaDB service is running.
# Checking if mariadb service enabled
sudo systemctl is-enabled mariadb

# Checking mariadb service status
sudo systemctl status mariadb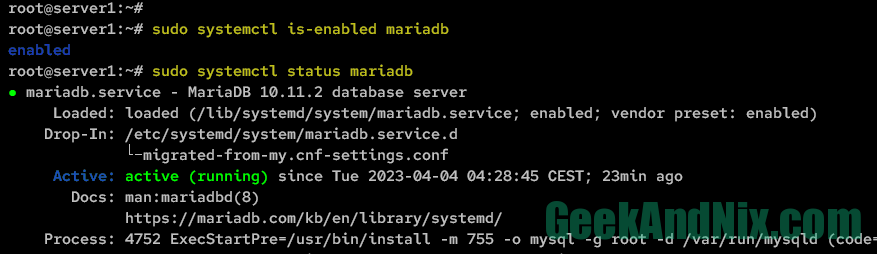
7. Lastly, verify the MariaDB version using the following command.
sudo mariadb --version
Step 2 – Securing MariaDB Server on Ubuntu
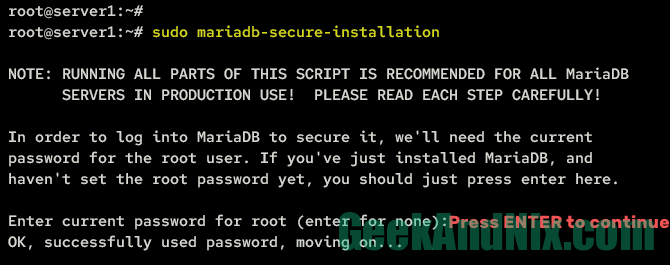
Now that the MariaDB server is up and running, you can move on to securing the MariaDB server installation. And the recommended way to do this is by utilizing the mariadb-secure-installation command.
Secure the MariaDB deployment by running the mariadb-secure-installation command below.
sudo mariadb-secure-installationThe setup wizard will ask you to provide an answer between y for YES and n for NO regarding the following MariaDB security configurations.
The mariadb-secure-installation is a shell script provided by the MariaDB server package that helps you to secure and set up your MariaDB installation. You can set up the root password, remove the default anonymous user and default database test, and also disable remote login for the root user.
Setup MariaDB root Password
Press ENTER to continue when asked for the MariaDB root password. By default, there is no password for the MariaDB root user and you must set it up in the next section.
In MariaDB, you can set up the user authentication via password or unix_socket authentication. Input Y to enable unix_socket authentication for the root user.
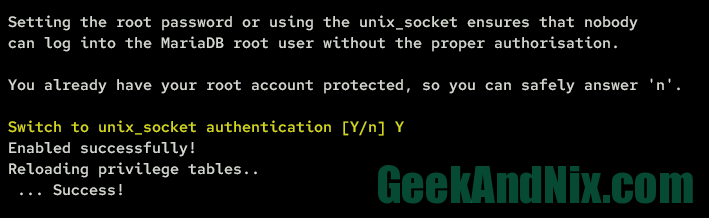
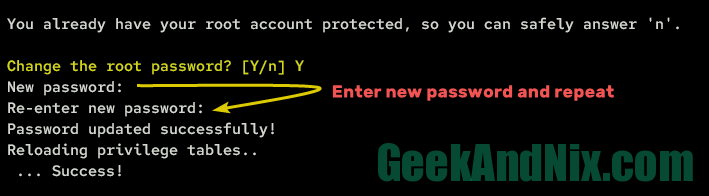
Now, input Y when asked to set up the MariaDB root password. Then, input your new password and repeat.
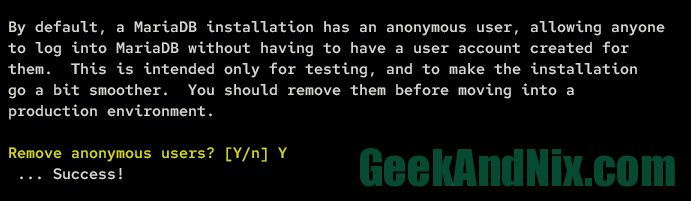
Removing Anonymous User
The default MariaDB installation comes with an anonymous user who is allowed to log in to MariaDB without providing a username and password. You must remove it.
Input Y when asked to remove the anonymous user.
Disable Remote Login for MariaDB root User
Do not allow any root or administrative account to log in remotely for every application, especially on the MariaDB server.
Input Y when asked to disable the remote login for the MariaDB root user.

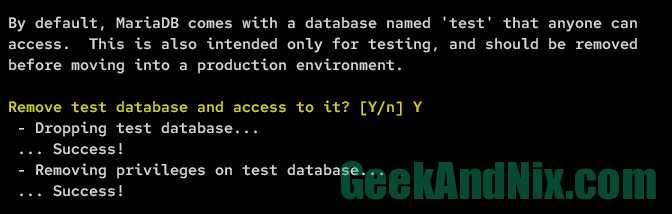
Removing the Default Database test
In the previous section, you removed the anonymous user from MariaDB. Now, input Y when asked to remove the default database test from your MariaDB server installation. The default database test on MariaDB is used for testing purposes only.
Reloading Tables Privileges
When asked to reload table privileges, input Y and press ENTER. With this, the changes that you’ve made via the mariadb-secure-installation command will be applied immediately without restart.

After you’ve finished the process, you can expect to see an output similar to:
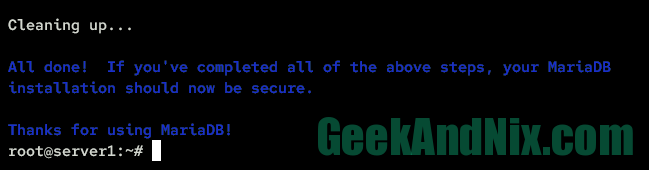
You have now successfully reached the stage where the MariaDB server is secured and the default root password is configured. Now, proceed to the next step to ensure that the password for the MariaDB root user is working.
Step 3 – Logging in To MariaDB Server via MariaDB Client
In this section, you will verify the MariaDB root password by logging in to the MariaDB server via the mariadb command-line tool.
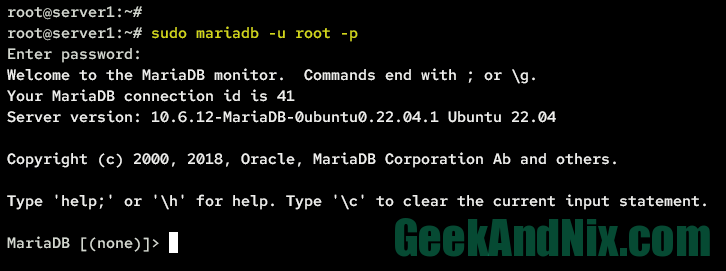
1. Run the following command to log in to the MariaDB server via the root user with the following mariadb.
sudo mariadb -u root -pWhen prompted, input the password of your MariaDB root user. Once logged in successfully, you should get the SQL shell prompt such as MariaDB [(none)]>.
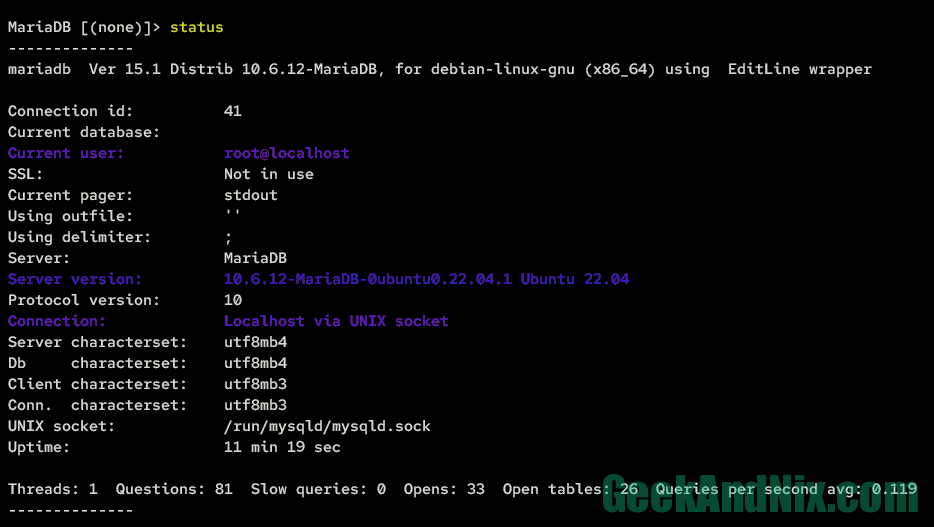
2. Now, run the status query to verify the connection to the MariaDB server.
statusYou should expect that you’re connected to the MariaDB server as user root@localhost via local UNIX socket. Furthermore, you can also expect to verify the MariaDB server version in the Server version: section.
3. Lastly, you can type quit to exit from the SQL shell.
quitStep 4 – Creating MariaDB Database and User
In this section, you will explore basic queries for creating a database and user. By completing this, you will have a good understanding of how to create a database and user on MariaDB.
1. First, ensure that you have logged in to SQL shell, or you can run the following command to log in via the root user.
sudo mariadb -u root -pInput your MariaDB root password when prompted.
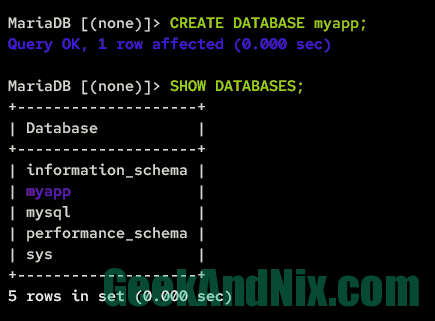
2. Once logged in, run the query CREATE DATABASE to create a new database myapp on MariaDB. Then, check the list of available databases using the query SHOW DATABASES.
# Creating database on MariaDB
CREATE DATABASE myapp;

# Checking the list databases
SHOW DATABASES;
When successful, the myapp database should be available on the database list.
3. Now, run the CREATE USER query to create a user myuser@localhost on MariaDB. It’s important to change the password Strongp4ssw0rd!# in the following query with a new strong password.
CREATE USER myuser@localhost IDENTIFIED BY 'Strongp4ssw0rd!#';4. Next, run the query GRANT ALL PRIVILEGES to allow the MariaDB user myuser@localhost to access and manage the database myapp.
Then, you must execute the query FLUSH PRIVILEGES to apply the changes that you have made.
# Grant permission for MariaDB user to specific database
GRANT ALL PRIVILEGES ON myapp.* TO myuser@localhost;

# Reloading privilege tables
FLUSH PRIVILEGES;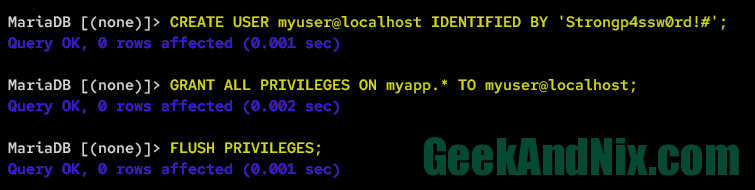
5. After that, run the following query to check the list of users on the MariaDB server. When everything goes smoothly, you should expect to see the user myuser@localhost available on the MariaDB users list.
SELECT user FROM mysql.user;6. You can also verify the given privileges of the MariaDB user myuser@localhost using the following query.
SHOW GRANTS FOR myuser@localhost;After the query is executed, you will notice the given privileges of the user myuser@localhost, which is to the database myapp.

7. Lastly, type quit to exit from the MariaDB SQL shell.
quitNow that you’ve created a database and user on MariaDB, the next step is to ensure that your new user can log in to the MariaDB server.
Step 5 – Connecting to Specific Database on MariaDB
This section will ensure that the new user that you’ve created in the previous step can log in to the MariaDB server with the new database via the mariadb command-line tool.
1. Run the following command to log in to SQL shell via the new user myuser to the target database myapp. When prompted for a password, input the password for user myuser.
sudo mariadb -h localhost -u myuser -D myapp -pWhen successful, you should expect to see the SQL shell prompt such as MariaDB [(myapp)]>.
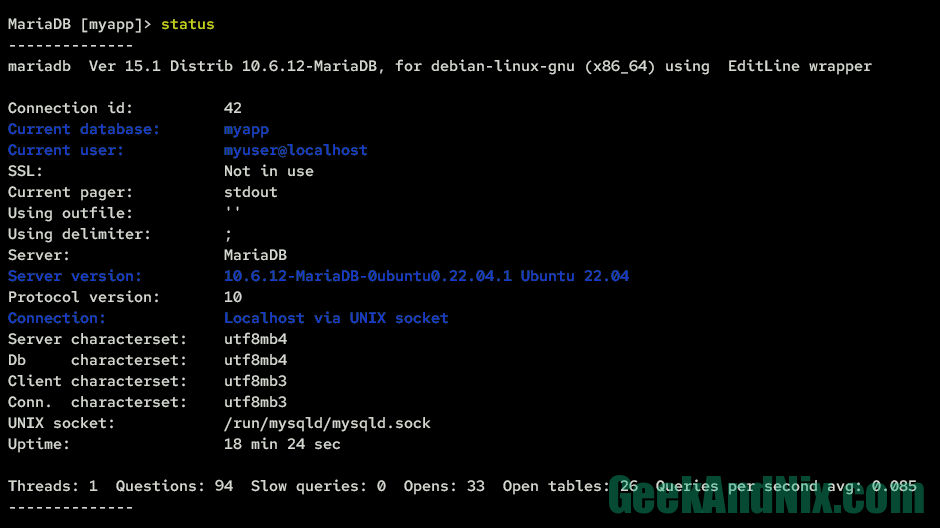
2. Now, run the status query to verify your connection to the MariaDB server.
statusThe output should display the detailed status of your current connection to the MariaDB server, which is logged in to the MariaDB server as a user myuser to the database myapp via UNIX socket connection.
Conclusion
Congratulations! By following these steps, you should now have a good understanding of how to install MariaDB via the Ubuntu repository and the official MariaDB repository. Furthermore, you have also secured the MariaDB server and configured the MariaDB root password via the mariadb-secure-installation script. And lastly, you have also learned how to connect to the MariaDB server via the mariadb command-line tool and learned how to create a database and user on MariaDB via the command line.
To take MariaDB to the next level, you could also secure data transit in MariaDB via SSL/TLS connections, improve the high availability via MariaDB Galera Cluster, or you can also install GUI or web-based MySQL client applications such as phpMyAdmin or Adminer.
System administrator and devops enthusiast, leveraging over 10+ years of Linux expertise to optimize operations. Proficient in FreeBSD, VMWare, KVM, Proxmox, PfSense, Ansible, Docker, and Kubernetes.


