How to Install and Manage Nginx web server on Ubuntu 24.04
Do you need the fastest web server that can handle high traffic with caching capabilities and low memory usage? Nginx web server is your answer.
For FreeBSD users, visit our guide How to Install and Configure Nginx on FreeBSD 14.
Through this tutorial, you will discover how to install and manage Nginx on Ubuntu 24.04 server.
Adding to that, you’ll dive into the configuration of server block or virtual host on Nginx, managing Nginx service, and the basic debugging process of Nginx service.
Prerequisites
For a successful outcome, you must have the following before starting this tutorial:
- A Linux server running Ubuntu 24.04.
See also: How to install Ubuntu 24.04 server (step-by-step) - An administrator user or non-root user with sudo/root privileges.
- An UFW (Uncomplicated Firewall) is up and running.
See also: Master 17 practical examples of UFW (Uncomplicated Firewall) - A domain name pointed to the server IP address. For local domain names, you can configure it through the
/etc/hostsfile.
Installing Nginx on Ubuntu Server
Nginx (pronounced as engine-x) is a lightweight and high-performance web server, reverse proxy, load balancer, HTTP cache, and mail proxy with a small footprint and small resource usage.
On Ubuntu, there are two different ways to install Nginx:
- Installing Nginx via Ubuntu repository: This allows you to install Nginx easily via the APT package manager without a third-party repository.
- Installing Nginx via the official Nginx repository: This allows you to install the latest version of Nginx, which means you get new features, security updates, and bug fixes.
Installing Nginx via Ubuntu Repository
Take the following steps to install Nginx via the Ubuntu repository.
1. First, update your Ubuntu package index to get the updated version of package information.
sudo apt update
2. Install Nginx using the following apt install command. When prompted, input y to confirm, then press ENTER.
sudo apt install nginx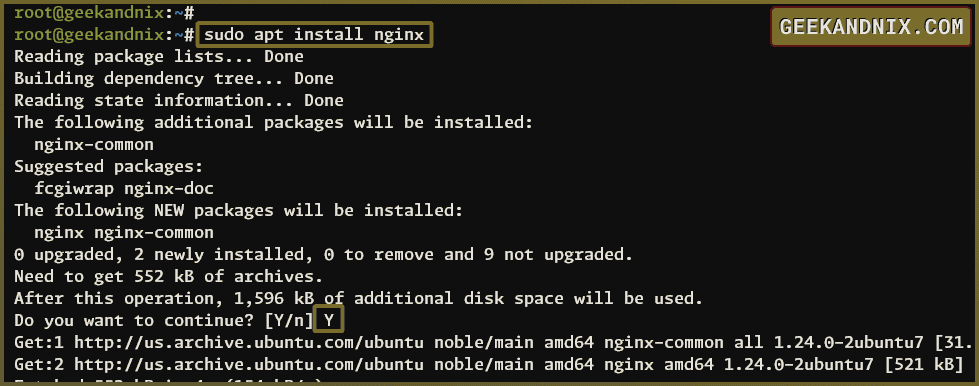
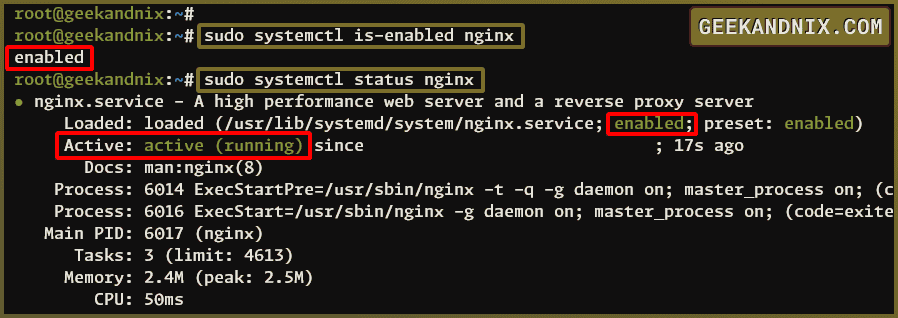
3. Once installation is finished, run the following command to verify the Nginx service and ensure that the se4rvice is running and enabled.
# checking if nginx is enbaled
sudo systemctl is-enabled nginx

# checking nginx service status
sudo systemctl status nginx
If Nginx running and enabled, you should receive an output that is similar to:
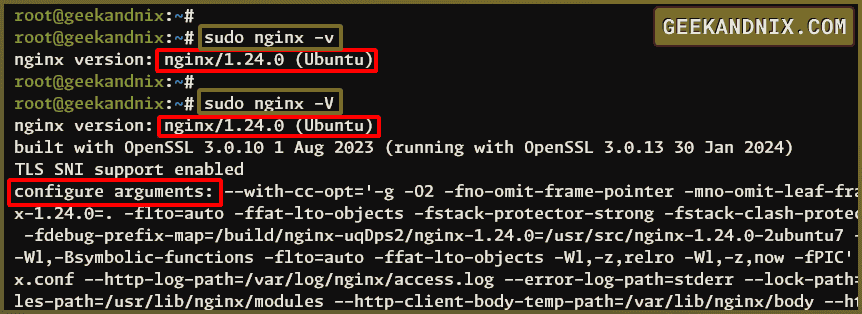
4. Lastly, run the following command to check the Nginx version.
# simple version
sudo nginx -v

# verbose or detailed version
sudo nginx -V
At this time, the Ubuntu repository provides Nginx version 1.24.
Installing Nginx on Ubuntu via the Official Nginx Repository
There are two versions of Nginx that available on the Nginx repository:
- Mainline: the most latest version of Nginx packages with more bugfixes and security updates.
- Stable: If you’re worried and concerned about the impacts when new features come, use the Nginx stable branch.
Proceed with the following steps to install Nginx via the official Nginx repository:
1. Run the following command to install some basic package dependencies.
sudo apt install curl gnupg2 ca-certificates lsb-release ubuntu-keyring2. Now, download and add the GPG key of the Nginx repository using the command below.
curl https://nginx.org/keys/nginx_signing.key | gpg --dearmor \
| sudo tee /usr/share/keyrings/nginx-archive-keyring.gpg >/dev/null
3. Choose the repository of the Nginx version that you want to install, between mainline and stable. Then, run the following command to add the Nginx repository.
Mainline branch:
echo "deb [signed-by=/usr/share/keyrings/nginx-archive-keyring.gpg] \
http://nginx.org/packages/mainline/ubuntu `lsb_release -cs` nginx" \
    | sudo tee /etc/apt/sources.list.d/nginx.list
Stable branch:
echo "deb [signed-by=/usr/share/keyrings/nginx-archive-keyring.gpg] \
http://nginx.org/packages/ubuntu `lsb_release -cs` nginx" \
    | sudo tee /etc/apt/sources.list.d/nginx.list
4. Next, run the following command to set up the repository pinning for Nginx packages. With this, Nginx packages from the official Nginx repository will be prioritized over the Ubuntu repository.
echo -e "Package: *\nPin: origin nginx.org\nPin: release o=nginx\nPin-Priority: 900\n" \
| sudo tee /etc/apt/preferences.d/99nginx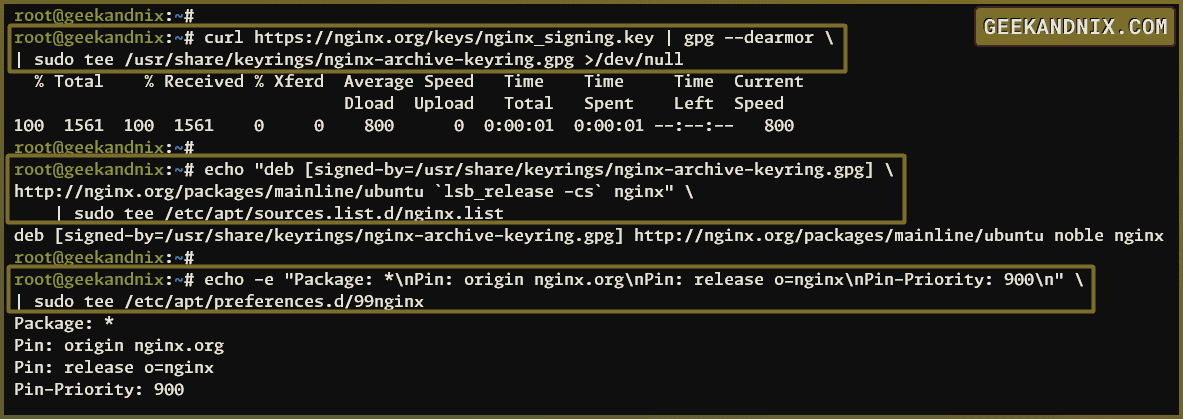
5. Now, update and refresh the Ubuntu package index to apply the new repository. Then, install Nginx using the apt install command below.
sudo apt update && sudo apt install nginxInput y when prompted, then press ENTER to proceed.
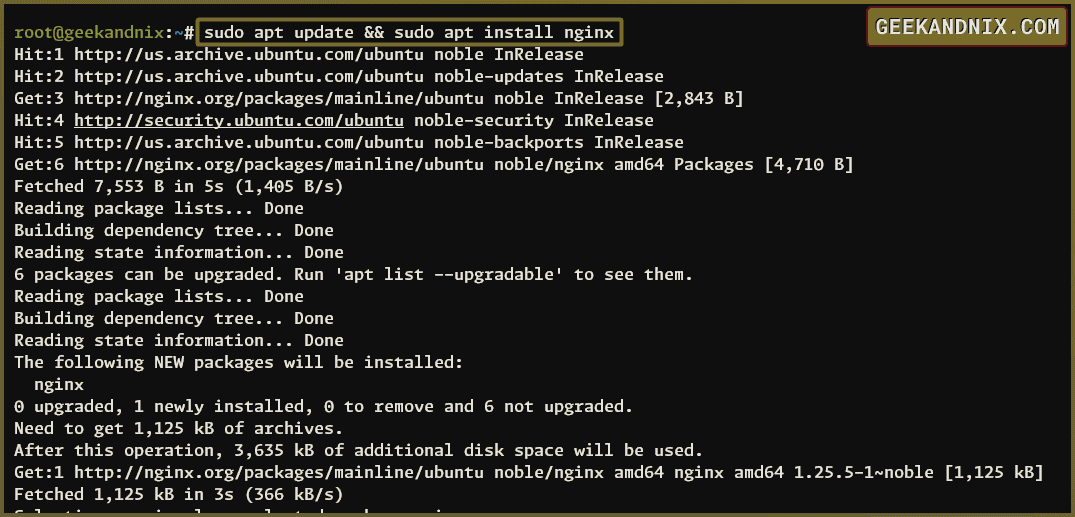
6. Once Nginx is installed, start and enable the Nginx service using the following command.
sudo systemctl enable --now nginx
7. Then, verify the Nginx service status to ensure that the service is running and enabled.
# checking nginx is enabled
sudo systemctl is-enabled nginx

# checking nginx status
sudo systemctl status nginx
When successful, you should expect an output like this:

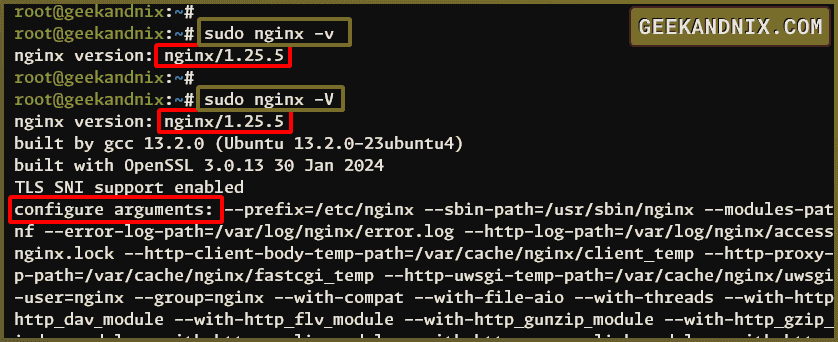
8. Lastly, run the following command to verify the Nginx version.
sudo nginx -v
sudo nginx -V
At this time, if you’re using a stable branch, you should get an output of Nginx version 1.26. And for the mainline branch, you should get Nginx version 1.25.5.
Opening HTTP and HTTPS Ports via UFW
When installing Nginx, the new UFW application profile for Nginx is included.
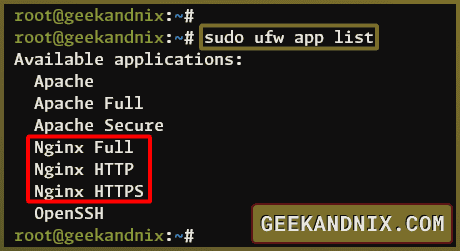
1. Run the following command to verify the list of UFW application profiles.
sudo ufw app listYou will notice three different Nginx application profiles like this:
- The Nginx HTTP: open the HTTP port 80 for Nginx.
- The Nginx HTTPS: open the HTTPS port 443 for Nginx.
- The Nginx Full: open both HTTP and HTTPS (ports 80 and 443) for Nginx.
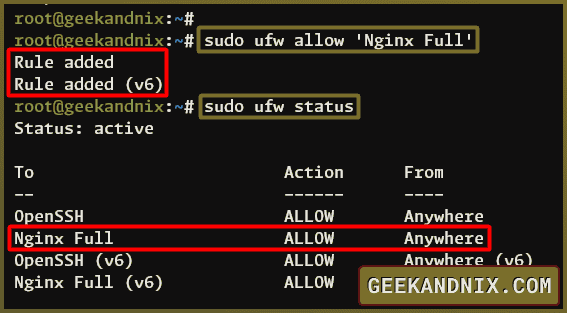
2. Now, run the ufw command below to add the Nginx Full application profile and open both ports 80 and 443. When successful, you should get an output such as Rule added.
sudo ufw allow "Nginx Full"3. Verify the UFW status and the list of available rules using the following command.
sudo ufw statusThe application profile Nginx Full should appear on the list of enabled rules with the Action = ALLOW.
Checking Nginx Web Server
After configuring UFW, you can move on to verify the Nginx installation.
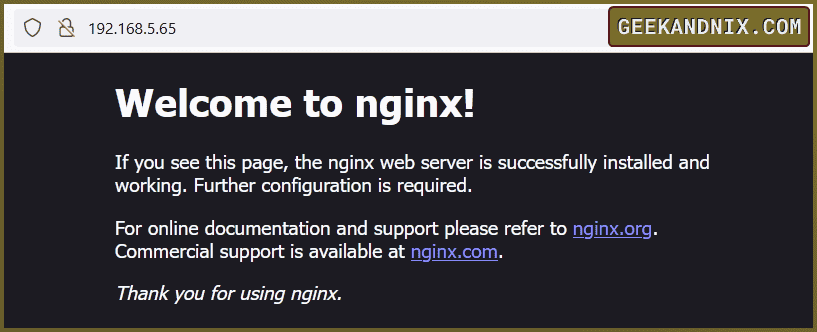
1. Open your web browser and type the server IP address on the address bar (i.e: http://192.168.5.35/).
When Nginx installation and UFW configuration are successful, the default index.html page of the Nginx web server should be displayed like this:
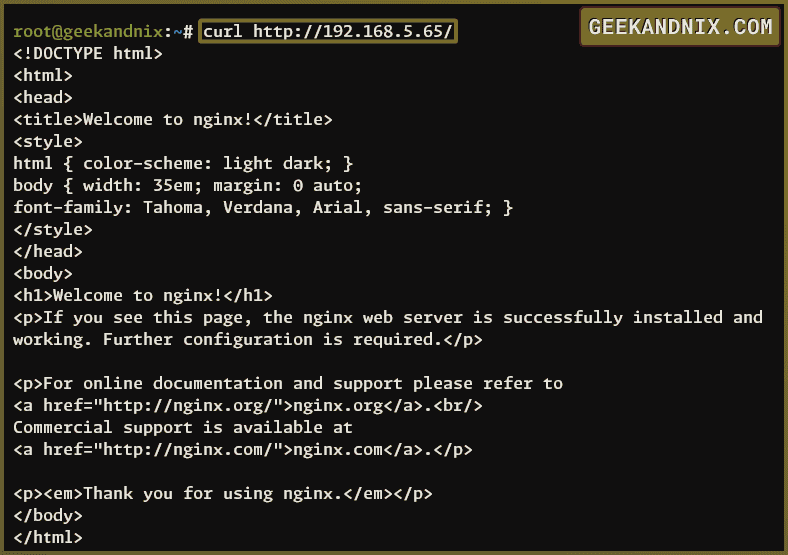
2. Furthermore, you can verify Nginx from the terminal using the curl command below.
curl http://192.168.5.65/The source code of the index.html page should be displayed on your terminal.
Guide to Nginx Configurations Files and Directories
Before you start configuring Nginx, you must have some basic knowledge about Nginx configuration files and directories.
1. On Ubuntu, Nginx configuration files are stored in the /etc/nginx directory. Below are some important Nginx configuration files and directories that you must know:
- nginx.conf: main configuration of Nginx web server.
- sites-available: a directory where the Nginx server blocks a.k.a virtual hosts stored.
- sites-enabled: a directory where server blocks are activated. All files inside this directory must be a symlink from the
sites-availabledirectory. - modules-available: Nginx custom modules will be stored in this directory, while the default modules stored in the
/usr/share/nginx/modules-availabledirectory. - modules-enabled: enabled modules for Nginx must be stored in this directory. All modules here are a symlink from
modules-availableor/usr/share/nginx/modules-availabledirectory.
2. In addition to that, the default Nginx log directory /var/log/nginx, which is important for debugging. By default, there are two log files available – access.log and error.log.
3. Lastly, the directory /var/www/html is the default web root directory for the Nginx web server. The default index.html file is available in this directory.
Configuring Nginx Server Block a.k.a Virtual Host
The Nginx server block or virtual host (on Apache) gives you the ability to set up multiple domain names on a single server or single IP address.
Before configuring the server block, decide which domain name and path of the web root directory that you want to use. In this case, you will set up a server block with the following:
- A domain name:
mydomainapp.com(local domain). - A web root directory:
/var/www/myappdirectory.
Setting Up Web Root Directory
First, you must create the web root directory and the index.html file.
1. Run the following command to create a new web root directory /var/www/myapp.
sudo mkdir -p /var/www/myapp2. Now, run the following command to create a new index.html file to the web root directory /var/www/myapp.
echo "<h1><center>Server Block: myapp.devel</center></h1>" >> /var/www/myapp/index.html3. Lastly, change the ownership of the /var/www/myapp directory to the user and group www-data using the command below.
sudo chown -R www-data:www-data /var/www/myapp
Creating Nginx Server Block Configuration
After creating web root directory and index.html file, you can now create a new Nginx server block to /etc/nginx/sites-available directory.
1. create a new Nginx server block configuration myapp.conf into the directory /etc/nginx/sites-available/ using your preferred editor.
sudo nano /etc/nginx/sites-available/myapp.conf2. Insert the following lines and be sure to change the parameter of root to your web root directory and server_name with your domain name.
server {
        listen 80;

        # web root directory and default index
        root /var/www/myapp;
        index index.html index.htm index.nginx-debian.html;

        # domain name
        server_name myapp.devel;

        location / {
                # First attempt to serve request as a file, then
                # as directory, then fall back to displaying a 404.
                try_files $uri $uri/ =404;
        }
}
When finished, save and exit the file.
Activating Nginx Server Block
To activate the Nginx server block, you must create a symlink of the server block configuration to the directory sites-enabled.
1. Run the following command to activate the server block configuration myapp.conf to the directory /etc/nginx/sites-enabled/.
sudo ln -s /etc/nginx/sites-available/myapp.conf /etc/nginx/sites-enabled/2. Next, run the following command to verify the list of files on the /etc/nginx/sites-enabled/ directory. You should expect to see the server block configuration myapp.conf.
ls /etc/nginx/sites-enabled/
Checking Nginx Configurations
With the server block configuration activated, you must verify the Nginx configuration to ensure that you have proper Nginx syntax and configurations.
1. Run the following command to verify the Nginx configuration.
sudo nginx -tWhen you have proper Nginx configurations, you should see the output like this:

2. Alternative to that, you can verify the Nginx configuration with the command below. The -T option allows you to print out details loaded Nginx configurations.
sudo nginx -TIf successful, you should get the same output as shown above, but also the Nginx configuration printed out to your screen.
Applying Nginx Server Block
Now that you’ve proper Nginx syntax, you can restart the Nginx service and apply your changes.
1. Now, run the following command to restart the Nginx service and apply the new changes on the server block.
sudo systemctl restart nginx2. Then, verify the Nginx service to ensure that the service is up and running.
sudo systemctl status nginx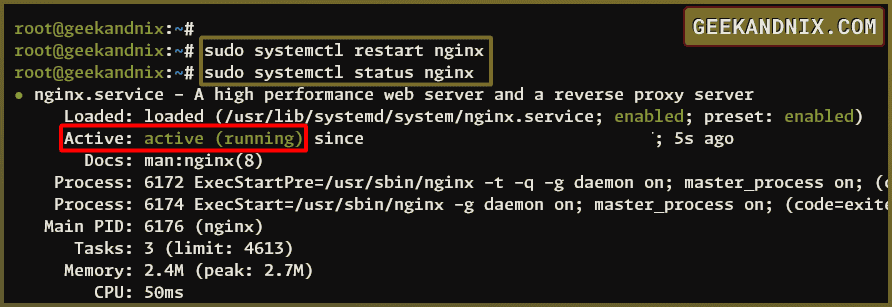
If successful, you should see the Nginx service is running like this:
3. In addition, you can also use the ss command below to verify HTTP port 80.
ss -tulpn | grep 80When successful, you should expect an output that HTTP port 80 is in the LISTEN state and used by Nginx.

Accessing Your Domain Name
After completing the previous steps, you should now have the Nginx server block up and running with your domain name.
Now let’s verify the server block configurations by accessing the target domain name from the web browser.
1. If you’re using a local domain, then you must add the following configuration to your local machine.
- For Linux, add the following configuration to the
/etc/hostsfile. - For Windows host, add to the
C:\Windows\System32\drivers\etc\hostsfile.
# server ip       # domain name
192.168.5.65      myapp.devel
2. Now, open your web browser and type your domain name on the address bar (e.g http://myapp.devel/).
If successful, you should get the index.html page like this:

Managing Nginx Service via systemctl Utility
If you’ve followed the tutorial so far, you should have the Nginx web server up and running. Furthermore, you also have a better grasp of understanding of how to set up server block or virtual host on Nginx.
Moving forward, you will learn how to manage the Nginx service on via the systemctl service manager for systemd.
1. To start Nginx, run the systemctl start command below.
sudo systemctl start nginx2. To restart the Nginx service, run the systemctl restart command below.
sudo systemctl restart nginx3. To stop the Nginx web server, run the systemctl stop command below.
sudo systemctl stop nginx4. To reload the Nginx service, run the systemctl reload command below.
sudo systemctl reload nginx5. Lastly, to verify the Nginx service status, run the systemctl status command below.
sudo systemctl status nginxDebugging Nginx Web Server
When it comes to troubleshooting in Nginx, follow these procedures:
1. Check the Nginx service to ensure that the Nginx is running via the systemctl command below.
sudo systemctl status nginx2. You can also utilize systemd logs to check details of logs on your system, including Nginx logs. Run the following command when Ngix fails to start. This will show you the last 20 lines of systemd logs.
sudo journalctl -n 203. Last but not least, you must keep an eye on the Nginx log files in the /var/log/nginx directory.
Run the following tail command to print the last 10 lines of the Nginx log file. Each Nginx server block can have a different log file, ensure to change the path of the log filename.
tail -f /var/log/nginx/error.logUninstalling Nginx from Ubuntu Server
In case you want to uninstall and remove Nginx, take the following steps:
1. First, run the following command to stop and disable the Nginx service.
sudo systemctl disable --now nginx2. Now, run the following command to uninstall Nginx packages.
# uninstall nginx
sudo apt remove nginx -y

# remove unnecessary packages
sudo apt autoremove -y
3. After that, remove the Nginx configuration directory /etc/nginx using the command below.
sudo rm -rf /etc/nginxConclusion
In summary, you’ve successfully installed Nginx on Ubuntu Server 24.04, whether via the Ubuntu repository or the official Nginx repository. You’ve also learned how to set up a Nginx server block that allows you to host multiple domain names in a single server.
With this in your hand, you can now other softwares such as PHP-FPM and MySQL/MariaDB. You can also run CMS (Content Management System) like WordPress and Drupal.


