How to Install and Secure phpMyAdmin on FreeBSD 14
Managing MySQL/MariaDB servers from the command line is challenging for some people. To solve this, you can install phpMyAdmin to manage the MySQL/MariaDB server via a web browser. The phpMyAdmin is a web application that can be installed on most operating systems, including FreeBSD.
In this guide, I will show you how to install and secure phpMyAdmin on the FreeBSD 14 server. I also cover how to connect securely to phpMyAdmin via SSH tunneling.
Without any delay, let’s begin!
Prerequisites
Before you proceed, make certain that you have the following:
- A FreeBSD 14 server was initialized with sudo for administrator privileges.
- The Apache web server, PHP, and MySQL or MariaDB are installed, up and running.
Checking PHP, Apache, and MySQL/MariaDB
Before installing phpMyAdmin, you will ensure that PHP, Apache, and MySQL/MariaDB are ready. You will verify the current PHP version and ensure the mod_php is enabled. Then, you will ensure both Apache and MySQL/MariaDB services are running.
Follow through these actions to check phpMyAdmin dependencies:
1. First, run the command below to verify your PHP version. In this example, I will use PHP 8.3 for installing phpMyAdmin.
php --version2. Now, run the command below to verify the mod_php module in your Apache web server.
apachectl -M | grep phpAs you can see below, the mod_php module for Apache is enabled.
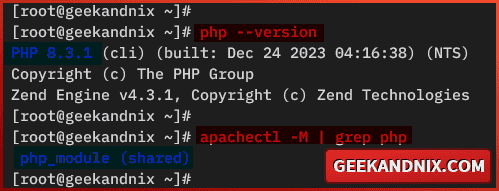
3. Next, run the command below to verify the apache24 service and ensure that the service is running.
service apache24 statusAs pointed out below, the apache24 service status is running.
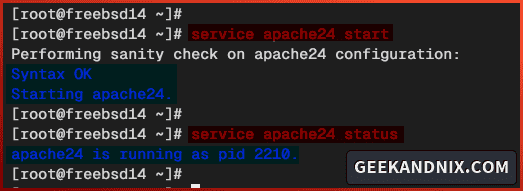
4. Lastly, run the following command to verify the MySQL/MariaDB service status.
service mysql-server statusYou can see below the MySQL/MariaDB service is running.

Installing phpMyAdmin on FreeBSD
With dependencies ready, let’s jump to the phpMyAdmin installation via the package manager. On FreeBSD, you can install the latest phpMyAdmin via the PKG package manager. But, if you prefer manually, you can install it via Ports or download the source code manually.
Perform the following steps to install phpMyAdmin on FreeBSD:
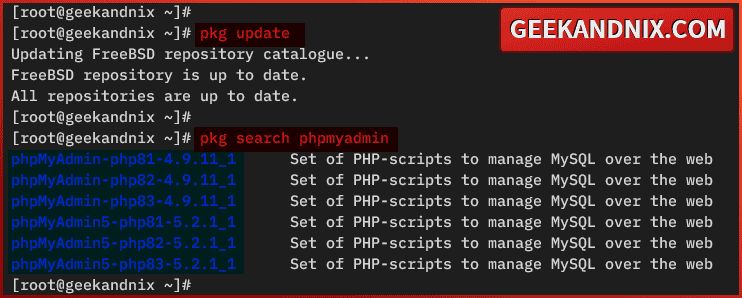
1. Before installing phpMyAdmin, run the command below to update the FreeBSD package index and find packages with the name phpmyadmin.
# updating repository package index
pkg update

# searching phpmyadmin packages
pkg search phpmyadmin
In the picture below, you can see there are multiple phpMyAdmin packages for different PHP versions.
2. Now, run the command below to install phpMyAdmin for PHP 8.3 version. Be sure to choose the phpMyAdmin package that matches your PHP version.
pkg install phpMyAdmin5-php83Enter y to advance to the installation.
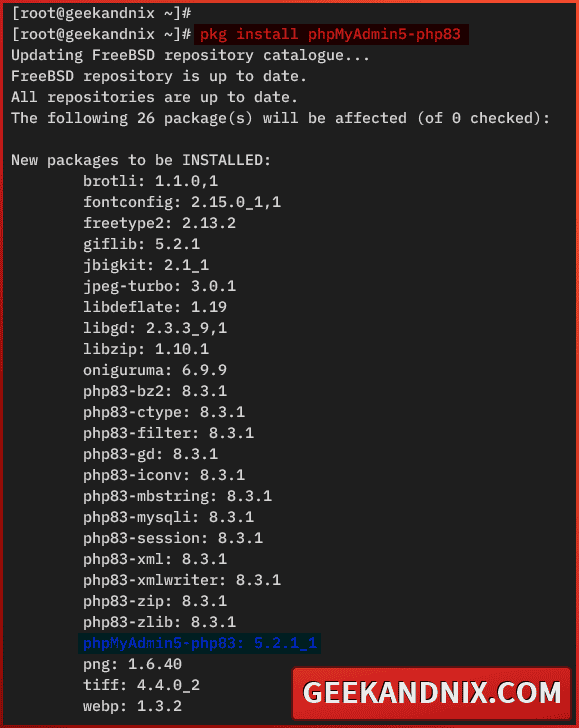
3. Once the installation is complete, the phpMyAdmin should be installed in the /usr/local/www/phpMyAdmin/ directory, with the default configuration /usr/local/www/phpMyAdmin/config.inc.php.
4. Lastly, run the following command to verify the phpMyAdmin source code in the /usr/local/www/phpMyAdmin/ directory.
ls /usr/local/www/phpMyAdmin/You can phpMyAdmin source code like the picture below:

Creating MySQL/MariaDB user for phpMyAdmin
With your successful installation of phpMyAdmin, let’s navigate to create a new MySQL/MariaDB user for managing databases via phpMyAdmin. The main idea is to not use MySQL root user for phpMyAdmin.
Carry out the following tasks to create a new MySQL/MariaDB user for phpMyAdmin:
1. First, log in to the MySQL/MariaDB server using the command below. Enter your MySQL/MariaDB root password when prompted.
mysql -u root -p2. Run the following query to create a new user that will be used for managing MySQL/MariaDB via phpMyAdmin. In this case, I will create a new user john with the password JohnStrongP4ssword for the phpMyAdmin.
CREATE USER 'john'@'localhost' IDENTIFIED BY 'JohnStrongP4ssword';3. Now, run the query below to allow user john to access any databases in the MySQL/MariaDB server. Then, reload table privileges to apply your modifications.
GRANT ALL PRIVILEGES ON . TO 'john'@'localhost' WITH GRANT OPTION;
FLUSH PRIVILEGES;
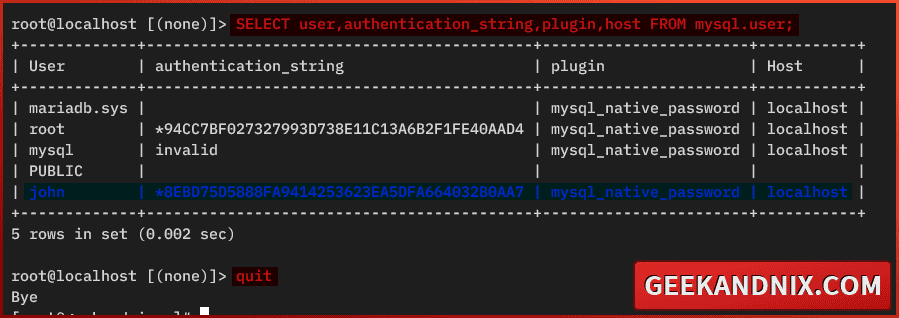
4. Next, execute the following query to check users in the MySQL/MariaDB server. Ensure that your new user is available on the MySQL/MariaDB server.
SELECT user,authentication_string,plugin,host FROM mysql.user;5. Lastly, type quit to exit from the MySQL/MariaDB server.
Configuring phpMyAdmin on FreeBSD
Now that you have created the MySQL/MariaDB user, move on to the phpMyAdmin configuration. Here’s you will set up phpMyAdmin with the following:
- Editing the
config.inc.phpfile: This is needed to enable cookie authentication and set up the default MySQL/MariaDB server connection. - Integrating phpMyAdmin with Apache: This will ensure your phpMyAdmin is accessible via Apache.
Let’s dive right in!
Editing config.inc.php
Here you will modify the phpMyAdmin configuration config.inc.php, enable the cookie authentication, and then set up the default MySQL/MariaDB server that phpMyAdmin will connect to.
1. Before editing the phpMyAdmin configuration, run the openssl command below to generate 32 random characters. Copy the generated string, you will need it for later.
openssl rand -base64 222. Now, open the phpMyAdmin configuration using the vim editor.
vim /usr/local/www/phpMyAdmin/config.inc.php3. Add the following configuration to enable cookie authentication for phpMyAdmin. Be sure to change the blowfish_secret with your 32 random characters.
// use here a value of your choice at least 32 chars long
$cfg['blowfish_secret'] = '9MD4KyCbxjaAD37RhSznlRmlktqt2w==';

$i=0;
$i++;
$cfg['Servers'][$i]['auth_type']     = 'cookie';
4. Insert the configuration below to set up the default MySQL/MariaDB server to 127.0.0.1. This is the target MySQL/MariaDB server to which phpMyAdmin will be connected to.
// default connection to 127.0.0.1
$cfg['Servers'][$i]['host'] = '127.0.0.1';
Save the edits and close the file.
Integrating phpMyAdmin with Apache web server
In this section, you will modify the Apache configuration httpd.conf and add a new configuration that will be used to run phpMyAdmin.
1. First, run the vim command below to open the Apache configuration /usr/local/etc/apache24/httpd.conf.
vim /usr/local/etc/apache24/httpd.confAdd the index.php as the default index page to the DirectoryIndex option.
<IfModule dir_module>
    DirectoryIndex index.html index.php
</IfModule>
Insert the following configuration to set up integration for phpMyAdmin with the Apache web server. In this example, the phpMyAdmin will be accessible via the URL path /pma.
# httpd
Alias /pma/ "/usr/local/www/phpMyAdmin/"

<Directory "/usr/local/www/phpMyAdmin/">
    Options None
    AllowOverride All
    Require all granted
</Directory>
Save the file and exit when done.
2. Now, run the command below to verify the Apache syntax. if you have the correct syntax, you should get an output Syntax OK.
apachectl configtest3. Lastly, run the service command below to restart the apache24 service and implement your changes.
service apache24 restartAccessing phpMyAdmin
So far, you have completed the phpMyAdmin configuration. Let’s now verify your installation by accessing phpMyAdmin from your local computer.
To access your phpMyAdmin installation, follow these steps:
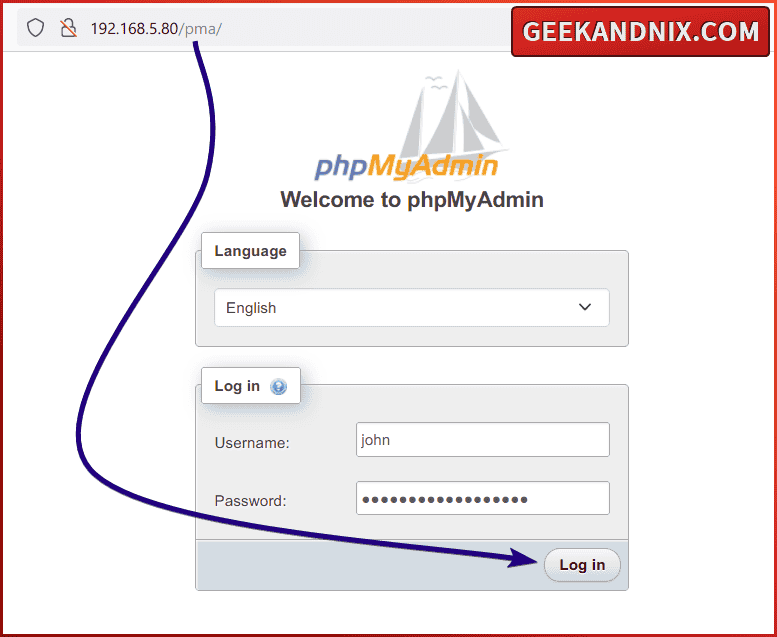
1. Open your web browser and visit http://192.168.5.80/pma/. If your installation is successful, you should get the phpMyAdmin login page.
Input your MySQL/MariaDB username and password, then click Log in.
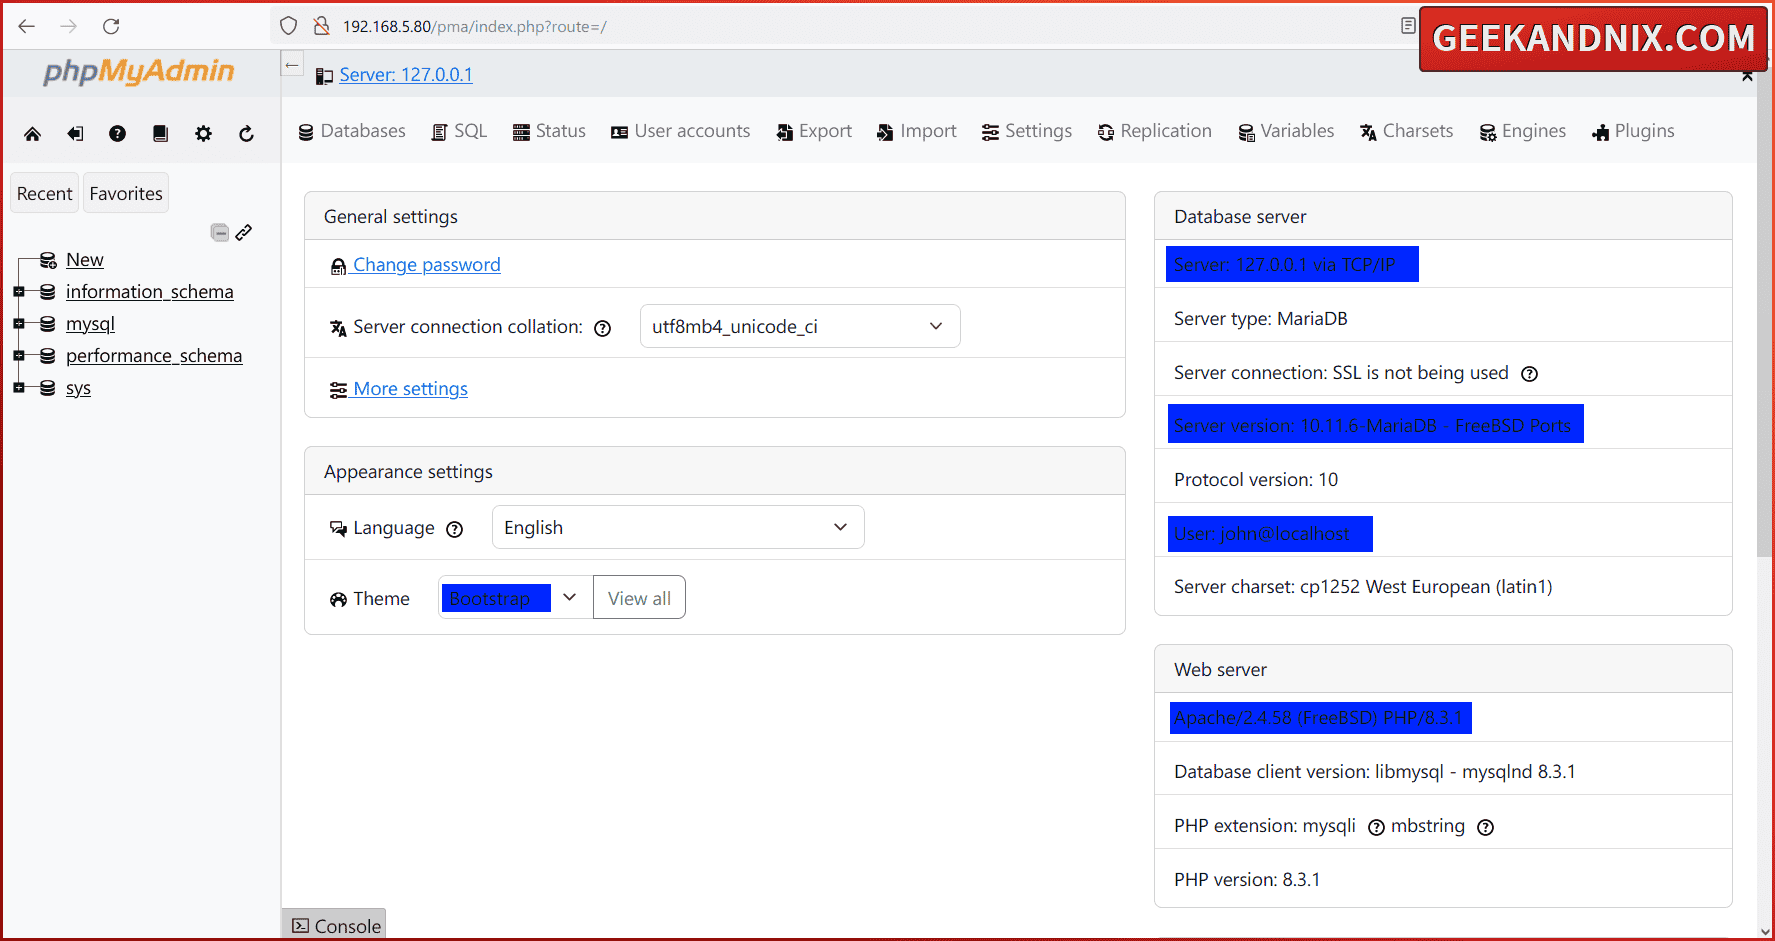
2. If you have the correct MySQL/MariaDB credentials, you should be presented with the phpMyAdmin dashboard like the following – In this picture, I’ve changed the theme to Bootstrap:
3. At the first login, scroll down to the bottom page and you will see an error related to the phpMyAdmin storage configuration. Click the link Find out why.

4. Now, click Create to set up a new database phpmyadmin that will be used for the default phpMyAdmin storage.

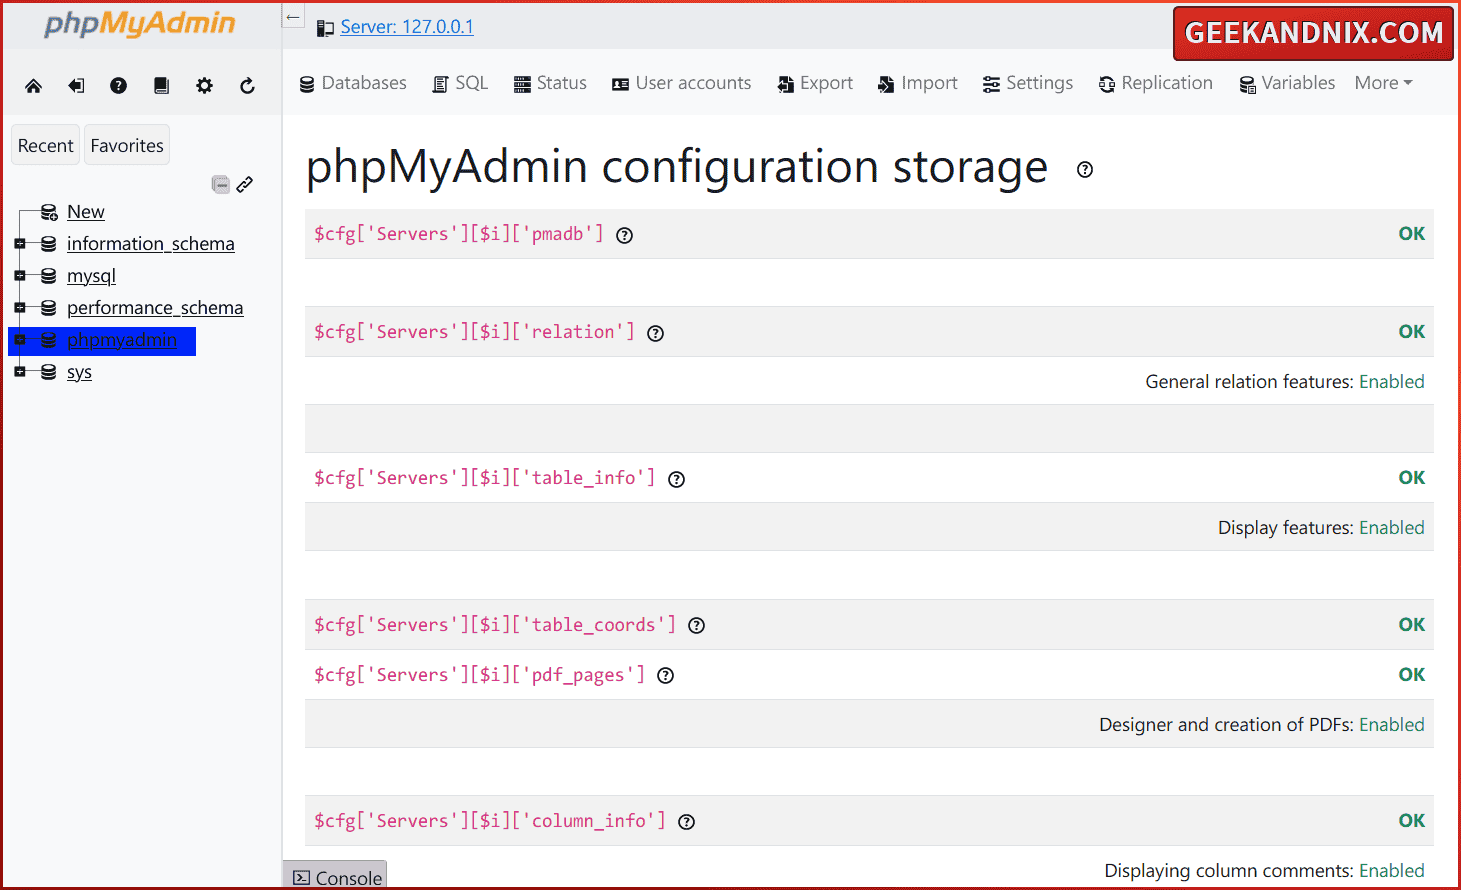
5. Once the database is created, you will see the following confirmation – also, you can see some additional features are enabled.
Securing phpMyAdmin with Apache basic_auth
In this guide, you will set up additional authentication for phpMyAdmin via Apache’s basic_auth module. This will strengthen the security of your phpMyAdmin because only authenticated users will get the phpMyAdmin login page.
Execute the following actions to secure phpMyAdmin with Apache basic_auth module:
1. First, run the vim command below to create the .htaccess file on the /usr/local/www/phpMyAdmin/ directory.
vim /usr/local/www/phpMyAdmin/.htaccessAdd the following configuration to set up phpMyAdmin authentication via Apache’s basic_auth module. In this case, only the user in the /usr/local/etc/apache24/.htpasswd will be allowed to access phpMyAdmin.
AuthType Basic
AuthName "Restricted Access"
AuthUserFile /usr/local/etc/apache24/.htpasswd
Require valid-user
Save and exit the file when finished.
2. Run the htpasswd command below to generate a new password file /usr/local/etc/apache24/.htpasswd with the first user john. Input your password when prompted and repeat.
# add new htpasswd file with first user john
sudo htpasswd -B -c /usr/local/etc/apache24/.htpasswd john

# add user david to existing htpasswd file
sudo htpasswd -B /usr/local/etc/apache24/.htpasswd david
3. Now, run the command below to restart the apache24 service and implement your changes.
service apache24 restart4. Lastly, open a new tab and visit your phpMyAdmin installation http://192.168.5.80/pma/.
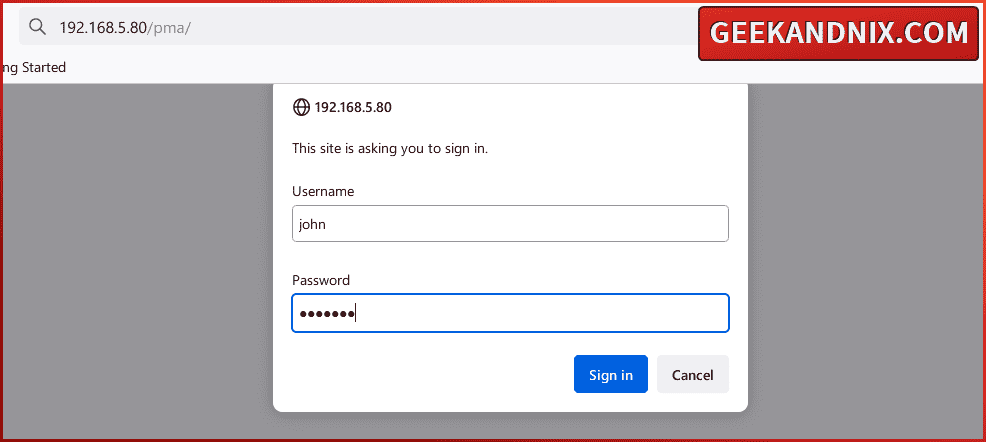
If your Apache24 basic_auth configuration was successful, you will be shown the pop-up login for authentication. Input your Apache basic_auth user and password, then click Sign in.
Connecting to phpMyAdmin securely via SSH tunneling
You should always access your phpMyAdmin securely, especially if on the remote server. To accomplish this, you can use SSL from your Apache web server or via SSH tunneling. In this case, I will cover the SSH tunneling method.
Follow through on these actions to connect to phpMyAdmin via SSH tunneling:
1. On your local machine, run the ssh command below to create SSH tunneling to your FreeBSD server. This will create secure tunneling for port 80 on the FreeBSD server to the localhost port 8080.
ssh -L 8080:localhost:80 [email protected]Be sure to use your username and enter your password when asked.

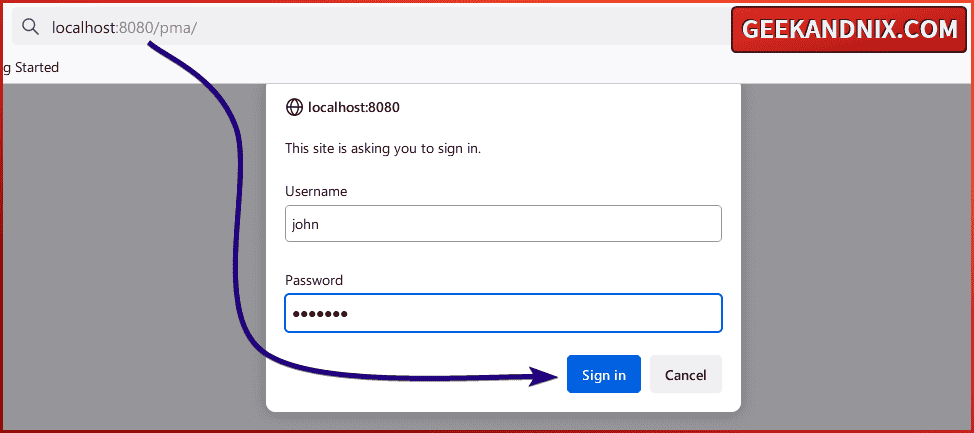
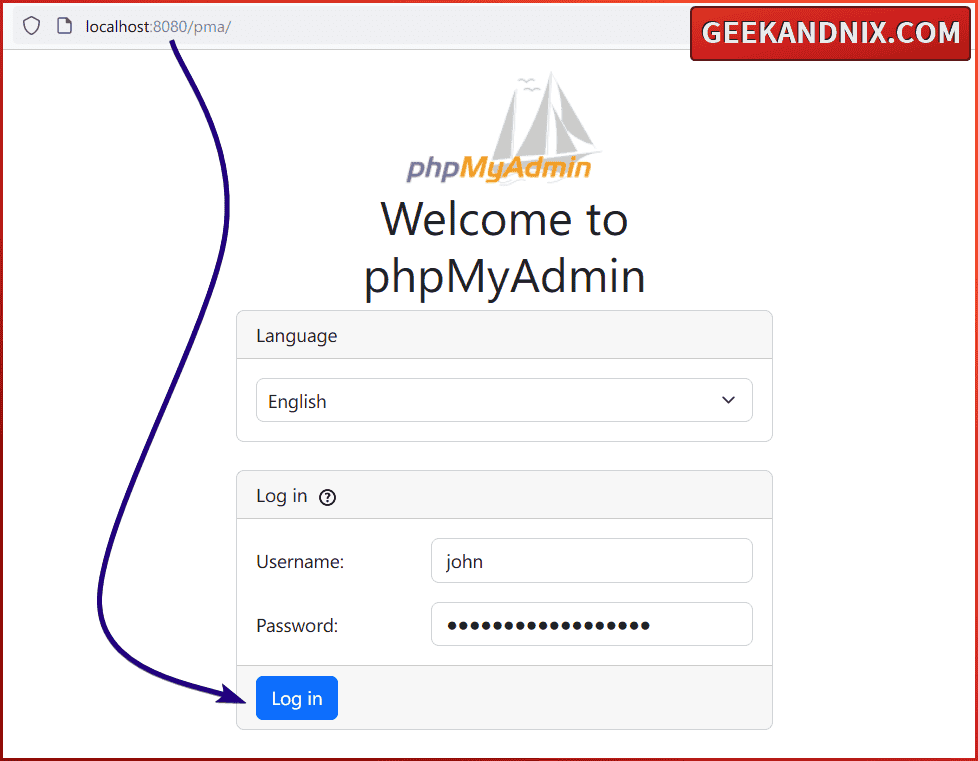
2. Now, back to your web browser and open your phpMyAdmin installation via URL http://localhost:8080/pma. Input your credentials for Apache basic_auth and click Sign in.
3. If authentication is successful, you should see the phpMyAdmin login page like the following – You can now log in to phpMyAdmin via MySQL/MariaDB user:
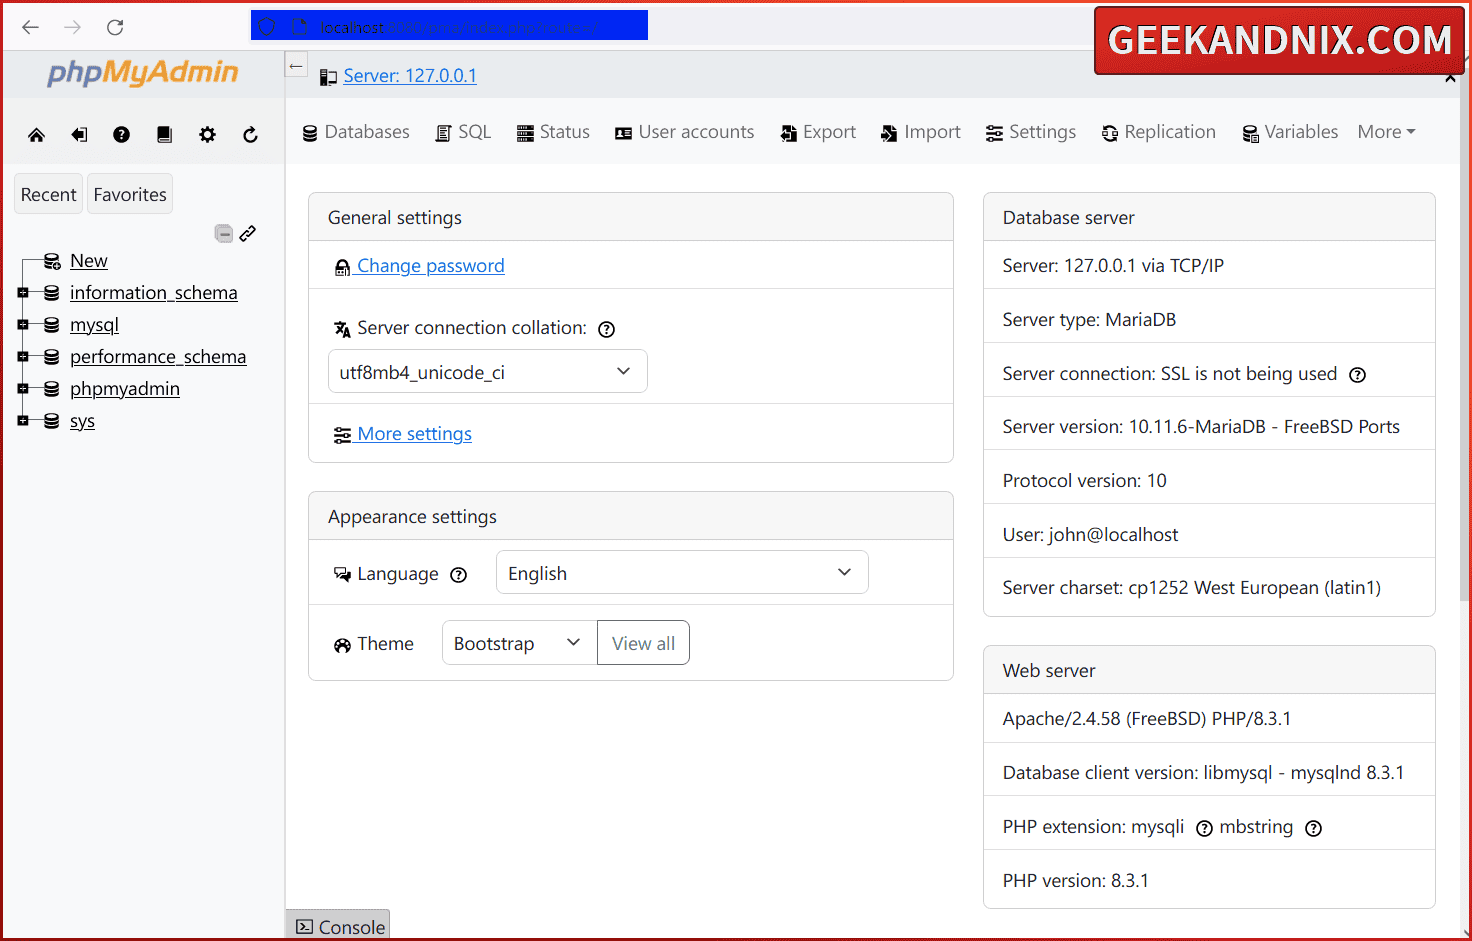
4. If you have correct credentials for MySQl/MariaDB server, you will see the phpMyAdmin dashboard like this – from here, you can now manage your MySQL/MariaDB databases securely via phpMyAdmin.
Common error in phpMyAdmin installation
When creating this guide, I got two errors below:
1. First, I got an error mysqli::real_connect(): (HY000/2002): No such file or directory when logging in to phpMyAdmin. To solve this issue, you need to specify the default MySQL/MariaDB server on the config.inc.php.
Add the following line to your config.inc.php.
// default connection to 127.0.0.1
$cfg['Servers'][$i]['host'] = '127.0.0.1';
2. Secondly, I also got an error AuthType not allowed here when integrating phpMyAdmin with the Apache web server. To solve this, ensure that you have configuration AllowOverride all within the phpMyAdmin directive, such as:
<Directory "/usr/local/www/phpMyAdmin/">
    Options None
    AllowOverride All
    Require all granted
</Directory>
Conclusion
Good job and well done! You have completed the installation of phpMyAdmin on the FreeBSD 14 server with Apache, PHP 8.3, and MySQL/MariaDB. You also secured phpMyAdmin via the Apache basic_auth module and learned how to connect securely to phpMyAdmin via SSH tunneling.
Moving forward, it’s recommended to secure phpMyAdmin by implementing SSL, and you can also add a remote MySQL server to your phpMyAdmin.
