How to Install phpMyAdmin on Debian 12
In this guide, I will show you how to install phpMyAdmin on Debian 12 server.
The phpMyAdmin is a web application written in PHP for managing MySQL/MariaDB servers. Here, I will teach you how to install phpMyAdmin via the Debian repository, then how to secure it via the basic_auth authentication module, and lastly how to securely access phpMyAdmin via SSH tunneling.
tl;dr:
- You can easily install phpMyAdmin on Debian via the
apt install phpmyadmincommand. - Strengthen your security via
basic_authfor additional authentication. - Always use HTTPS or SSH tunneling to connect to phpMyAdmin.
Prerequisites
To start this guide, make sure you have:
- A Debian 12 server initialized with non-root user sudo privileges.
- The LAMP Stack (Apache, MySQL/MariaDB, and PHP) is installed.
Installing required PHP Extensions
Before installing phpMyAdmin, you must ensure PHP extensions mysqli, mbstring, gd, and zip are installed. Follow these steps to install those PHP extensions to your Debian server:
1. First off, run the command below to update your Debian package index.
sudo apt update2. Now, run the apt install command below to install PHP extensions that are required by phpMyAdmin, such as mysql, mbstring, gd, and zip.
sudo apt install php-mysql php-mbstring php-gd php-zipInput Y and hit Enter to confirm the installation.

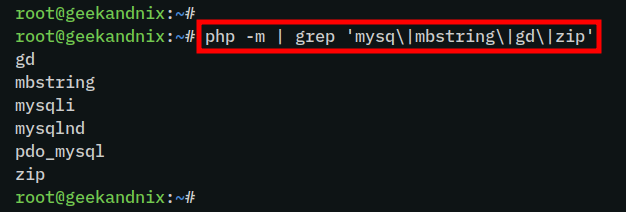
3. Once the installation is complete, run the command below to verify list-enabled PHP extensions.
php -m | grep 'mysq\|mbstring\|gd\|zip'If extensions mysqli, mbstring, gd, and zip are enabled, you will get an output like the following:
Creating MySQL/MariaDB administrator user
Now you will need to create a new MySQL/MariaDB administrator user for phpMyAdmin. So instead of using MySQL/mariaDB root user, you will be using this user for managing databases via phpMyAdmin.
To create a MySQL/MariaDB administrator user, follow these steps:
1. log in to the MySQL/MariDB server as a root user using the command below. Enter your MySQL/MariaDB root password when prompted.
sudo mysql -u root -p2. Now, run the following queries to create a MySQL/MariaDB administrator user david with the password StrongP4ssword. Then, allow the user david to access all databases and reload table privileges to apply your edits.
# create mysql user
CREATE USER 'david'@'localhost' IDENTIFIED BY 'StrongP4ssword';

# allow user david to access databases in MySQL/MariaDB server
GRANT ALL PRIVILEGES ON *.* TO 'david'@'localhost' WITH GRANT OPTION;

# reloading table privileges
FLUSH PRIVILEGES;
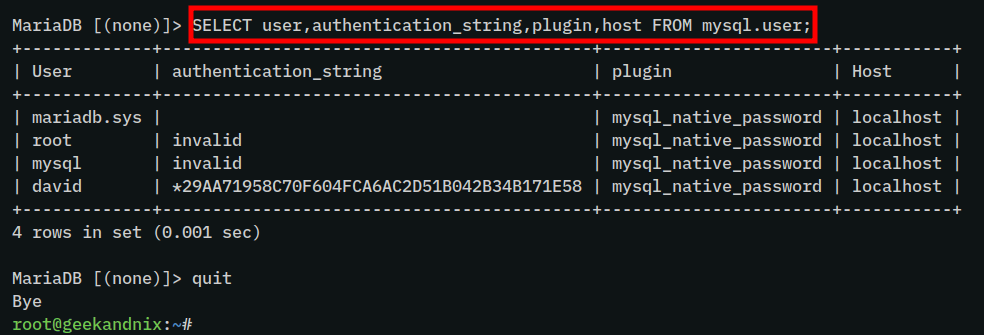
3. Lastly, run the query below to verify the list of users on the MySQL/MariaDB server. Then, type quit to log out.
# listing MySQL/MariaDB users
SELECT user,authentication_string,plugin,host FROM mysql.user;

# exit
quit
You will see user david is created as administrator on the MySQL/MariaDB server:
Installing phpMyAdmin via the Debian repository
By default, the phpMyAdmin is available on the Debian repository and can be installed via APT. This will automatically install other packages such as Apache and PHP packages. So this is suitable if you’re using the LAMP Stack or using a fresh Debian server.
To install and secure phpMyAdmin on Debian, complete the following steps:
1. Run the following apt install command to install phpMyAdmin via the Debian repository. Type Y to confirm the installation.
sudo apt install phpmyadminSelect apache2 as a web server for the phpMyAdmin.
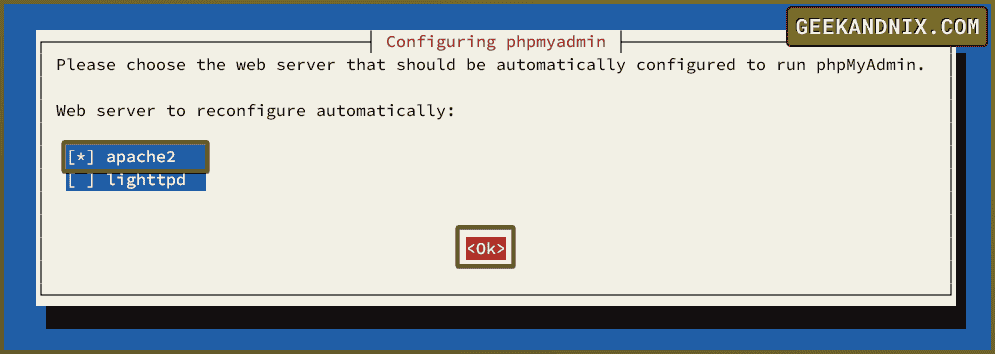
Select Yes to configure the phpMyAdmin database via dbconfig-common.

Type the password for the phpMyAdmin database and repeat.

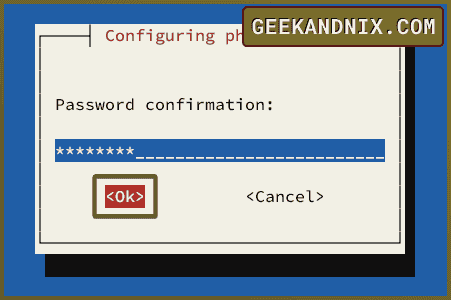
2. Once the installation is finished, take a look at the following configuration file and directory:
/etc/phpmyadmin: The configuration for phpMyAdmin. You’ll find the main configurationconfig.ini.phpin this directory./var/www/phpmyadmin: The phpMyAdmin source code is stored in this directory./etc/apache2/conf-available/phpmyadmin.conf: The Apache snippet configuration for phpMyAdmin.
3. Now, run the vim editor to open the Apache snippet for phpMyAdmin /etc/apache2/conf-available/phpmyadmin.conf.
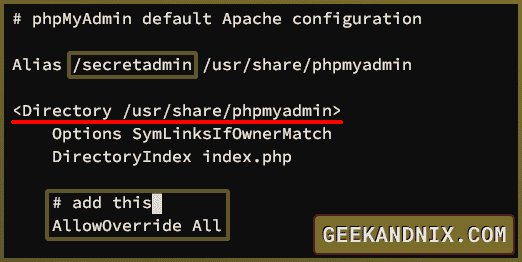
sudo vim /etc/apache2/conf-available/phpmyadmin.confChange the default /phpmyadmin path to a new path such as Alias /secretadmin. Thus will change the default access to phpMyAdmin to the new URL path /secretadmin.
Alias /secretadmin /var/www/phpmyadminAdd the new line AllowOverride All to the directive <Directory /usr/share/phpmyadmin> ... </Directory>. With this, you’ll allow overriding Apache settings via the .htaccess file to this directive.
AllowOverride AllWhen done, save and exit the file.
4. Then, create a new file /var/www/phpmyadmin/.htaccess using vim.
sudo vim /var/www/phpmyadmin/.htaccessPaste the following configuration to secure phpMyAdmin with the Apache basic_auth module.
AuthType Basic
AuthName "Restricted Access"
AuthUserFile /etc/phpmyadmin/.htpasswd
Require valid-user
Save and exit the file.
5. Next, run the following htpasswd command to create a new password file /etc/phpmyadmin/.htpasswd and make sure to change the username david with your user.
sudo htpasswd -c /etc/phpmyadmin/.htpasswd davidEnter your password and repeat when prompted:

6. Now, run the apachectl command below to check your Apache syntax and restart the Apache service to apply your modifications.
sudo apachectl configtest
sudo systemctl restart apache2
The output Synatax OK confirms that your Apache configuration is correct.
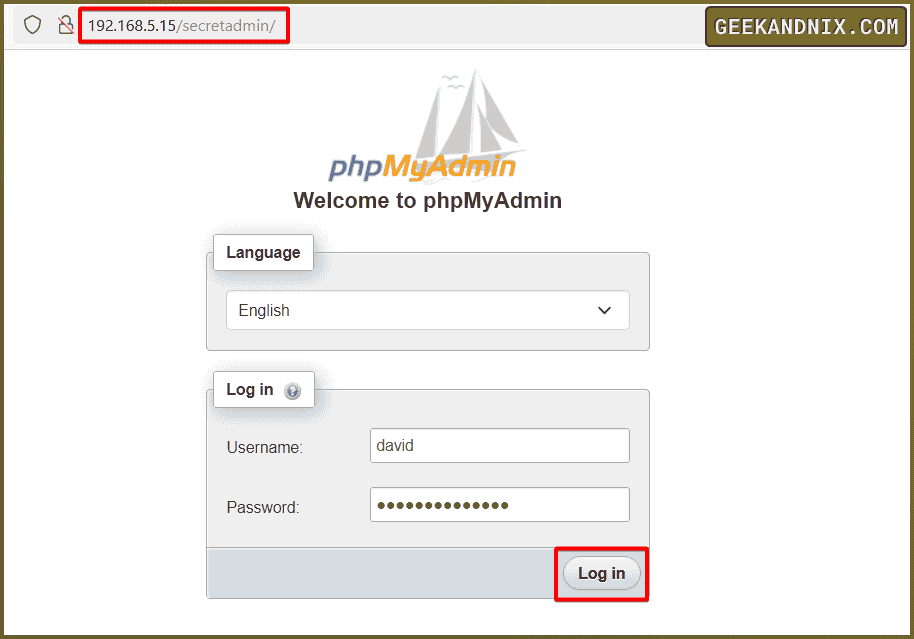
7. Lastly, visit http://192.168.5.15/secretadmin to access your phpMyAdmin. Enter your basic_auth user and password when asked and click Sign In.
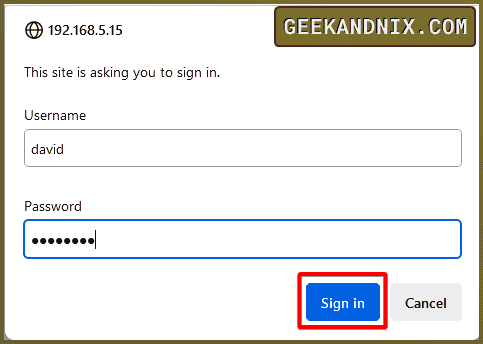
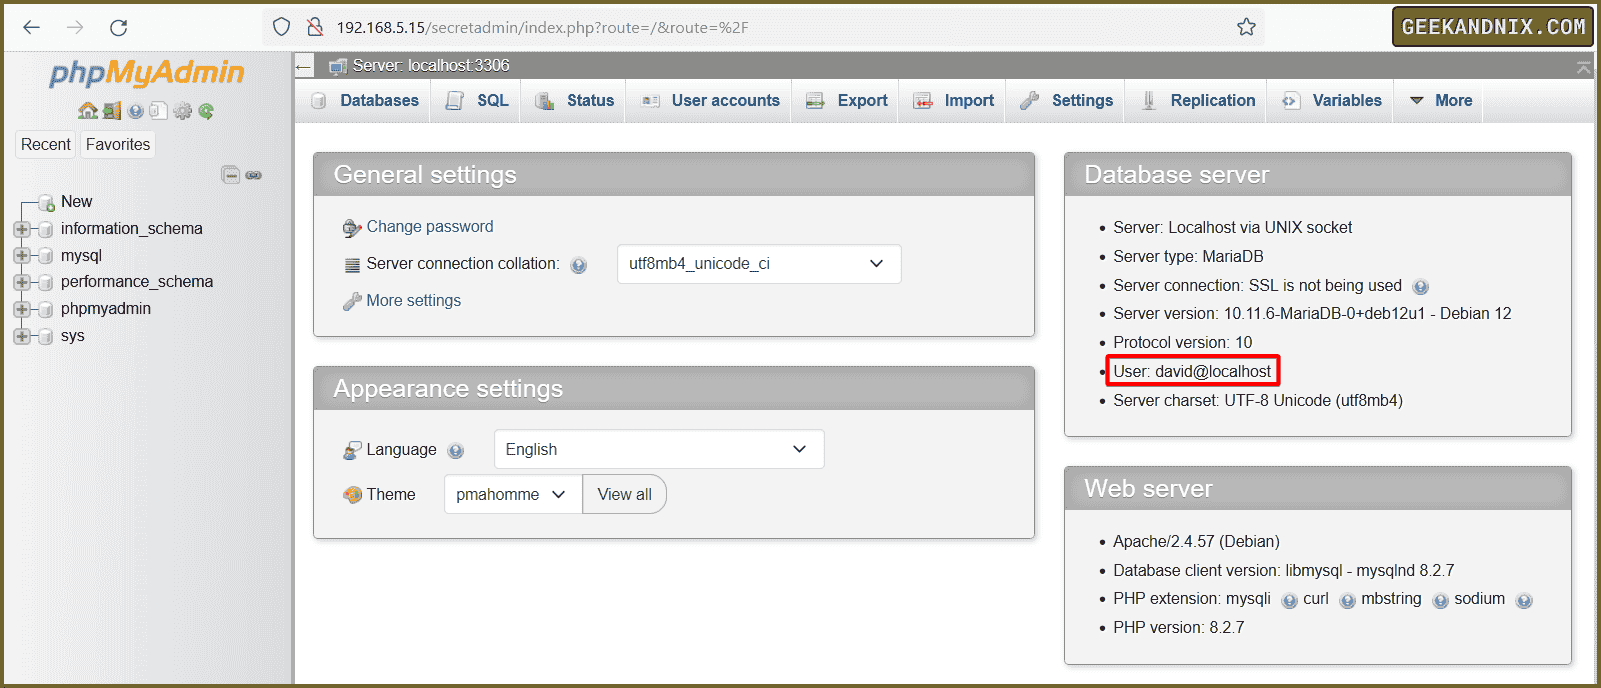
Once logged in, you will see the phpMyAdmin login page. Type MariaDB administrator user and password, then click Log in.
Now you will get the phpMyAdmin dashboard.
Connecting to phpMyAdmin with SSH Tunneling
In this section, you’ll access phpMyAdmin via SSH tunneling, which will secure your MySQL/MariaDB database management. Use this as an alternative for SSL if you’re deploying on a public server or internet.
1. On your local computer, run the ssh command below to create secure SSH tunneling to your Debian server. Make sure to type your password when asked.
In this example, you will set up SSH tunneling for port 80 on the server to port 8080 on your local machine.
ssh -L 8000:localhost:80 [email protected]
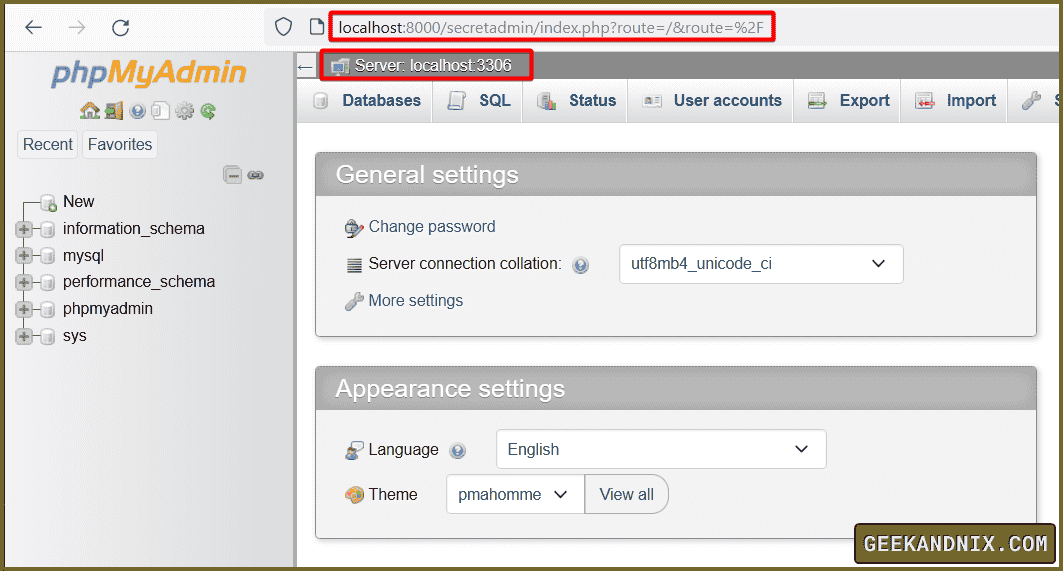
2. Now visit your phpMyAdmin via URL http://localhost:8080/secretadmin and you will be prompted with the Apache basic_auth authentication. From here, you can log in to your phpMyAdmin and manage the MySQL/MariaDB server securely.
Conclusion
In this guide, you have installed phpMyAdmin on Debian 12 server. You also have secured phpMyAdmin with additional authentication via the basic_auth module and learned how to connect to phpMyAdmin securely via SSH tunneling.
