How to Install NTP Server and Client with ntpd on FreeBSD 14
NTP or Network Time Protocol plays a crucial role in distributed computer networks. Especially for time synchronization across networks and relying on timestamps to get data accuracy. On FreeBSD, you can easily create an NTP server and client with the ntpd or NTP daemon.
In this tutorial, I will show you how to install the NTP server and client via ntpd on FreeBSD 14.
Without delay, let’s get started!
Prerequisites
To complete this tutorial, you will need to have access to the following:
- A FreeBSD 14 server initialized with sudo root/administrator privileges and pf (Packet Filter) firewall.
- A FreeBSD client machine that will be used as an NTP client.
Enabling ntpd on FreeBSD
NTPD or NTP daemon is a system daemon for creating both an NTP server and a client. It is available by default on FreeBSD, you just need to enable it before configuring the NTP server or client.
To enable ntpd on FreeBSD, follow the steps below:
1. First, run the command below to check the ntp parameters within the rc.conf file. This gives you the list of parameters contained with ntp.
sysrc -A | grep ntpd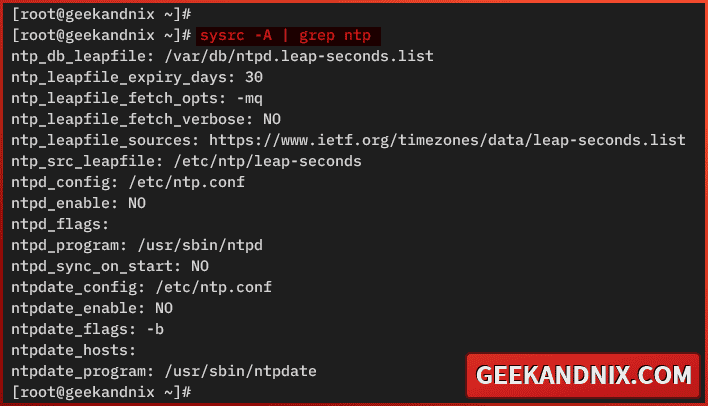
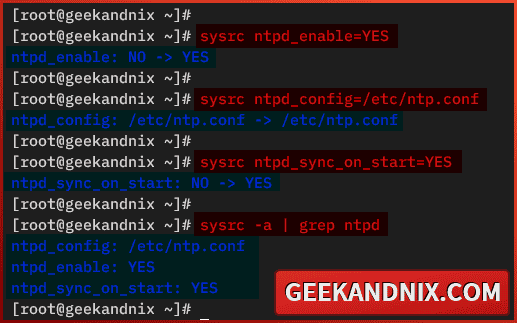
2. Run the following command to enable the ntpd service, set the default configuration to /etc/ntp.conf, and enable auto-sync at startup.
# enable ntpd
sysrc ntpd_enable=YES

# set default ntp configuration
sysrc ntpd_config=/etc/ntp.conf

# sync time at starts
sysrc ntpd_sync_on_start=YES
3. Lastly, run the command below to verify the enabled ntpd parameters.
sysrc -a | grep ntpdMake sure you get the following output:
Setting up NTP server with ntpd on FreeBSD
After you have enabled ntpd, let’s move on to configure the NTP server on FreeBSD. Here, you will set up the proper timezone on your system, then modify the /etc/ntp.conf file to create an NTP server with ntpd.
Carry out the following steps to set up the NTP server with ntpd on FreeBSD:
1. To get started, run the pkg command below to install the zoneinfo package. Enter y to confirm with the installation.
pkg install zoneinfo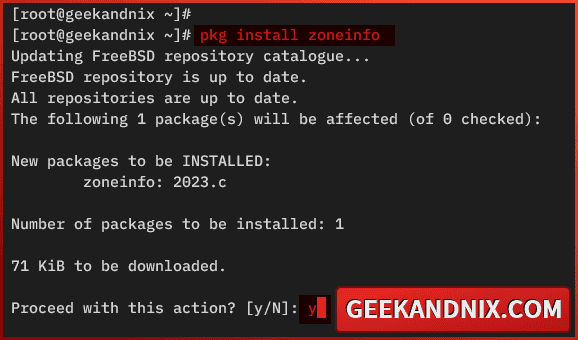
2. Now, run the command below to set up the default timezone for your FreeBSD server. In this example, I will set up the default timezone to Europe/Amsterdam.
unlink /etc/localtime
ln -s /usr/share/zoneinfo/Europe/Amsterdam /etc/localtime
3. Next, open the ntpd configuration /etc/ntp.conf using vim.
vim /etc/ntp.conf4. Visit https://www.ntppool.org/en/ and select the NTP server sources matching your timezone. So here are some NTP sources that will be used.
Replace the default NTP pool with the following. In this case, I will tell ntpd to synchronize against specific NTP servers. The iburst option will be used for faster synchronization.
server 0.nl.pool.ntp.org iburst
server 1.nl.pool.ntp.org iburst
server 2.nl.pool.ntp.org iburst
server 3.nl.pool.ntp.org iburst
5. Lastly, add the following configuration to allow access from networks 192.168.5.0/24 to your NTP server.
restrict 192.168.5.0 mask 255.255.255.0 nomodify notrapSave and exit when finished.
Managing ntpd Service on FreeBSD
Having completed the NTP server configuration, proceed to start and manage the ntpd service on FreeBSD. Perform the following actions to start and manage ntpd on your system:
1. To start the ntpd service, run the following command.
service ntpd start2. Now, verify the ntpd service with the following command to ensure the service is running.
service ntpd statusAs pointed out below, the ntpd service running on pid 11311.

3. Next, run the command below to stop the ntpd service when needed.
service ntpd stop4. Lastly, run the command below to restart ntpd whenever you make changes to the /etc/ntp.conf file.
service ntpd restartUsing ntpq to verify NTP Sources
Now that the NTP server is up and running, the next task is to verify your NTP server operation. Which can be performed with the ntpq command. The ntpq or ntp query is a utility for querying and monitoring the NTP server, both performance and operations.
Run the ntpq command below to get the list of NTP server peers.
ntpq -pAs displayed in the screenshot below, the FreeBSD server is connected to the nearest NTP server sources.

Allowing NTP traffic via PF (Packet Filter) on FreeBSD
As you’ve now verified your NTP server, it’s time to open NTP port 123/udp and allow traffic to your NTP server. In this example, I will use pf (Packet Filter) to allow traffic to the NTP server.
Perform the following actions to open the NTP port on FreeBSD via the pf firewall:
1. Edit pf config file /etc/pf.conf using vim.
vim /etc/pf.confAdd the ntp service to the list udp_services configuration like this:
udp_services = "{ domain, ntp }"Save and exit the file after editing.
2. Now, run the command below to reload pf and take the effects of your changes.
service pf reload3. Then, run the command below to verify the ntp service on the pf rules.
pfctl -sr | grep ntp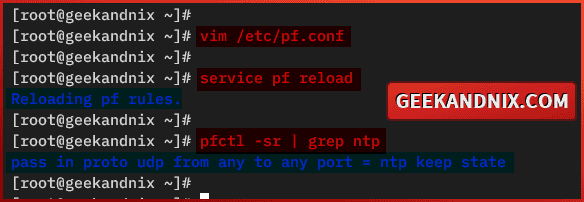
Setting up NTP client with ntpd on FreeBSD
Now that you’ve mastered the installation of the NTP server via ntpd, let’s now shift gears to install and set up the NTP client with ntpd. The idea is the client connects to the NTP server in the local network. In this case, I will use a FreeBSD client to connect to the local NTP server.
Execute the following actions to set up the NTP client with ntpd on the FreeBSD client:
1. First, run the command below to install the zoneinfo package on your FreeBSD client.
pkg install -y zoneinfo2. Run the following command to set up the default timezone for your client. So here I will use the timezone Europe/Amsterdam, the same as the NTP server.
unlink /etc/localtime
ln -s /usr/share/zoneinfo/Europe/Amsterdam /etc/localtime
3. Now, edit the NTP configuration /etc/ntp.conf using vim.
vim /etc/ntp.confReplace the default NTP pool with your NTP server. Be sure to change the IP address with your NTP server IP address.
# set default pool to ntpd local 192.168.5.80
pool 192.168.5.80 iburst
Save the file and exit.
4. Next, run the command below to enable the ntpd service and configure auto-sync time when starts.
# enable ntpd on client
sysrc ntpd_enable=YES

# auto sync ntp on client
sysrc ntpd_sync_on_start=YES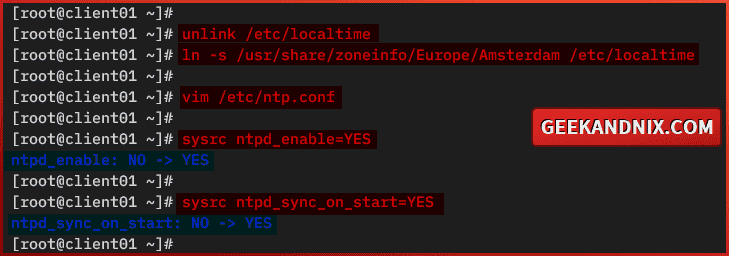
5. Then, run the following command to start and verify the ntpd service on your FreeBSD client. In this example, the ntpd service is running on pid 1751.
# starting ntpd
service ntpd start

# checking ntpd status
service ntpd status
6. Lastly, run the ntpq command below to verify the list of NTP server peers.
ntpq -pHere, you should see your client connected to your NTP server. In this example, the FreeBSD client is connected to the NTP server 192.168.5.80.

Conclusion
Excellent work! You have finished the configuration for ntpd for creating an NTP server on FreeBSD 14. On top of that, you have also learned how to set up ntpd as an NTP client for computer clients. You can now provision your client easily to synchronize time to your local NTP server.
Besides that, why not explore the power of NTS (Network Time Security) for your local NTP server? It provides secure and encrypted traffic for time synchronization on your local network.
