How to Install PostgreSQL on Debian 12 Server
Hello geekandnix fellow, in this guide, I will show you how to install PostgreSQL on Debian 12 server.
I’ll cover the following:
- How to install PostgreSQL on Debian (via the Debian repository and the official PostgreSQL repository)
- How to secure PostgreSQL deployment
- How to create a user, database, and table in PostgreSQL
- Basic PostgreSQL queries for CRUD operations
With those, both system administrators and developers can benefit from this guide.
Let’s get started.
Prerequisites
Before you start, you need the following:
- A Debian 12 server. Follow our guide to install Debian 12 Server.
- A non-root user with sudo privileges. Follow our tutorial to setup and initialize Debian 12 server.
Installing PostgreSQL server via Debian repository
PostgreSQL is a free, open-source, high-performance, and advanced RDBMS (Relational Database Management System). On Debian, you can easily install it via APT, with the current available version of PostgreSQL 15.
To install PostgreSQL on Debian, follow these steps:
1. First, run the apt command below to update your Debian package index.
sudo apt update2. Install PostgreSQL to your Debian server by executing the apt install command below. Enter Y to confirm the installation.
sudo apt install postgresql postgresql-contrib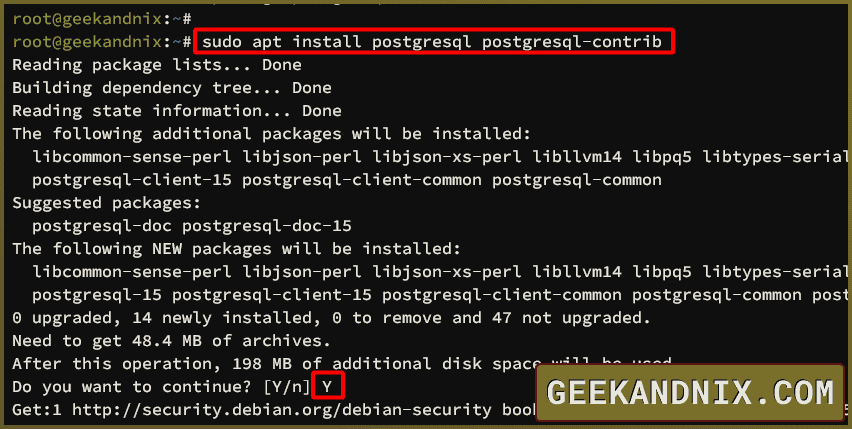
3. After installation is complete, run the command below to verify PostgreSQL service status.
sudo systemctl is-enabled postgresql
sudo systemctl status postgresql
If PostgreSQL is enabled and running, you will see an output like the following:

4. Optional, run the ss command below to check PostgreSQL server port 5432.
ss -tulpnIf PostgreSQL running, you will port 5432 are used by the postgressql process:

5. Lastly, run the command below to check the PostgreSQL version.
sudo -u postgres psql -c "SELECT version();"As seen in the following output, PostgreSQL 15 is installed via the Debian repository.

Installing PostgreSQL through official PostgreSQL repository
The second method to install PostgreSQL on Debian is via the official PostgreSQL repository. Thus provides multiple PostgreSQL versions, such as 16, 15, and 14. This scenario is suitable when you need to install a specific version of PostgreSQL, from the latest, stable, or old version.
You can install specific PostgreSQL server versions on Debian with the following:
1. To begin with, run the following command to install packages apt-transport-https, gnupg2, and lsb-release.
sudo apt install apt-transport-https gnupg2 lsb-release -y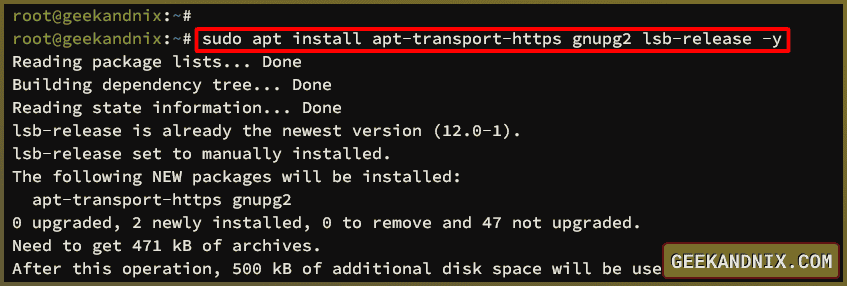
2. Add the PostgreSQL GPG key and repository to your Debian server with the command below.
# adding GPG key for PostgreSQL repository
curl -fsSL https://www.postgresql.org/media/keys/ACCC4CF8.asc | sudo gpg --dearmor -o /usr/share/keyrings/pgdg.gpg

# adding PostgreSQL repository
sudo sh -c 'echo "deb [arch=amd64 signed-by=/usr/share/keyrings/pgdg.gpg] http://apt.postgresql.org/pub/repos/apt $(lsb_release -cs)-pgdg main" > /etc/apt/sources.list.d/pgdg.list'
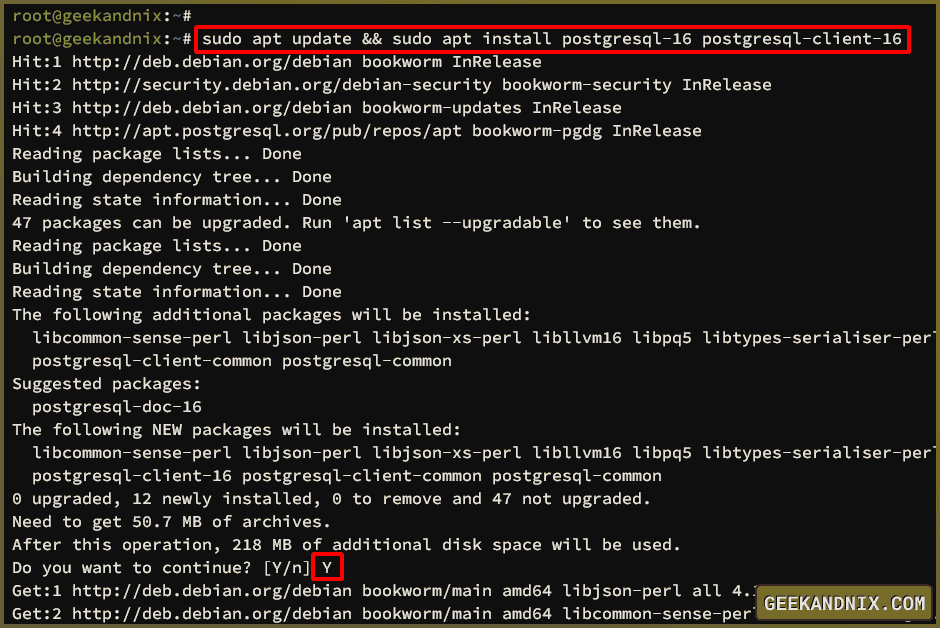
3. Now, execute the following apt command to update the package list and install the PostgreSQL server.
# installing PostgreSQL 16
sudo apt update && sudo apt install postgresql-16 postgresql-client-16
Enter Y to confirm the installation.
4. After installation is finished, run the systemctl command below to start, enable, and verify the PostgreSQL service.
sudo systemctl enable --now postgresql
sudo systemctl status postgresql
The following output confirms that the PostgreSQL service is running.

5. Lastly, run the command below to check your PostgreSQL version.
sudo -u postgres psql -c "SELECT version();"As you can see below, the PostgreSQL 16 is installed via the official PostgreSQL repository.

Securing PostgreSQL server installation
Securing your PostgreSQL deployment is your top priority after you have installed it. So you’ll ensure that you have a proper authentication method for your PostgreSQL server.
There are multiple host-based authentication methods for PostgreSQL, which can be configured via the pg_hba.conf file. Take a look at the PostgreSQL authentication methods below:
- Trust: Always trust the connection from this host.
- Password: Enable password authentication for this host.
- Peer: For local user authentication.
Without delay, proceed with the following to secure PostgreSQL installation.
1. Open the /etc/postgresql/15/main/pg_hba.conf file using the vim editor.
sudo vim /etc/postgresql/15/main/pg_hba.confChange the default password authentication for 127.0.0.1 to scram-sha-256 like the following:
# TYPE  DATABASE        USER            ADDRESS                 METHOD

# "local" is for Unix domain socket connections only
local   all             all                                     peer
# IPv4 local connections:
host    all             all             127.0.0.1/32            scram-sha-256
# IPv6 local connections:
host    all             all             ::1/128                 scram-sha-256
Save and exit the file.
2. Now, run the systemctl command below to restart PostgreSQL and apply the new password authentication.
sudo systemctl restart postgresql3. Next, execute the psql command below to login to the PostgreSQL server. The psql is a command line interface for connecting and managing the PostgreSQL server.
sudo -u postgres psql4. Run the following queries to change the password for the postgres user and type quit to exit. Make sure to replace the StrongP4ssw0rd password with your new strong password.
# change postgres password
ALTER ROLE postgres WITH PASSWORD 'StrongP4ssw0rd';

# exit from PostgreSQL
quit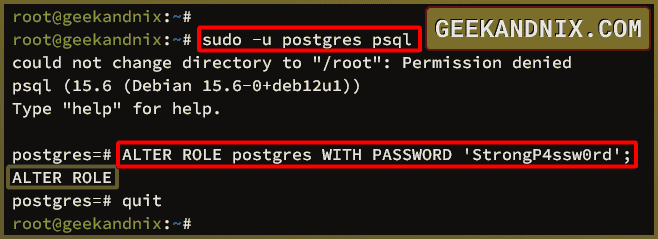
5. After you change the password, run the command below to connect to your PostgreSQL server. Enter your postgres password when prompted.
sudo -u postgres psql -U postgres -h localhost6. Once logged in, run the query \conninfo to check your connection details to PostgreSQL.
\conninfoYou can see below that you’ve connected to PostgreSQL via postgres with the password authentication.

Creating user and database in PostgreSQL
After you’ve secured PostgreSQL, let’s move on to create a new user and database on PostgreSQL. Whether you’re a system administrator or developer, you must know how to manage users and databases in PostgreSQL for installing or deploying (to production) your applications.
To create a user and database in PostgreSQL, follow these actions:
1. First, run the following queries to create a new user alice with the password aliceP4ssword on your PostgreSQL server. Then, confirm the list of users via the \du or display user query.
# create a new user
CREATE USER alice WITH CREATEDB PASSWORD 'aliceP4ssword';

# display users / listing users
\du
You should see the user alice is created in PostgreSQL.

2. Secondly, run the following query to create a new database alice with the owner alice. Then, check the list of databases and exit from the PostgreSQL server.
# create database
CREATE DATABASE alice WITH OWNER alice;

# listing databases
\l

# exit
quit
4. Next, run the following query to log in to PostgreSQL with the new user alice to the database alice. Enter the password for user alice when prompted.
sudo -u postgres psql -U alice -h localhost -d alice5. After logging in, execute the query \conninfo to check the detailed connection to the PostgreSQL server.
\conninfoAs you can see below, you’ve connected to PostgreSQL via user alice to the default database alice.

Creating a table in PostgreSQL
Now that you’ve created the user and database, the next step is to create a new table in PostgreSQL. Complete these steps to create a table in PostgreSQL:
1. To start, run the following queries to create a new database mydb in PostgreSQL.
CREATE DATABASE mydb;2. Now, run the \connect query to switch to the new database mydb.
\connect mydb;
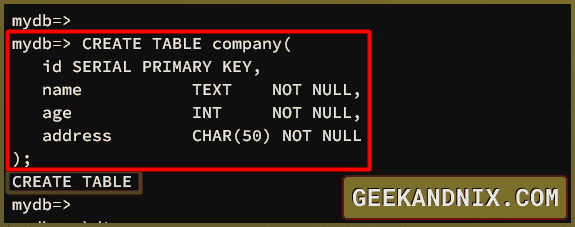
3. Next, run the CREATE TABLE query below to create a table company with columns id, name, age, and address.
CREATE TABLE company(
id SERIAL PRIMARY KEY,
name TEXT NOT NULL,
age INT NOT NULL,
address CHAR(50) NOT NULL
);
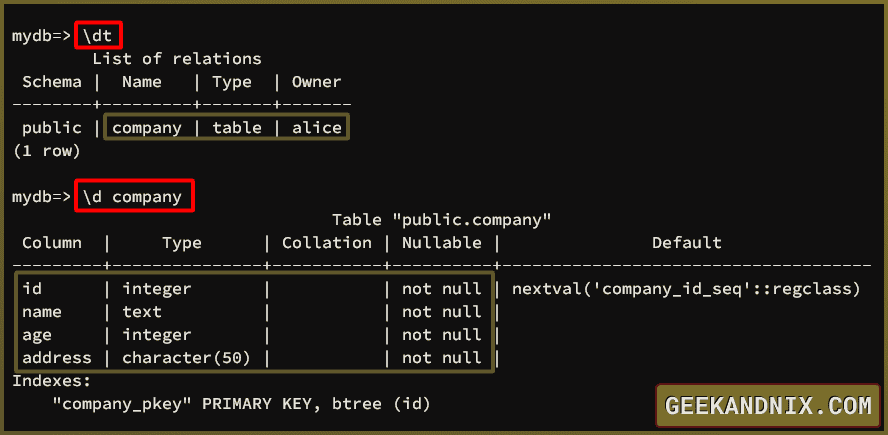
4. Lastly, run the following queries to check and describe the table in PostgreSQL.
# listing tables
\dt

# describe table company
\d company
You will see table company with columns id, name, age, and address in the database mydb.
Basic CRUD operations in the PostgreSQL server
So now you’ve created a table company, move to basic CRUD operations and queries in PostgreSQL. A CRUD or Create, Read, Update, and Delete are the basic operations for applications. Developers must know CRUD queries when developing applications using PostgreSQL.
Learn basic CRUD (Create, Read, Update, and Delete) operations in PostgreSQL with the following actions:
1. Insert new data to the table company with the INSERT query below.
INSERT INTO company(name, age, address) VALUES ('alice', 30, 'Texas'), ('joana', 20, 'New York'), ('bob', 25, 'California');Once data is added, you should get an output INSERT 0 2.

2. Now, run the SELECT query below to retrieve data from the table company. With the * character, you will retrieve data from all available columns, while specific column names such as name and age will show you the data from those specific columns.
SELECT * FROM company;
SELECT name, age FROM company;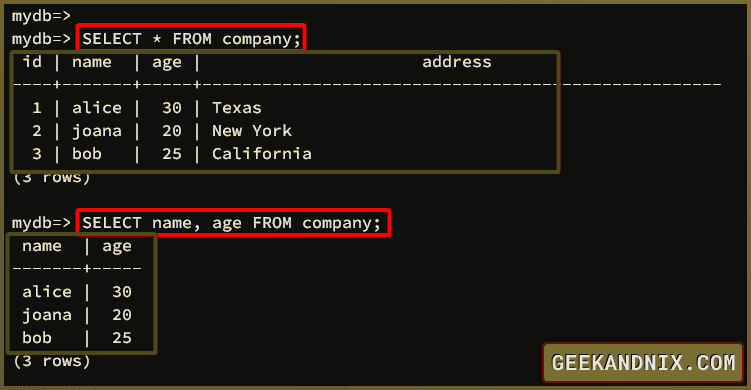
3. Next, run the UPDATE query below to update data in PostgreSQL. Followed by the SET with the new data and the WHERE clause to specify your target data. Once data is updated, you will see an output UPDATE 1.
UPDATE company SET age = 25 WHERE name = 'alice';4. Now, run the SELECT query below to verify your updated data. In this example, you can see the age for alice is changed to 25.
SELECT * FROM company WHERE name = 'alice';
5. Lastly, run the DELETE query followed by the WHERE clause to delete data in PostgreSQL.
DELETE FROM company WHERE id = 3;Once data is deleted, you should get an output DELETE 1.

Conclusion
By completing this tutorial, you’ve installed PostgreSQL on Debian 12 server (via the Debian repository and the PostgreSQL repository). You’ve also learned how to secure PostgreSQL via authentication, creating user, database, and table in PostgreSQL. Furthermore, you’ve learned basic CRUD (Create, Read, Update, and Delete) operations and queries in PostgreSQL.
From here, you can continue to deploy your PostgreSQL-based applications or develop your applications using PostgreSQL as the database.


