How to Install Node.js on Ubuntu 24.04 (3 Methods)
Node.js is an open-source JavaScript runtime platform that allows you to run and execute JavaScript applications outside the web browser. The Node.js can run on Windows, Mac OS, and Linux, such as Ubuntu and Debian.
For FreeBSD users, explore our latest guide: 3 Methods to Install Node.js and Yarn or NPM on FreeBSD.
In this guide, we’ll walk you through the installation of Node.js on the Ubuntu 24.04. You’ll learn how to install Node.js on Ubuntu with different methods.
Prerequisites
Before you begin, ensure that you have a Ubuntu machine and a non-root user with sudo/administrator privileges.
See also: How to install Ubuntu 24.04 server (step-by-step)
Installing Node.js via Ubuntu Repository
By default, the Ubuntu 24.04 repository provides the Node.js package, and at the current time, Ubuntu provides the Node.js v18.
This is the easiest way to install Node.js, you don’t need to add a third-party repository, you can install it via APT. But, the backward/cons of using this method is you can’t choose a specific version of Node.js for your application.
1. To start, update your Ubuntu package index via the apt update command below.
sudo apt update
2. Now, install the Node.js package by executing the apt install command. With this, you will also install the NPM (Node.js Package Manager) via Ubuntu repository.
sudo apt install nodejs npmType y to proceed with the installation.
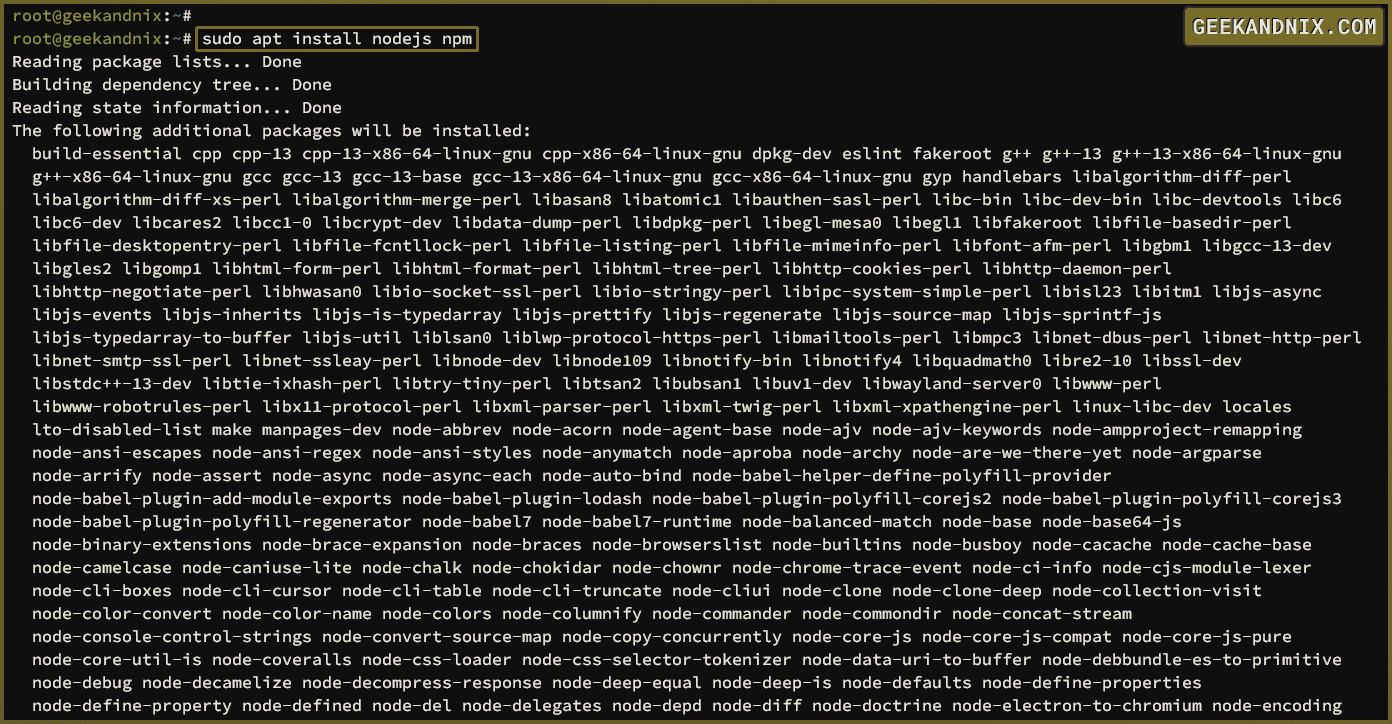
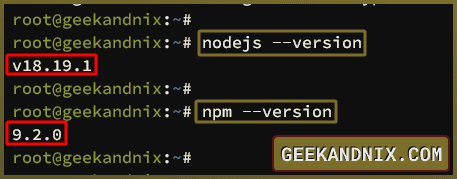
3. After the process is finished, check the Node.js and NPM version using the following command.
nodejs --version
npm --version
The output should display your current Node.js and NPM versions. In this case is Node.js v18 and NPM 9.2.
Installing Node.js on Ubuntu via Nodesource Repository
Multiple third-party repositories provide the Node.js package, and one of the most popular is Nodesource. The Nodesource repository offers multiple versions of Node.js for most Linux distributions, such as Ubuntu, Debian, and CentOS.
This is the recommended way to install Node.js, especially for deploying Node.js applications. The Nodesource repository provides flexibility for choosing Node.js versions, works with most Linux distributions, and is easy to set up via the install script.
1. Before adding the Nodesource repository, execute the following command to install packages such as ca-certificates, curl, and gnupg.
sudo apt install -y ca-certificates curl gnupg2. Then, run the below command to download the Nodesource’s GPG key.
curl -fsSL https://deb.nodesource.com/gpgkey/nodesource-repo.gpg.key | sudo gpg --dearmor -o /etc/apt/keyrings/nodesource.gpg3. Next, run the following command to add the Nodesource repository. Be sure to change the NODE_MAJOR environment variable with the target of the Node.js version such as 22, 20, 18.
# Select Node.js version
NODE_MAJOR=20

# Adding Node.js repository
echo "deb [signed-by=/etc/apt/keyrings/nodesource.gpg] https://deb.nodesource.com/node_$NODE_MAJOR.x nodistro main" | sudo tee /etc/apt/sources.list.d/nodesource.list
4. After the Nodesource repository is configured, execute the following command to update your Ubuntu package index, and install the Node.js to your Ubuntu system.
sudo apt update && sudo apt install nodejs -y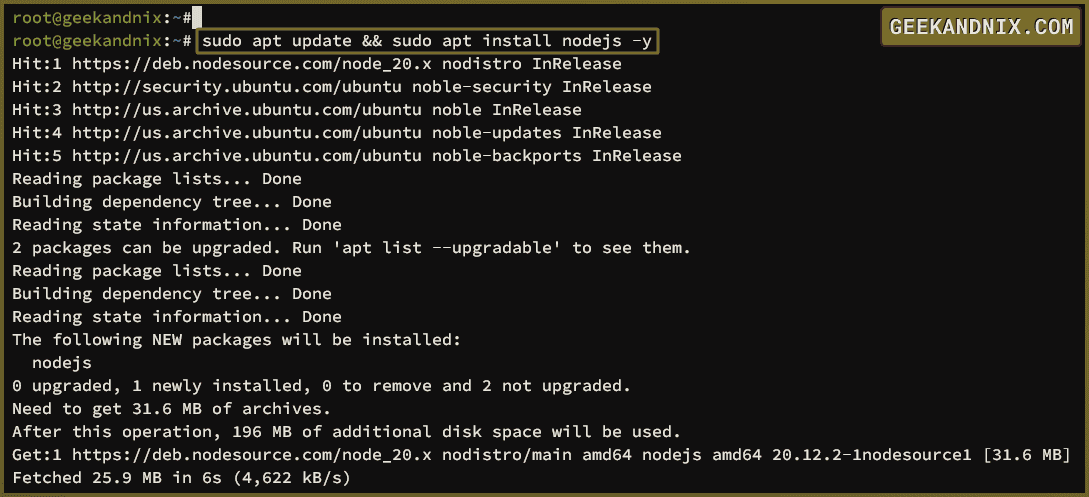
5. Lastly, run the following command to verify your Node.js version.
node --versionAfter the command executed, you should see the installed Node.js v20 to your Ubuntu system via a third-party Nodesource repository.

Installing Node.js via Tool Manager
The third method for installing Node.js is by using a tool manager. The following method is highly recommended for Node.js developers, who working on different types of Node.js projects. By using the tool manager, you can set up Node.js per project.
There are three most popular tool managers for Node.js, such as:
- nvm or Node Version Manager: a POSIX-compliant tool manager for Node.js that can be run on any Linux.
- n: another Node.js version manager written in Bash.
- volta: The next-generation toolchain manager for Node.js written in Rust and available as a static binary file. The functionality is similar to rustup for Rust, which allows you to set up different Node.js versions for your project.
In this guide, you will learn how to install and use Volta as a Node.js toolchain manager.
Installing Volta
In this case, you will install Volta as a non-root user named bob, and replace the user bob with your current user.
1. First, execute the command below to log in as user bob.
su - bob2. Now, execute the following command, you can run as a normal user (non-root). In this case, we’ll be using user bob.
curl https://get.volta.sh | bashDuring the Volta installation process, you should get the following output:
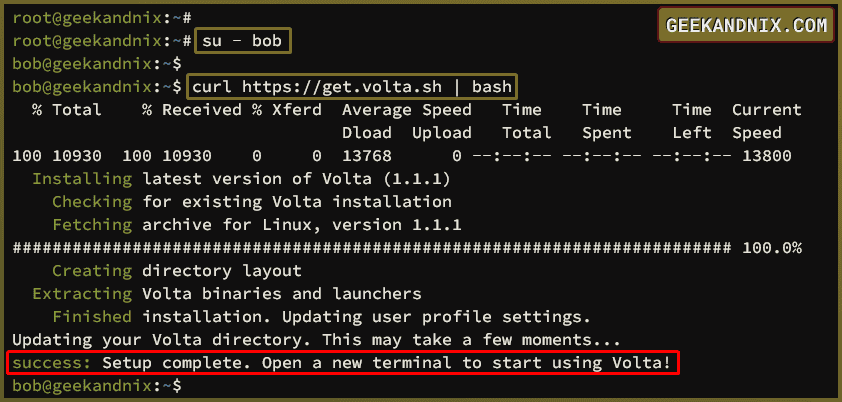
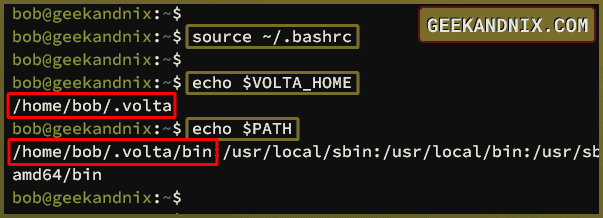
3. Once Volta is installed, reload the ~/.bashrc configuration to apply the changes to your system. The Volta installer scripts add some environment variables to the ~/.bashrc file.
source ~/.bashrc4. Next, execute the following command to verify the Volta installation directory.
echo $VOLTA_HOME
echo $PATH
In the following example, you should see the Volta home directory is available at /home/bob/.volta and the Volta bin PATH /home/bob/.volta/bin has been added to your system.
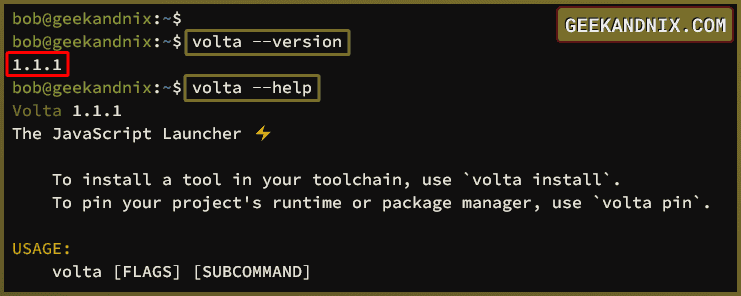
5. Lastly, check the Volta version and help messages by executing the command below.
volta --version
volta --help
Below you can see Volta 1.1.1 is installed on your Ubuntu system.
Installing and Managing Node.js Versions with Volta
As a toolchain for Node.js, Volta can be used for installing and managing multiple versions of Node.s on your system. Follow these tasks to manage your Node.js installation with Volta:
1. To begin with, execute the volta install command below to install Node.js with Volta. You can install specific and multiple versions of Node.js, and in this case, you will install Node.js’s latest version and the latest LTS version.
# Installing the latest version of Node.js
volta install node@latest

# Installing the latest and LTS version of Node.js
volta install node
volta install node@lts

# Installing specific Node.js 16
volta install node@18
2. Once you’ve installed Node.js, execute the following command to list of installed toolchain, including the Node runtimes.
volta list allWithin the Node runtime section, you should have installed two Node.js versions, v22 (latest), v21 (LTS), and v18 (old LTS).

3. After that, run the volta install command below to set up the Node.js LTS (v20) as the default Node.js version. If the target version is installed, Volta will configure it as the default Node.js version. When missing, Volta will install the target Node.js version to your system.
volta install node@lts4. Lastly, run the node command below to verify your current Node.js version.
node --versionAt this point, you should see Node.js v20 is configured as the default version on your current user.

Installing Package Manager via Volta
Volta is beyond Node.js version manager, which also provides the simplest way to install Node.js package managers, such as Yarn and NPM.
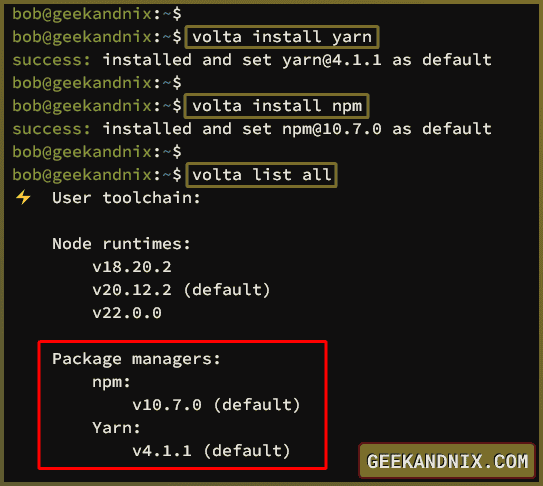
1. Execute the following command to install the Yarn package manager.
volta install yarn2. Or run the following command to install the NPM package manager.
volta install npm3. Lastly, run the volta list command below to show available toolchains on your environment.
# Checking list installed toolchain
volta list all

# Check the list installed NPM
volta list yarn
Within the Package Managers section, you should see that both Yarn and NPM are installed.
Setting up Specific Node.js version Per Project
If you’re working on multiple Node.js projects, and each project requires a different version of Node.js, then Volta is your best choice as the tool manager. The volta allows you to set up Node.js per project.
In the following example, you will create a new ~/project directory and initialize the Node.js project using Yarn – The Node.js package manager.
1. To start, execute the below command create a new ~/project directory, and go into it. Then, generate the package.json file using the yarn command.
# Creating ~/project directory
mkdir -p ~/project; cd ~/project/

# Initiazing Node.js project
yarn init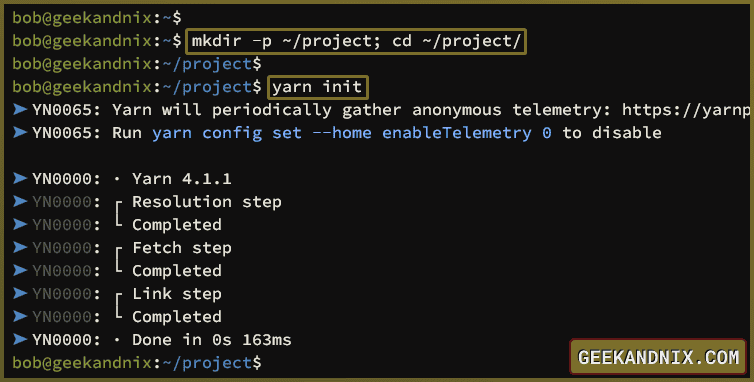
2. Now, run the volta pin command below to set up the default Node.js version to node@lts. The volta pin command will update the package.json file in your project directory.
# Pinning Node.js version
volta pin node@lts

# Checking package.json
cat package.json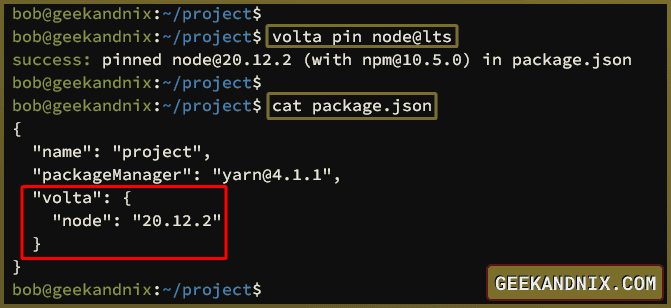
3. Next, within the ~/project directory, run the below command to check your current Node.js version. You should see that Node.js v20 or LTS is configured as the default version.
node --version4. But, when you move outside the ~/project directory, and check your Node.js version, you should see the Node.js 21 or the latest configured as default.
cd ~/
node --version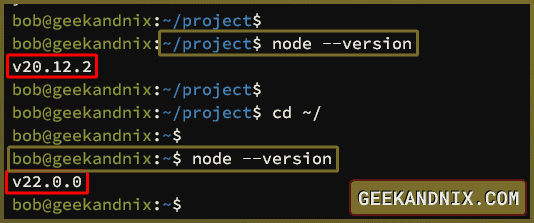
Running Application with Specific Node.js Version
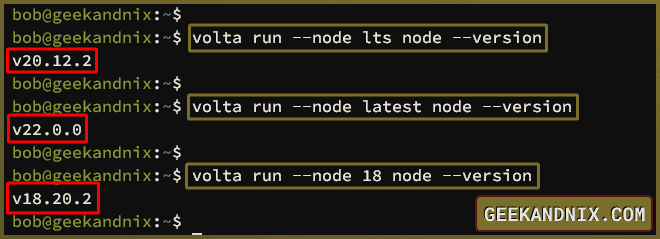
To run Node.js applications using a specific Node.js version, use the volta run command below.
# Executing with Node.js LTS
volta run --node lts node --version

# Executing with Node.js Latest
volta run --node latest node --version

# Executing with Node.js 18
volta run --node 18 node --version
Those two commands will print different Node.js versions.
Uninstalling Node.js from Ubuntu
1. To remove Node.js from your Ubuntu system, run the apt command below.
sudo apt remove nodejs -y && sudo apt autoremove -y2. If you’re installing Node.js via Nodesource, delete the Nodesource repository and refresh your package index using the following command.
sudo rm -f /etc/apt/sources.list.d/nodesource.list && sudo apt update3. Now, if you want to remove Volta from your system, execute the following command to remove the Volta installation directory.
rm -rf ~/.volta4. Then, open the ~/.bashrc file and remove the following lines.
export VOLTA_HOME="$HOME/.volta"
export PATH="$VOLTA_HOME/bin:$PATH"
5. Lastly, reload the ~/.bashrc configuration using the source command below.
source ~/.bashrcConclusion
To wrap up, you’ve installed Node.js on Ubuntu 24.04. You’ve learned 3 methods for installing Node.js, such as using the official Ubuntu repository, using a third-party Nodesource repository, and using tool manager like Volta.
You can now deploy your application using Node.js from the Nodesource repository, which provides multiple Node.js versions. Or, if you’re a developer, use Volta to set up your Node.js development environment.


