How to Install Java OpenJDK (21, 17, or 11) on Ubuntu 24.04/22.04
Java is an object-oriented programming language that follows a class-based structure, enabling developers to write code once and run it on any platform that supports Java. In this guide, we’ll show you how to install Java OpenJDK (21, 17, or 11), configure the JAVA_HOME environment variable, then configure multiple Java versions on the Ubuntu 24.04 server.
FreeBSD enthusiasts? Check our latest guide on How to Install Java OpenJDK (17, 18, 19, 20, 21) on FreeBSD 14.
Prerequisites
Before you start, make sure you have:
- An Ubuntu 24.04 server.
See also: How to install Ubuntu 24.04 server (step-by-step) - A non-root user with sudo or administrator privileges.
Differences between JVM, JRE, and JDK in Java
Below are some key points you must know about Java JVM, JRE, and JDK:
- The JVM (Java Virtual Machine) is an abstract space that allows you to run Java programs. When you run a Java program on your machine, the program is run on top of JVM (Java Virtual Machine).
- The JRE (Java Runtime Environment) is a full set of Java class libraries, JVM, and some required components to run Java applications. The JVM is part of and included in the JRE (Java Runtime Environment).
- JDK (Java Development Kit) is an SDK (Software Development Kit) that is required to create and develop Java programs, this includes the JRE, compilers, and debuggers for your Java applications.
In conclusion, knowing this, the Java JDK (Java Development Kit) is a complete software pack for developing and deploying Java programs, while JRE (Java Runtime Environment) is only used to run Java programs.
Installing OpenJDK 21, 17, or 11
By default, there are multiple Java versions available on the Ubuntu repository, such as Java 21,17, 11, and 8 and the latest version 21. This allows you to install specific Java versions you need, for both JDK (Java Development Kit) and JRE (Java Runtime Engine).
1. Before you proceed, update and refresh the Ubuntu package index using the following command.
sudo apt update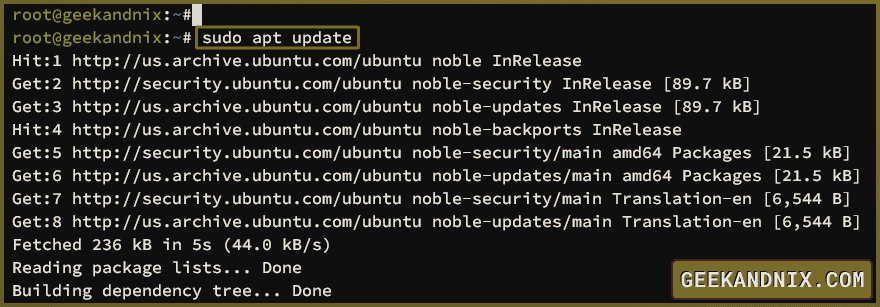
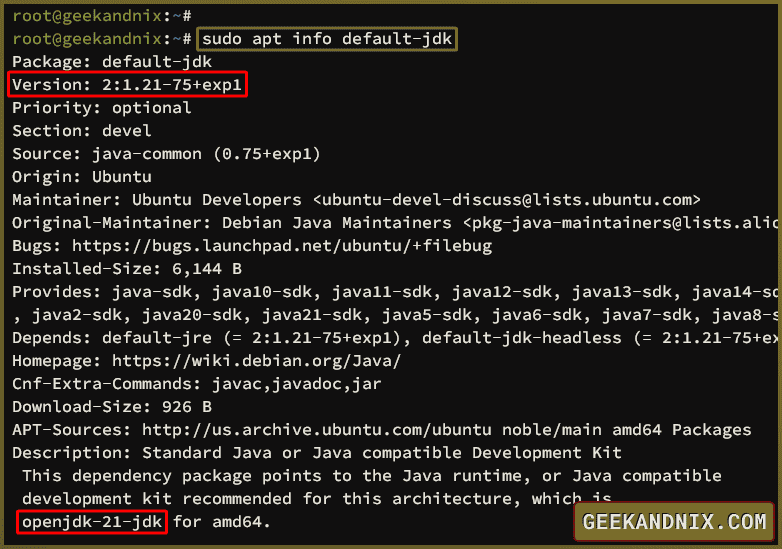
2. Now run the apt info command below to get detailed information about the default-jdk package.
sudo apt info default-jdkThe output indicates that the default-jdk contains the Java OpenJDK 21.
3. Next, install the default-jdk package by executing the apt install command below. By installing the default-jdk package, you will install both Java JDK and JRE to your system.
sudo apt install default-jdkType y to proceed with the installation.

4. Additionally, if you need to install a specific Java version or multiple Java versions such as Java OpenJDK 17, 11, or 8, use the following command.
## Installing Java OpenJDK 21
sudo apt install openjdk-21-jdk

## Installing Java OpenJDK 17
sudo apt install openjdk-17-jdk

## Installing Java OpenJDK 11
sudo apt install openjdk-11-jdk

## Installing Java OpenJDK 8
sudo apt install openjdk-8-jdk
5. Lastly, run the following command to check the Java version on your system. The command java is part of the JRE (Java Runtime Engine), which confirms that Java JRE is installed.
java --versionYou should see the installed Java version on your Ubuntu machine. In this case, the Java OpenJDK 21 is installed and configured as the default Java version.
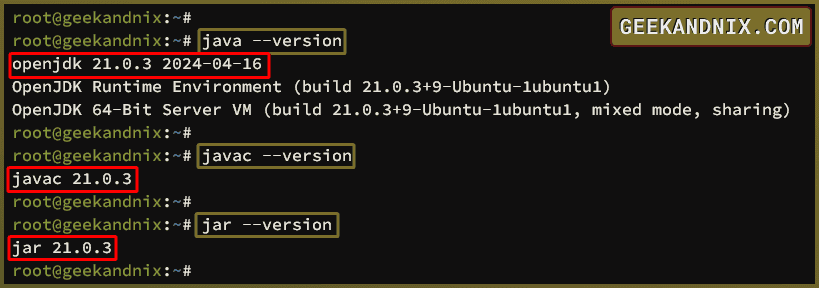
6. Furthermore, you can also verify some of the command-line tools such as javac and jar, which is part of JDK (Java Development Kit).
javac --version
jar --version
Setting Up JAVA_HOME Environment Variable
After installing Java, you will configure the JAVA_HOME environment variable on your system. To achieve that, you must know the Java OpenJDK installation directory, then create a new environment variable configuration to the /etc/profile.d directory.
1. First, run the command below to check the Java installation directory on your system.
sudo update-alternatives --list javaIn this case, we’ve two Java OpenJDK versions installed:
- The OpenJDK 17 which is located at
/usr/lib/jvm/java-17-openjdk-amd64directory. - The OpenJDK 21 with the installation directory /usr/lib/jvm/java-21-openjdk-amd64.

2. Now, run the vim command below to create a new system environment variable configuration /etc/profile.d/java-home.sh. This file will be loaded automatically when the user logs in to the server.
sudo vim /etc/profile.d/java-home.shInput the following configuration to create a JAVA_HOME environment variable and add the default JAVA_HOME/bin directory to the system PATH.
export JAVA_HOME=$(dirname $(dirname $(readlink -f $(which java))))
export PATH=$PATH:$JAVA_HOME/bin
When you’re done, save and exit the file.
3. Next, execute the following command to make the file /etc/profile.d/java-home.sh executable and reload the current system profile to apply the changes.
sudo chmod +x /etc/profile.d/java-home.sh
source /etc/profile
4. Enter the following command to verify the system PATH and JAVA_HOME environment variables.
echo $JAVA_HOME
echo $PATH
If the operation was successful, you should see the JAVA_HOME environment variable pointed to the /usr/lib/jvm/java-21-openjdk-amd64 directory. Also, the /usr/lib/jvm/java-21-openjdk-amd64/bin directory is added to the system PATH.

Setting Up Default Java Version
In Ubuntu, you can install different Java versions, you can have two or more Java versions installed on your system. In the following section, you’ll learn how to manage multiple Java versions and how to set up the default Java version on your system.
1. First, execute the following command to check the list of Java versions on your Ubuntu system.
sudo update-java-alternatives --listIn the following example, there are two Java OpenJDK versions installed, the Java OpenJDK 17 and 21.

2. Now, run the command update-java-alternatives below to set up the default Java version to OpenJDK 11. After the command is executed, the default version of both JDK and JRE will be changed to Java OpenJDK 17.
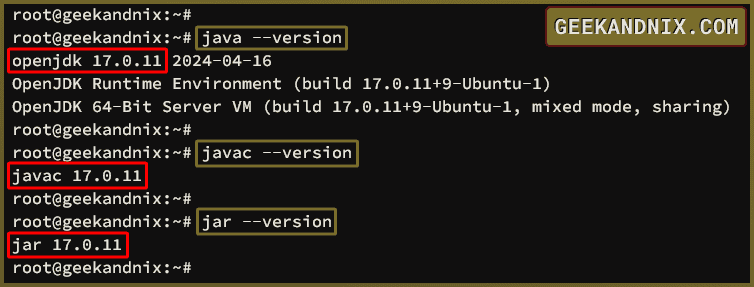
sudo update-java-alternatives --set java-1.17.0-openjdk-amd643. Verify the current Java version using the following command.
# verify default JRE
java --version

# verify default JDK
javac --version
jar --version
The following output indicates the default Java version has changed to Java OpenJDK 17.
Testing Java JDK and JRE
After you’ve configured the default Java version, you will learn how to create, compile, and run programs with Java OpenJDK. You’ll create a simple Hello World application, and compile it with javac (part of JDK), and then run the compiled program with java (part of JRE).
1. First, run the following vim editor to create a new file HelloJava.java.
vim HelloJava.javaInsert the following Java code that will print out the Hello Java - First Program.
class HelloJava
{
    public static void main(String args[])
    {
        System.out.println("Hello Java - First Program.");
    }
}
When finished, save and exit the file.
2. Next, run the javac command below to compile the HelloJava.java. After the code is compiled, you should see the file HelloJava.class. The HelloJava.class is the bytecode version of your Java application.
javac HelloJava.java
ls - HelloJava.class
3. Lastly, run your Java application using the following java command. You should get the output Hello Java - First Program. on your terminal.
java HelloJava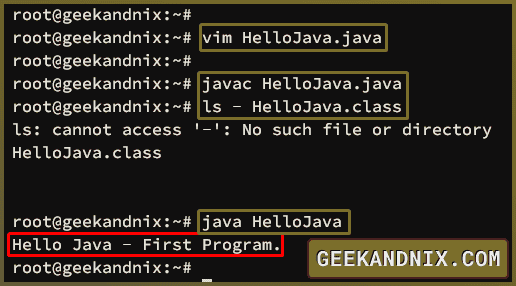
Uninstalling Java from Ubuntu
1. To uninstall the default-jdk package, run the following command. After executing the command, Java and dependencies will be removed, and the file /etc/profile.d/java-home.sh will also be removed.
# Uninstall default-jdk and remove orphaned (unused) packages
sudo apt remove default-jdk -y && sudo apt autoremove

# Delete the file /etc/profile.d/java-home.sh
sudo rm /etc/profile.d/java-home.sh
2. If you want to uninstall all available Java versions from your system, simply run the following command.
for i in 21 17 11 8
do
sudo apt remove openjdk-$i-jdk -y && sudo apt autoremove -y && sudo rm sudo rm /etc/profile.d/java-home.sh
done
Conclusion
Congratulations on completing the Java installation on the Ubuntu 24.04 server. You’ve also completed the configuration of the JAVA_HOME environment variable, learned how to manage multiple Java versions, and learned how to create and run Java applications.
From here, you can now start developing Java application such as via Apache Maven, explore distributed systems with Hadoop, and develop machine learning with Apache Spark.


